Bill Winke's tips on improving archery skills and becoming a better bowhunter
Recently, someone asked me on the Ask Winke part of MidwestWhitetail.com to go through my shooting form and the key things I think about when shooting a bow. That sparked this post. I'm not a world-class archer, but I learned to shoot a bow from guys who are. All of my techniques came from the best archers and bowhunters of the modern era. These five things are always the most important factors to top archers.
Grip
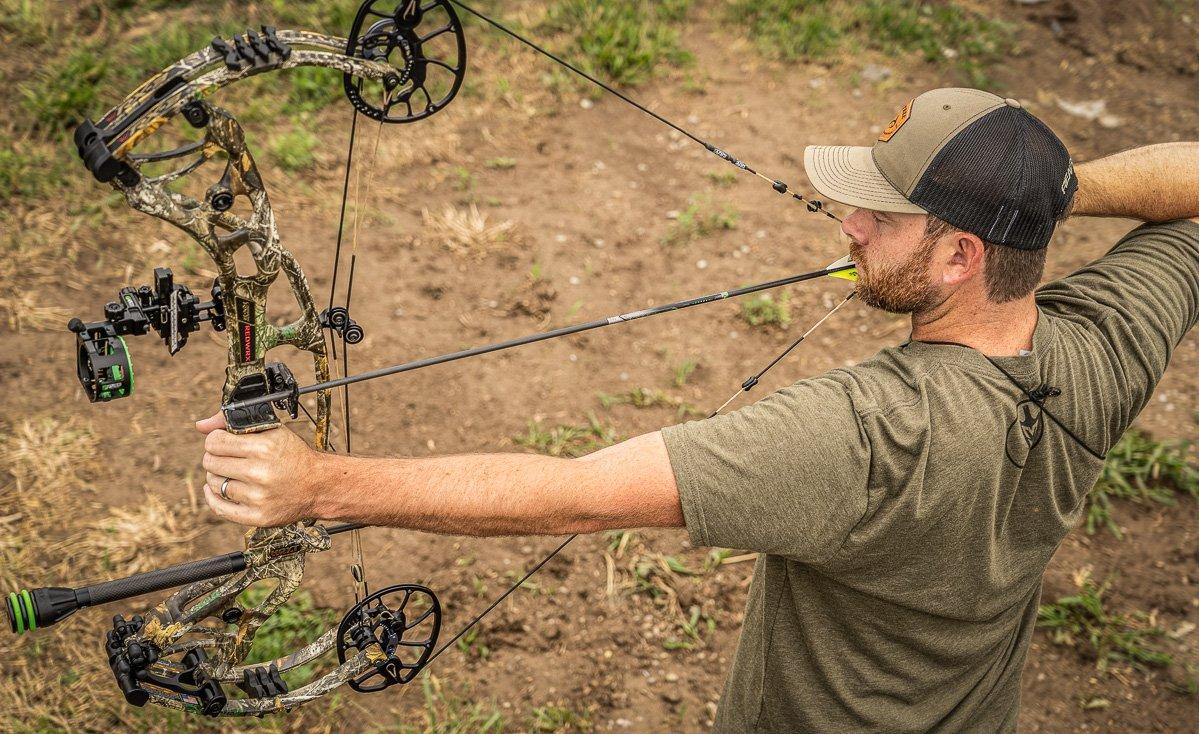
It's important to eliminate the hinge of your wrist by pressing against the back of the bow handle using the part of your palm that lines up perfectly with your forearm bones. You can find this spot easily by poking at your palm with the index finger of your other hand. Let your hand relax. Then, press in various spots on your palm and notice how your wrist flexes. When you find the perfect pressure point, the wrist won't flex. Make a conscious effort to push that part of your palm into the back of the grip when positioning your hand and drawing the bow. Never readjust the grip once you start the draw cycle.
Anchor Point
I use the back of my jawbone as a solid anchor point. I press the knuckle of my index finger into the pocket between my jawbone and ear lobe. I don't think my anchor point is necessarily superior to others, but it is one I can hit every time because I can feel it very precisely on the tip of my jawbone.
Peep sights (and kisser buttons) also help create a consistent anchor point. I use a larger peep size and then center the entire round pin guard of my Fuse sight inside that large opening. The large peep allows plenty of light to come through for easy visibility while hunting without giving up precision gained by centering the pin guard.
(Don't Miss: Why Speed Bows Don't Suck)
Bow Arm
The bow arm should stay nice and relaxed with a very slight bend to reduce tension. Make it act like a shock absorber. Once at full draw, create the ideal 90-degree angle between your upper body and bow arm. The arm is done moving until well after the shot. When aiming, move your bow arm (and sight pin) by rotating or bending the upper body. Use the big muscles of the legs and torso to control the bow's position rather than the small muscles of the shoulders, arms and hands. This makes for steadier and more consistent aiming.
(Don't Miss: The Best Draw Weight for Bowhunting)
Surprise Release
I'm much more consistent using back-tension with a surprise release than when trying to time shots and pull (punch) triggers. You can learn this by using a release aid designed specifically for it, such as a pure back-tension release that doesn't have a trigger.
(Here's How David Blanton Beat Target Panic)
Follow-Through
In my experience, the thing that most affects consistency is the follow-through. Regardless of anything else during the shot, if the bow is still aiming at the target until the arrow hits it, you'll be consistent. The follow-through (mentally and physically) is an important part of the shot. If struggling, focus on keeping the bow arm pointed at the target until the arrow hits and the issue usually goes away. This is a bit of an oversimplification, but it makes a huge difference.
These are the main things I focus on when shooting my bow. If I practice enough, at challenging distances, I can be in good whitetail hunting form within about two months. All the while keeping things pretty simple.
Don't Miss: 15 Archery Tips from the Pros


