How to Fix a Worn-Out Old Gun
Posted 2025-04-16 by
Whether you have an old beater lying around or just found a gunsmith’s special at a pawn shop, here’s a game plan to get it shooting again
Just like cars, bikes, and power tools, guns can get worn out. They’re mechanical things that can break, and they’re constantly subjected to the elements. If you’ve got a worn out old gun that you just can’t part with, or have found a bargain beater in a gun shop that you’d like to bring back to life, it’s possible to fix it or refurbish it for years in the field.
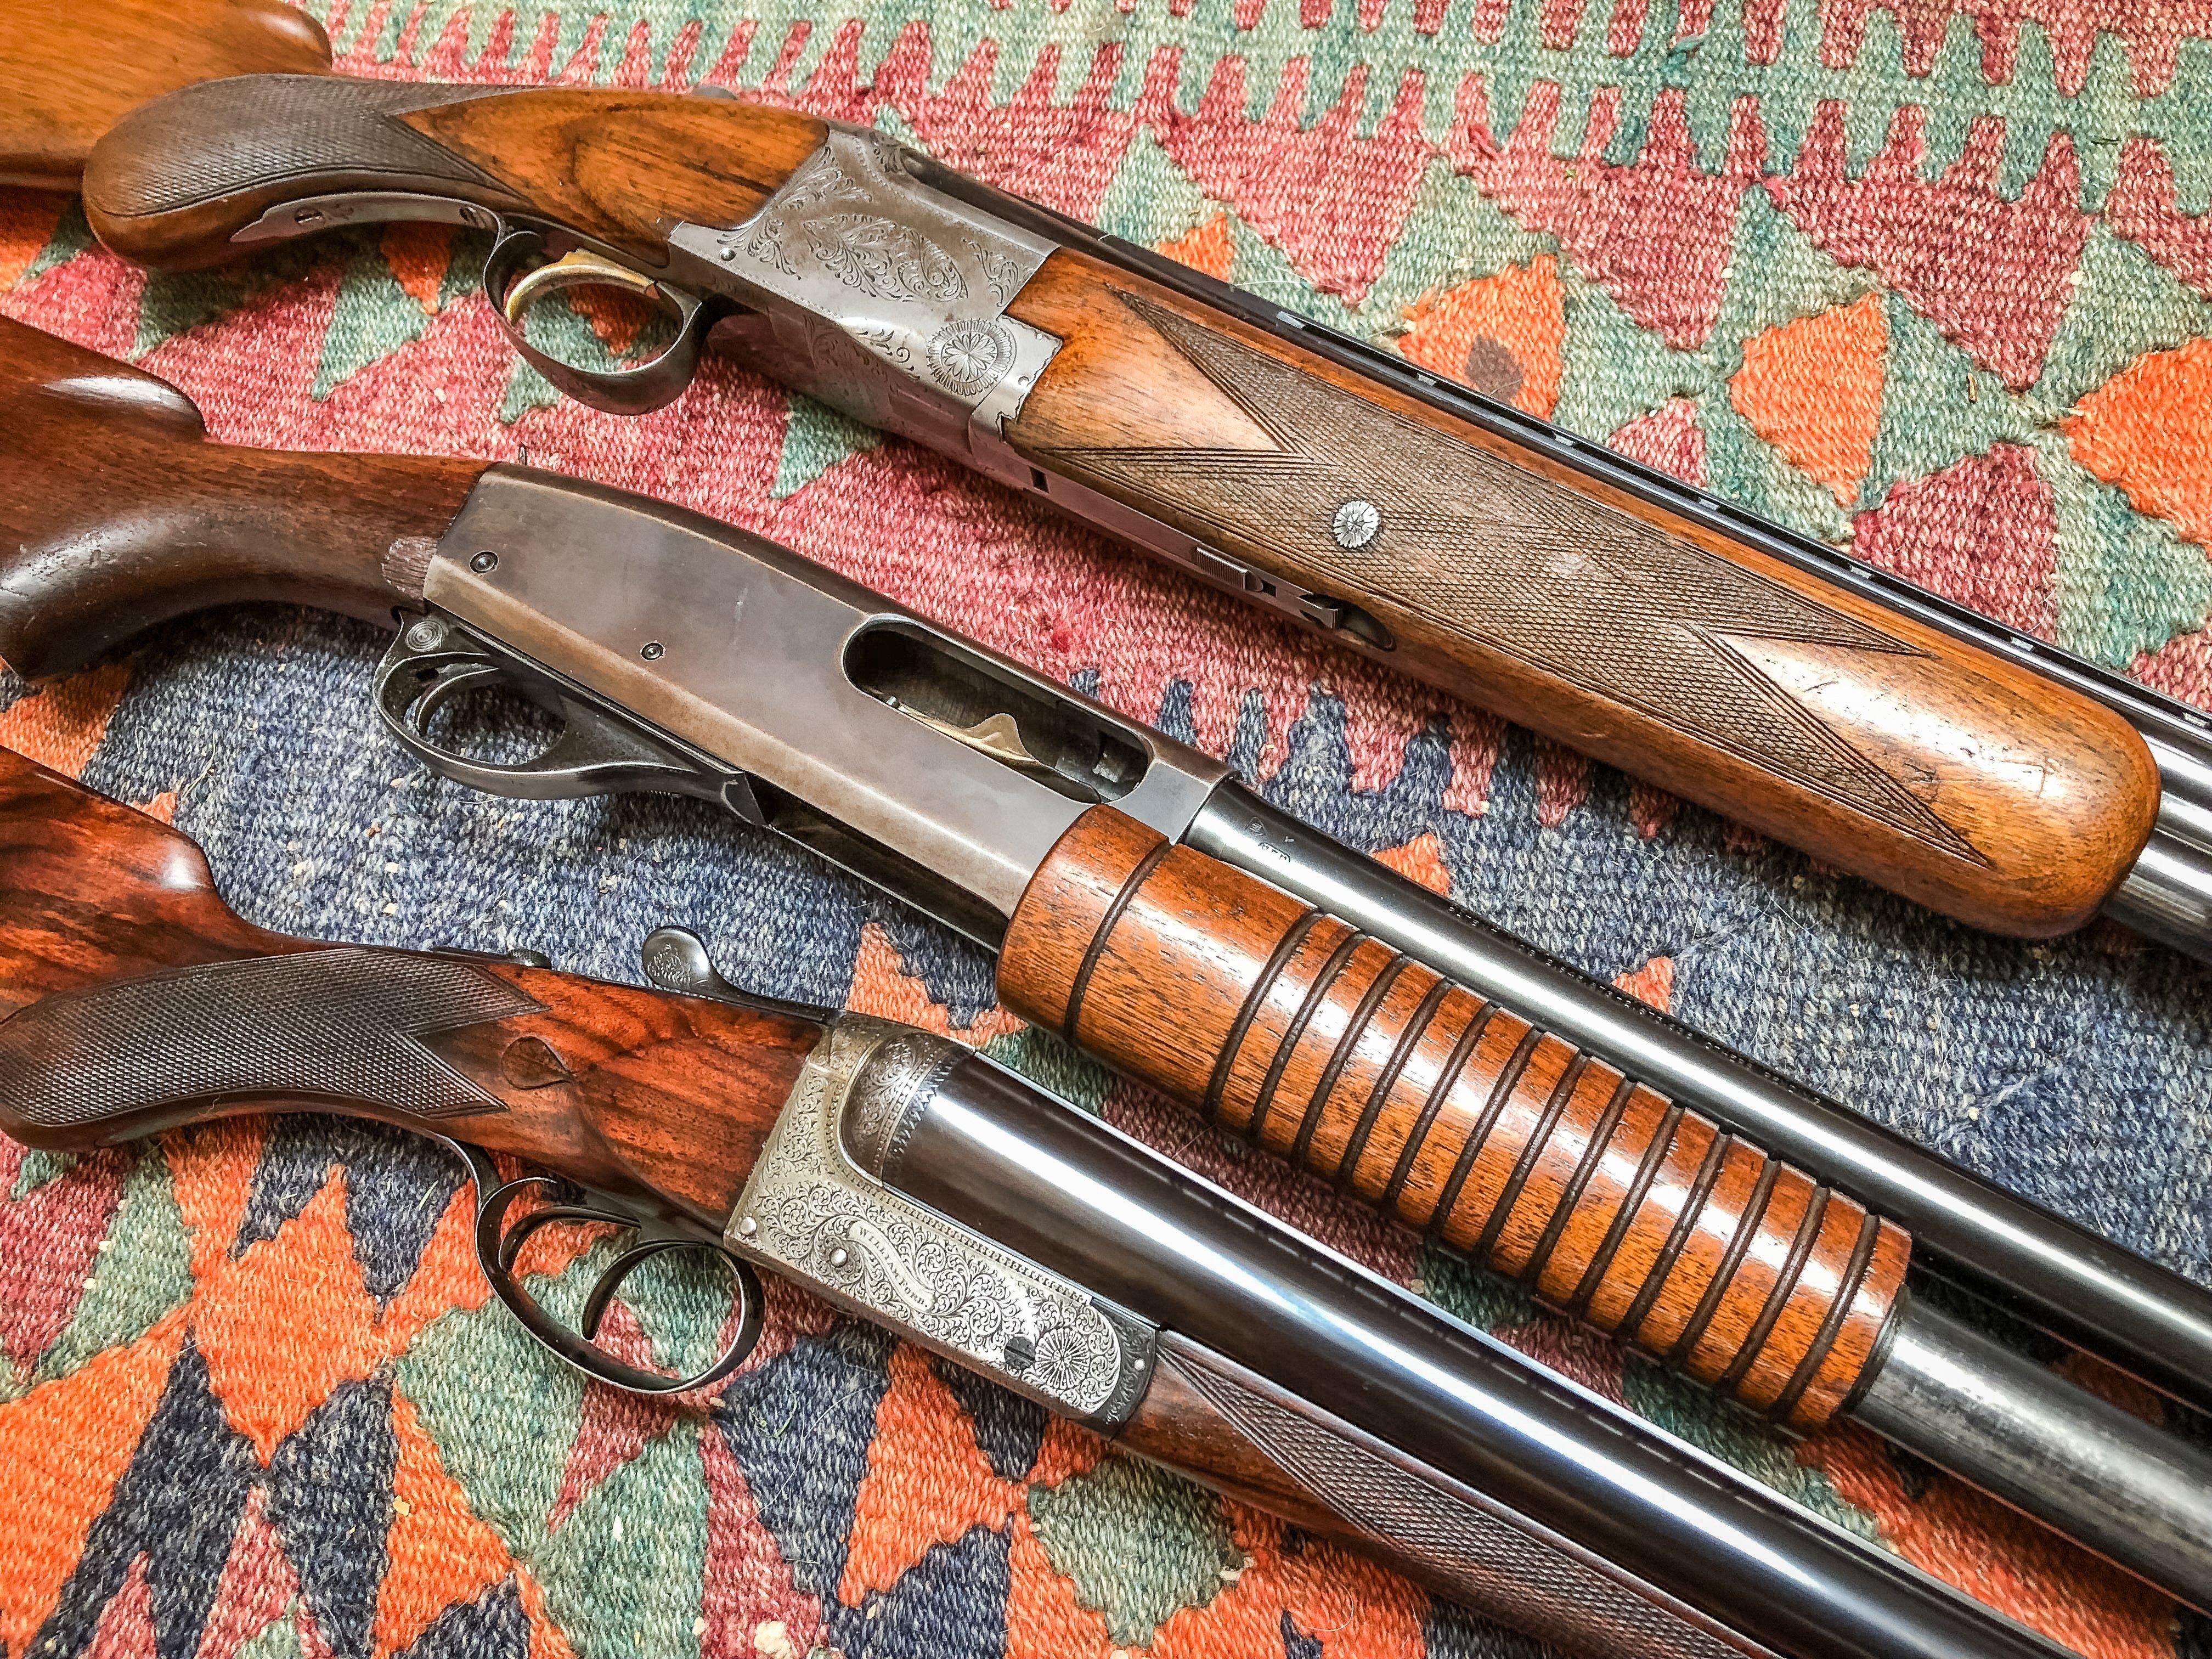
With proper care and restoration, even old, non-working guns can be returned to like-new condition. All images by the author
We don’t have enough space here to go into all of the details on repairing guns. There’s a lot of good information out there on the web and in books like Bryce Towsley’s Gunsmithing Made Easy or the Shooter's Bible Guide to Firearms Assembly, Disassembly, and Cleaning. But we can help you get started with a basic gameplan on how to get your old worn-out gun up and running again.
1) Assess The Damage
You need to know what you’re working with because, obviously, guns can be dangerous. It helps to know if the gun you’d like to bring back to life is too far gone. Generally, almost any old gun can be made new again, it just depends on how much money you want to spend. That’s why you should pay a little extra to have a gunsmith go over your gun to diagnose any major issues. You’ll know right away if you’ve got a project gun or a wall hanger.
It is important to have a qualified gunsmith go over any firearm that might be in questionable condition to make sure it is safe to fire.
Deal-breakers would include anything that makes the gun unsafe. This could be a worn-out trigger or safety that doesn’t work. It could also be something like Damascus barrels that could explode with modern ammo. Again, a qualified gunsmith is your best friend in these situations.
There are some other major disqualifiers that are easy for anybody to spot. For shotguns, big dents in the barrels, barrels that have come un-soldered, actions that are excessively loose (on over-unders and side-by-sides), or barrels with out-of-spec wall thicknesses should be left to a professional.
For rifles, excessive pitting in the barrel, an improperly cut chamber, or damage to the bolt/bolt face are all bad. I would also stay away from guns with heavy rust damage or anything that was involved in a flood or fire. You don’t want to do DIY repairs or refinishing on something of real value because such work can completely devalue it.
Don’t Miss: 5 Good Reasons to Try an Over / Under Turkey Gun
2) Strip and Clean
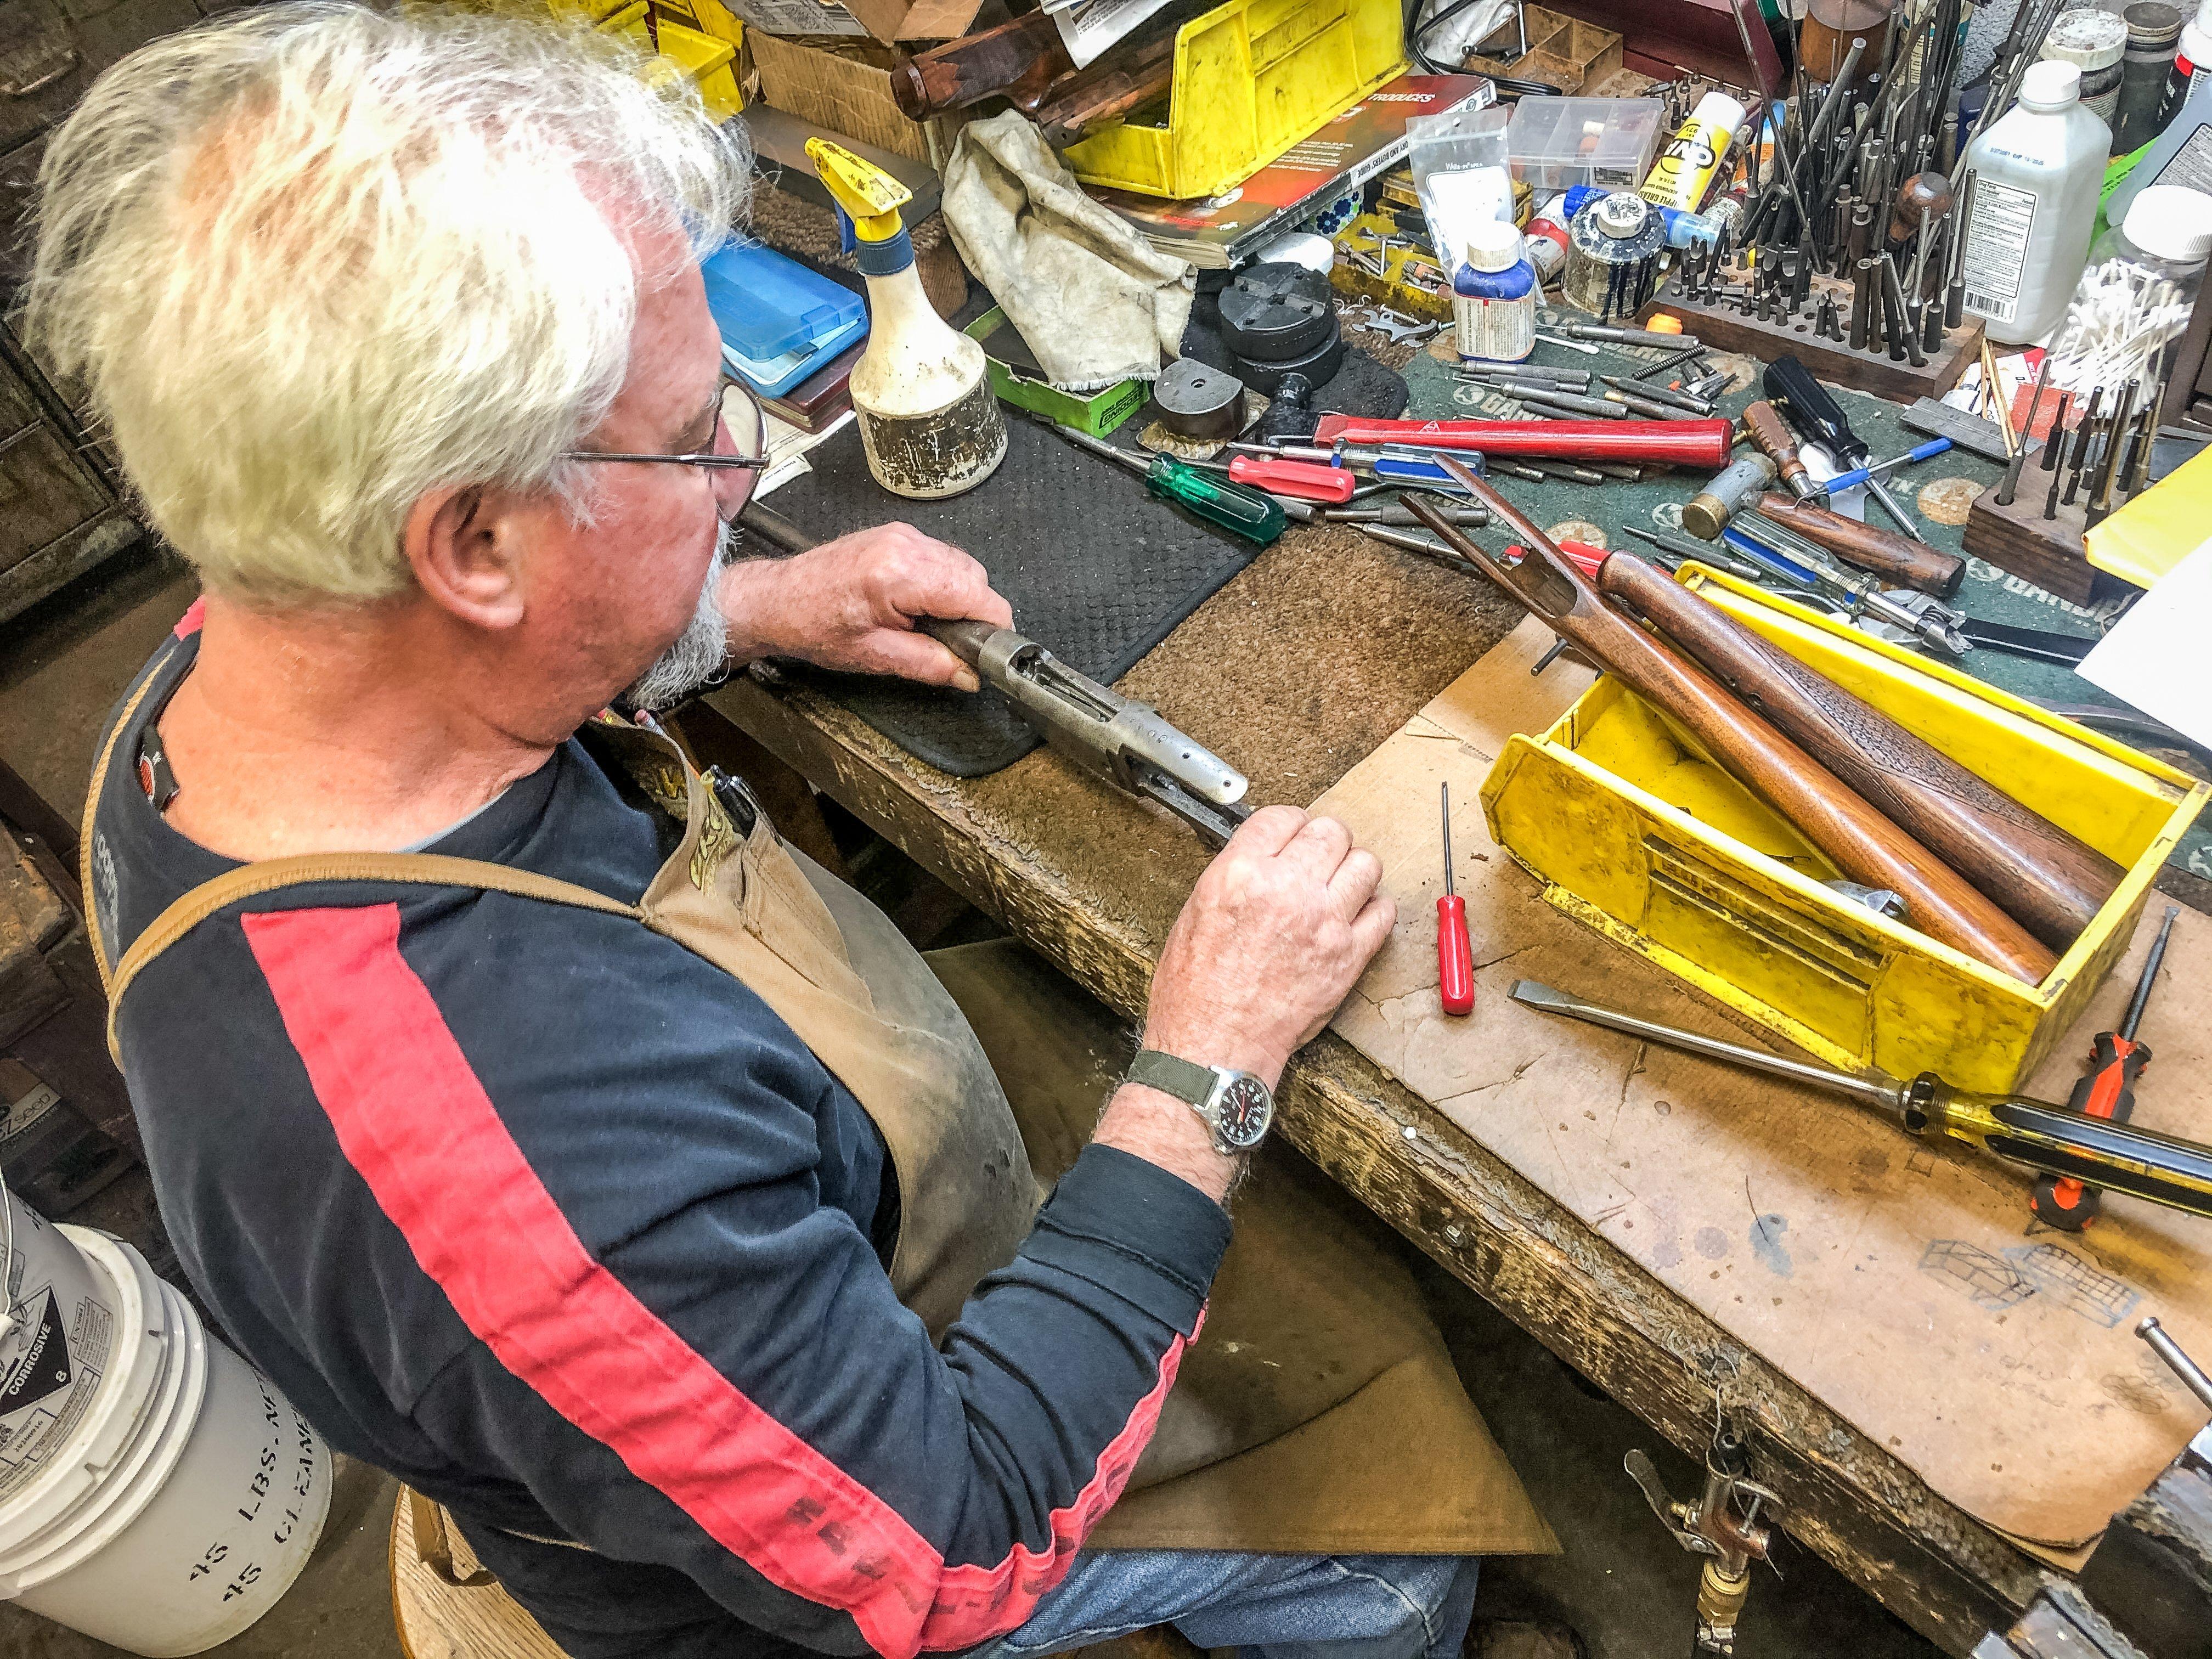
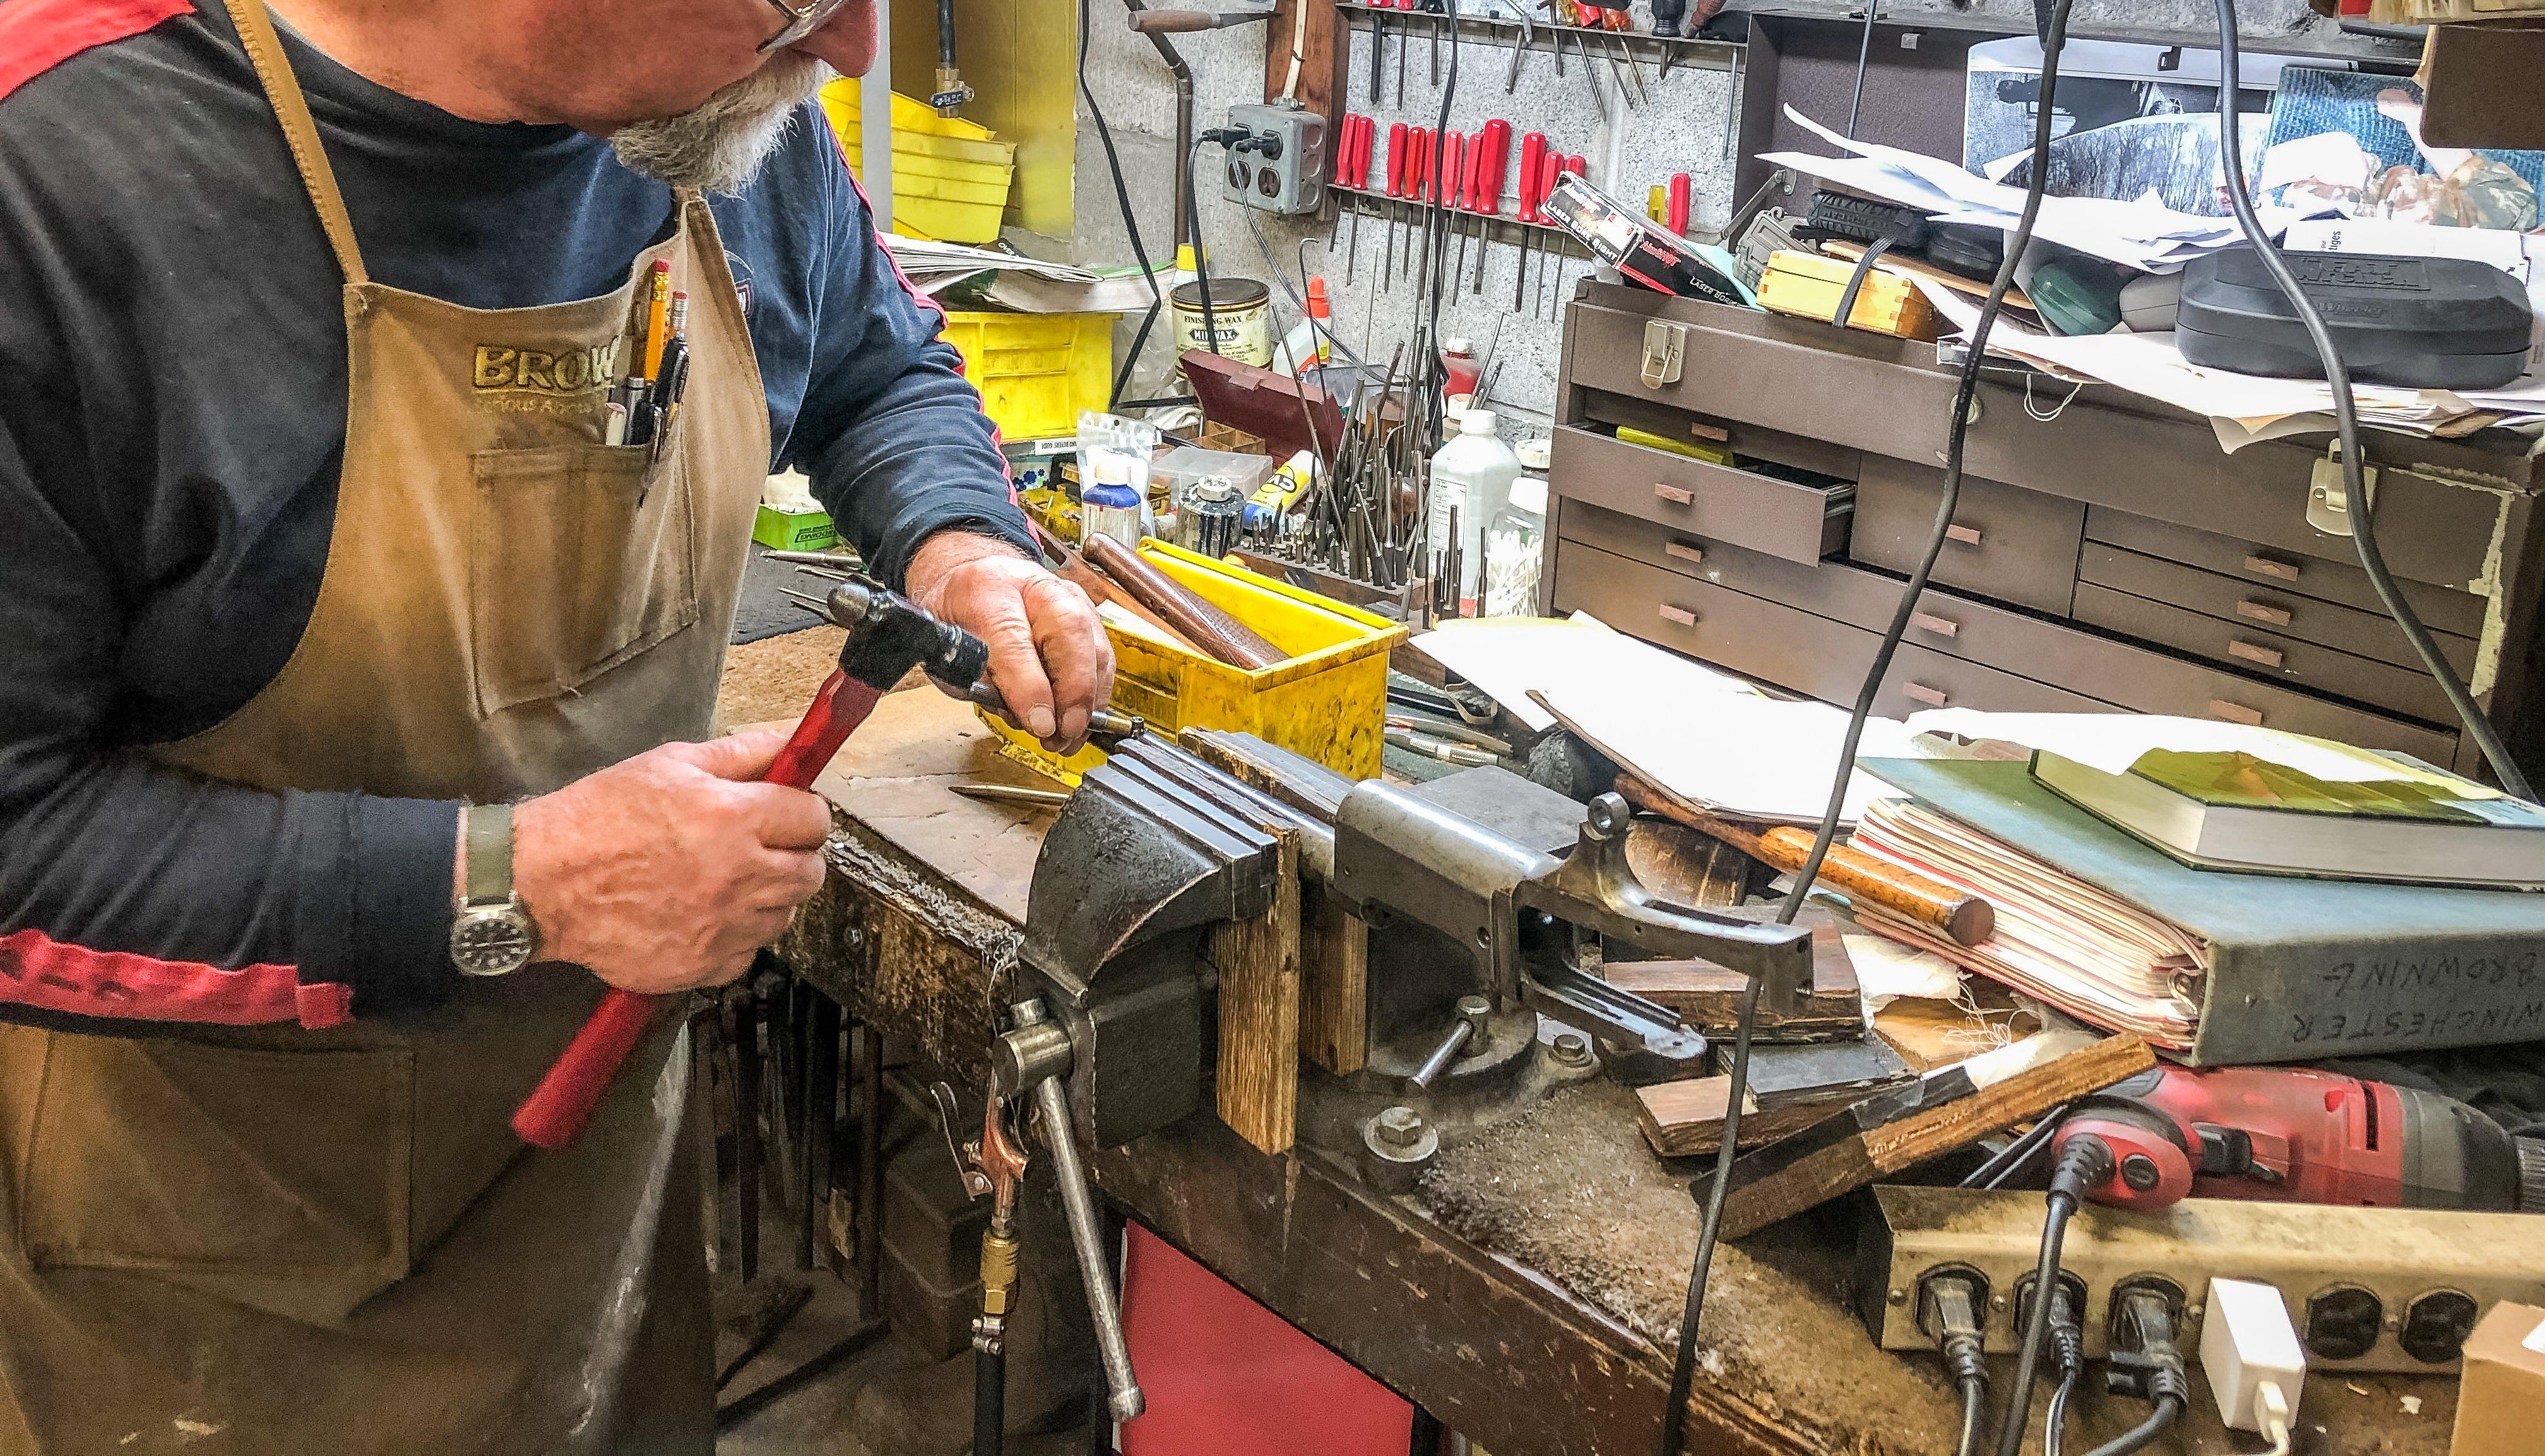
Now that you’ve given the gun a once-over and determined that it’s fixable, you’ll want to start taking it apart. If you’re confident enough to fix a gun, you’re probably confident enough to break it down to tiny parts. Still, you can get lost in this process, so it helps to have either a book of exploded gun drawings on hand or take pictures with your phone as you take the gun apart.
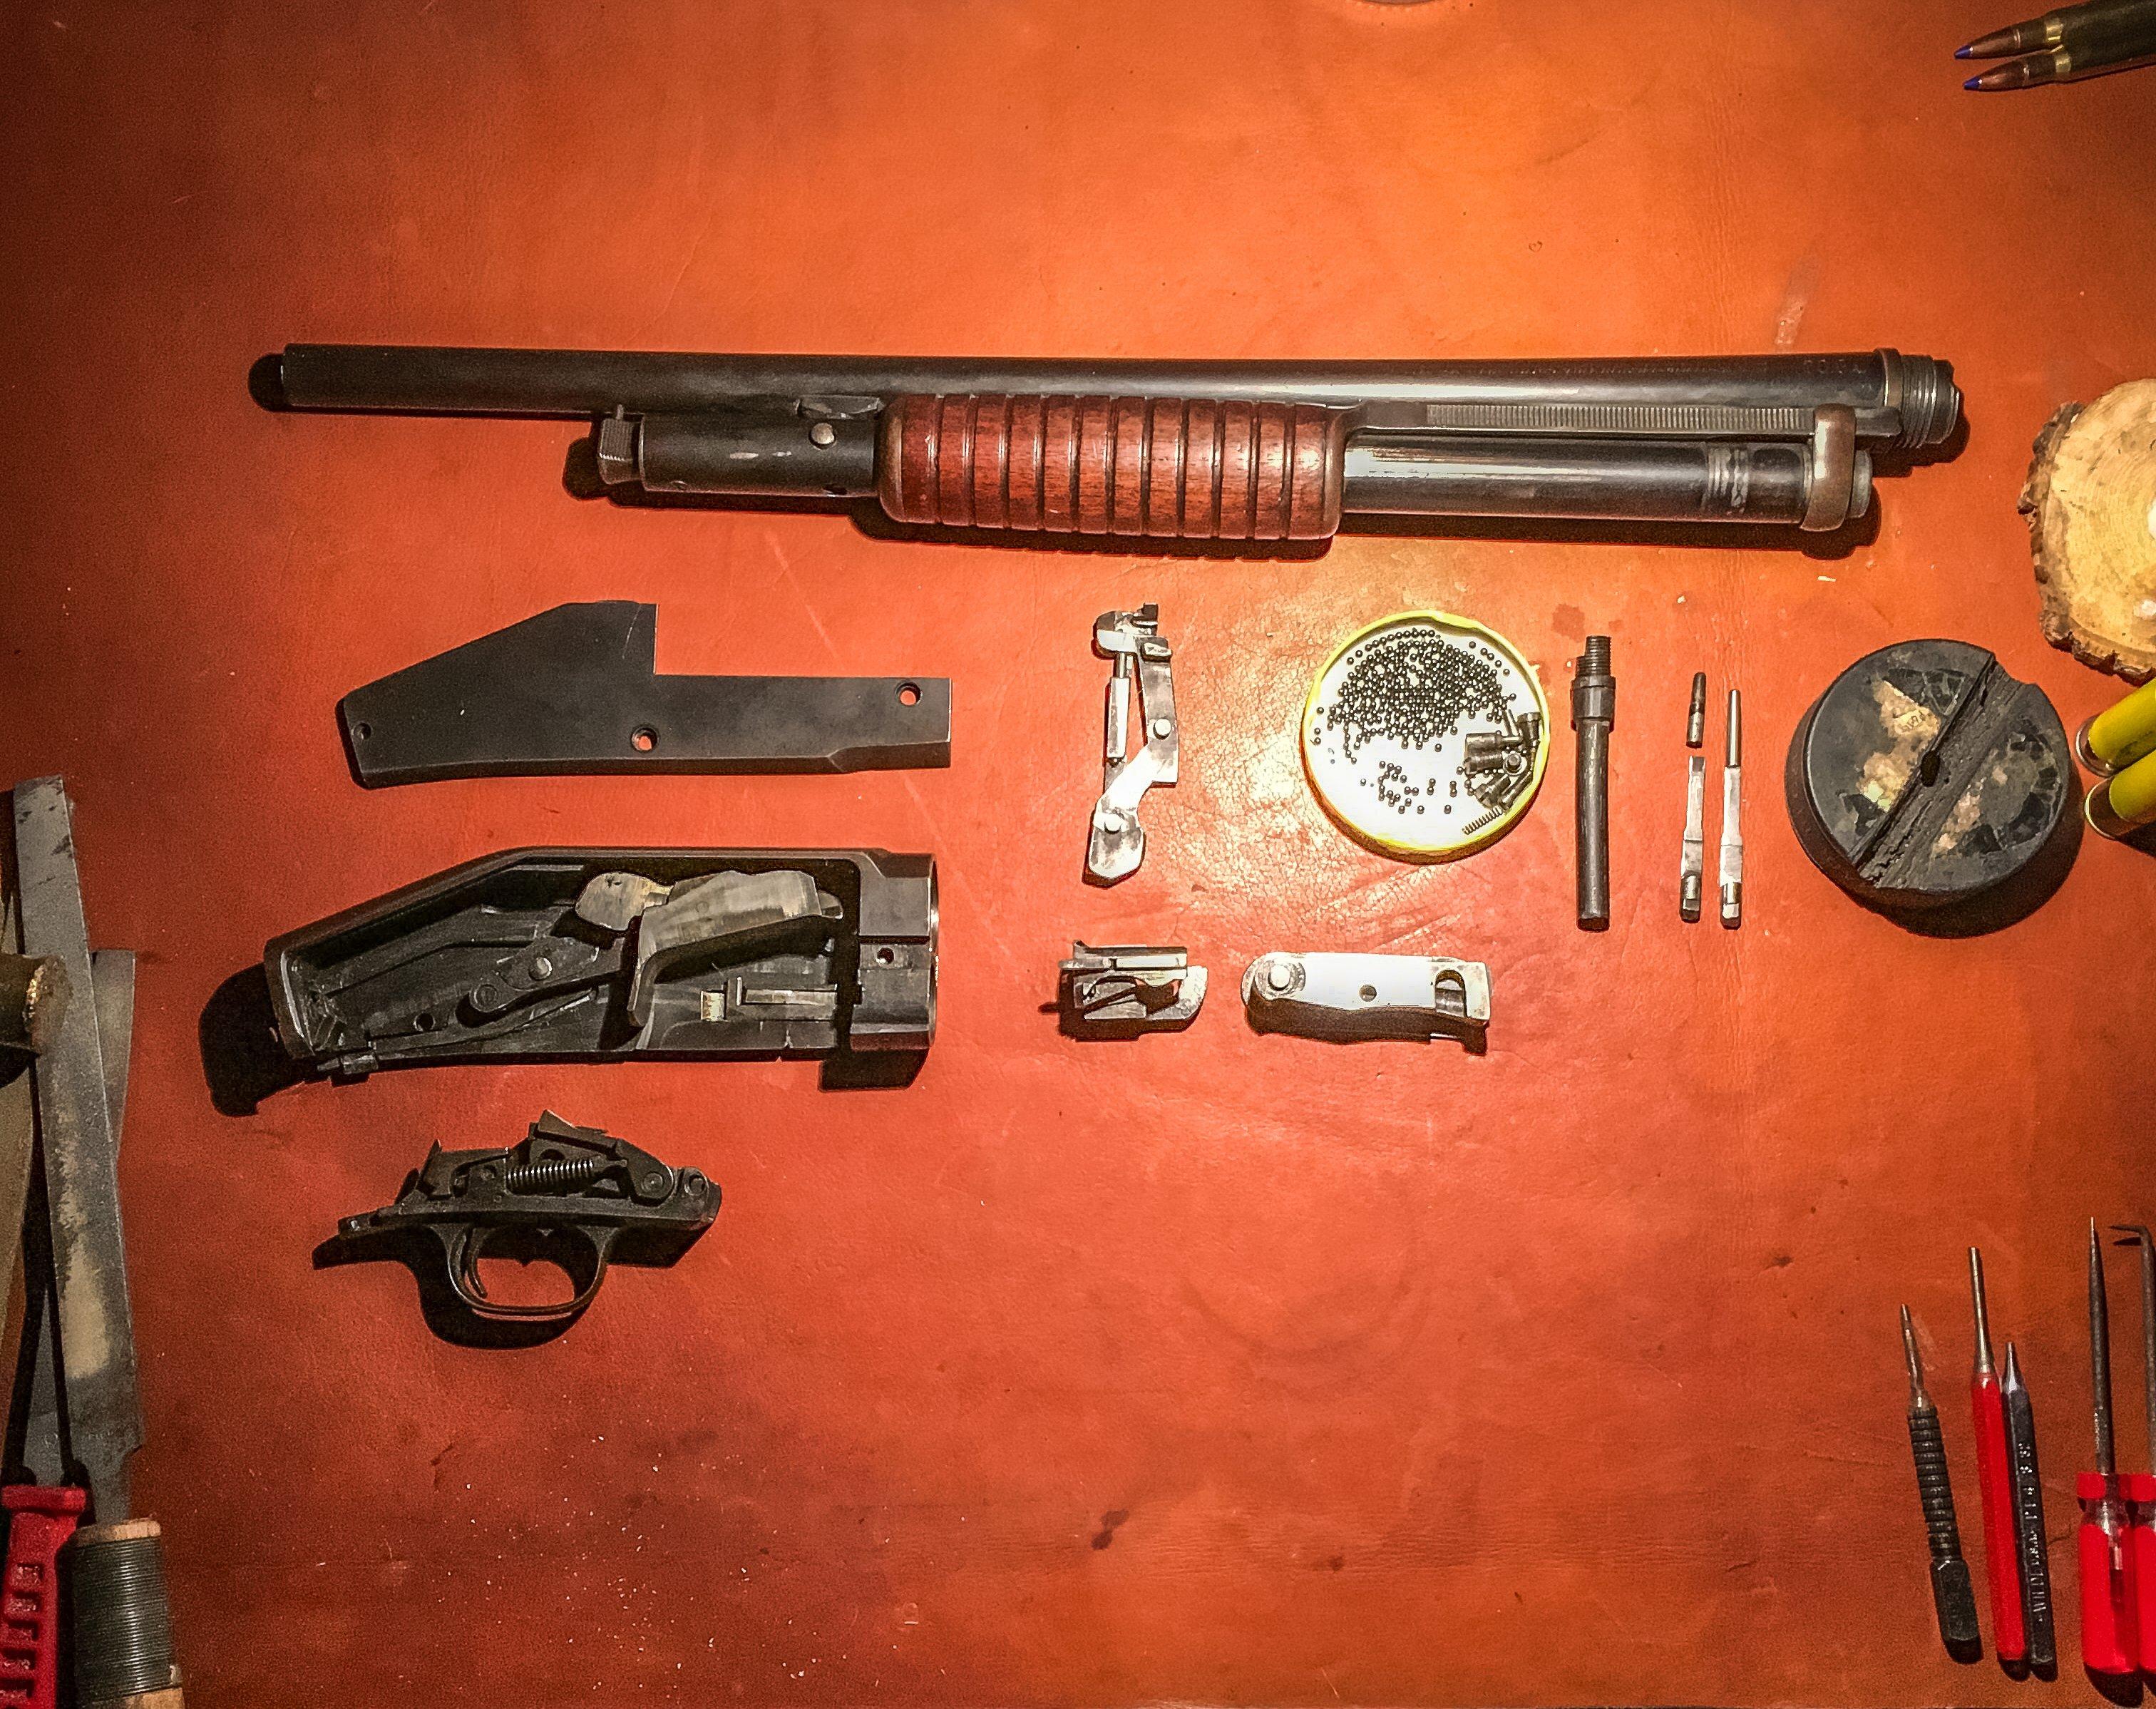
Most projects start with a complete disassembly and thorough cleaning.
It also helps to have the right tools. At minimum, you’ll want a good hollow-ground gunsmithing screwdriver set, a rubber block with holes in it, a padded vise, a punch set, a ball-peen hammer, and a nylon hammer.
Many times, a gun that seems worn out or broken just needs a good cleaning. Old gun oil can foul up the works, so I like to put everything back together after a deep clean to function test things again. If I have specific things that I know I need to repair, or cosmetic work to do like refinishing the stock or replacing screws, I’ll take the gun back apart, putting the parts in small bins or Ziplock bags and labeling the bins if necessary.
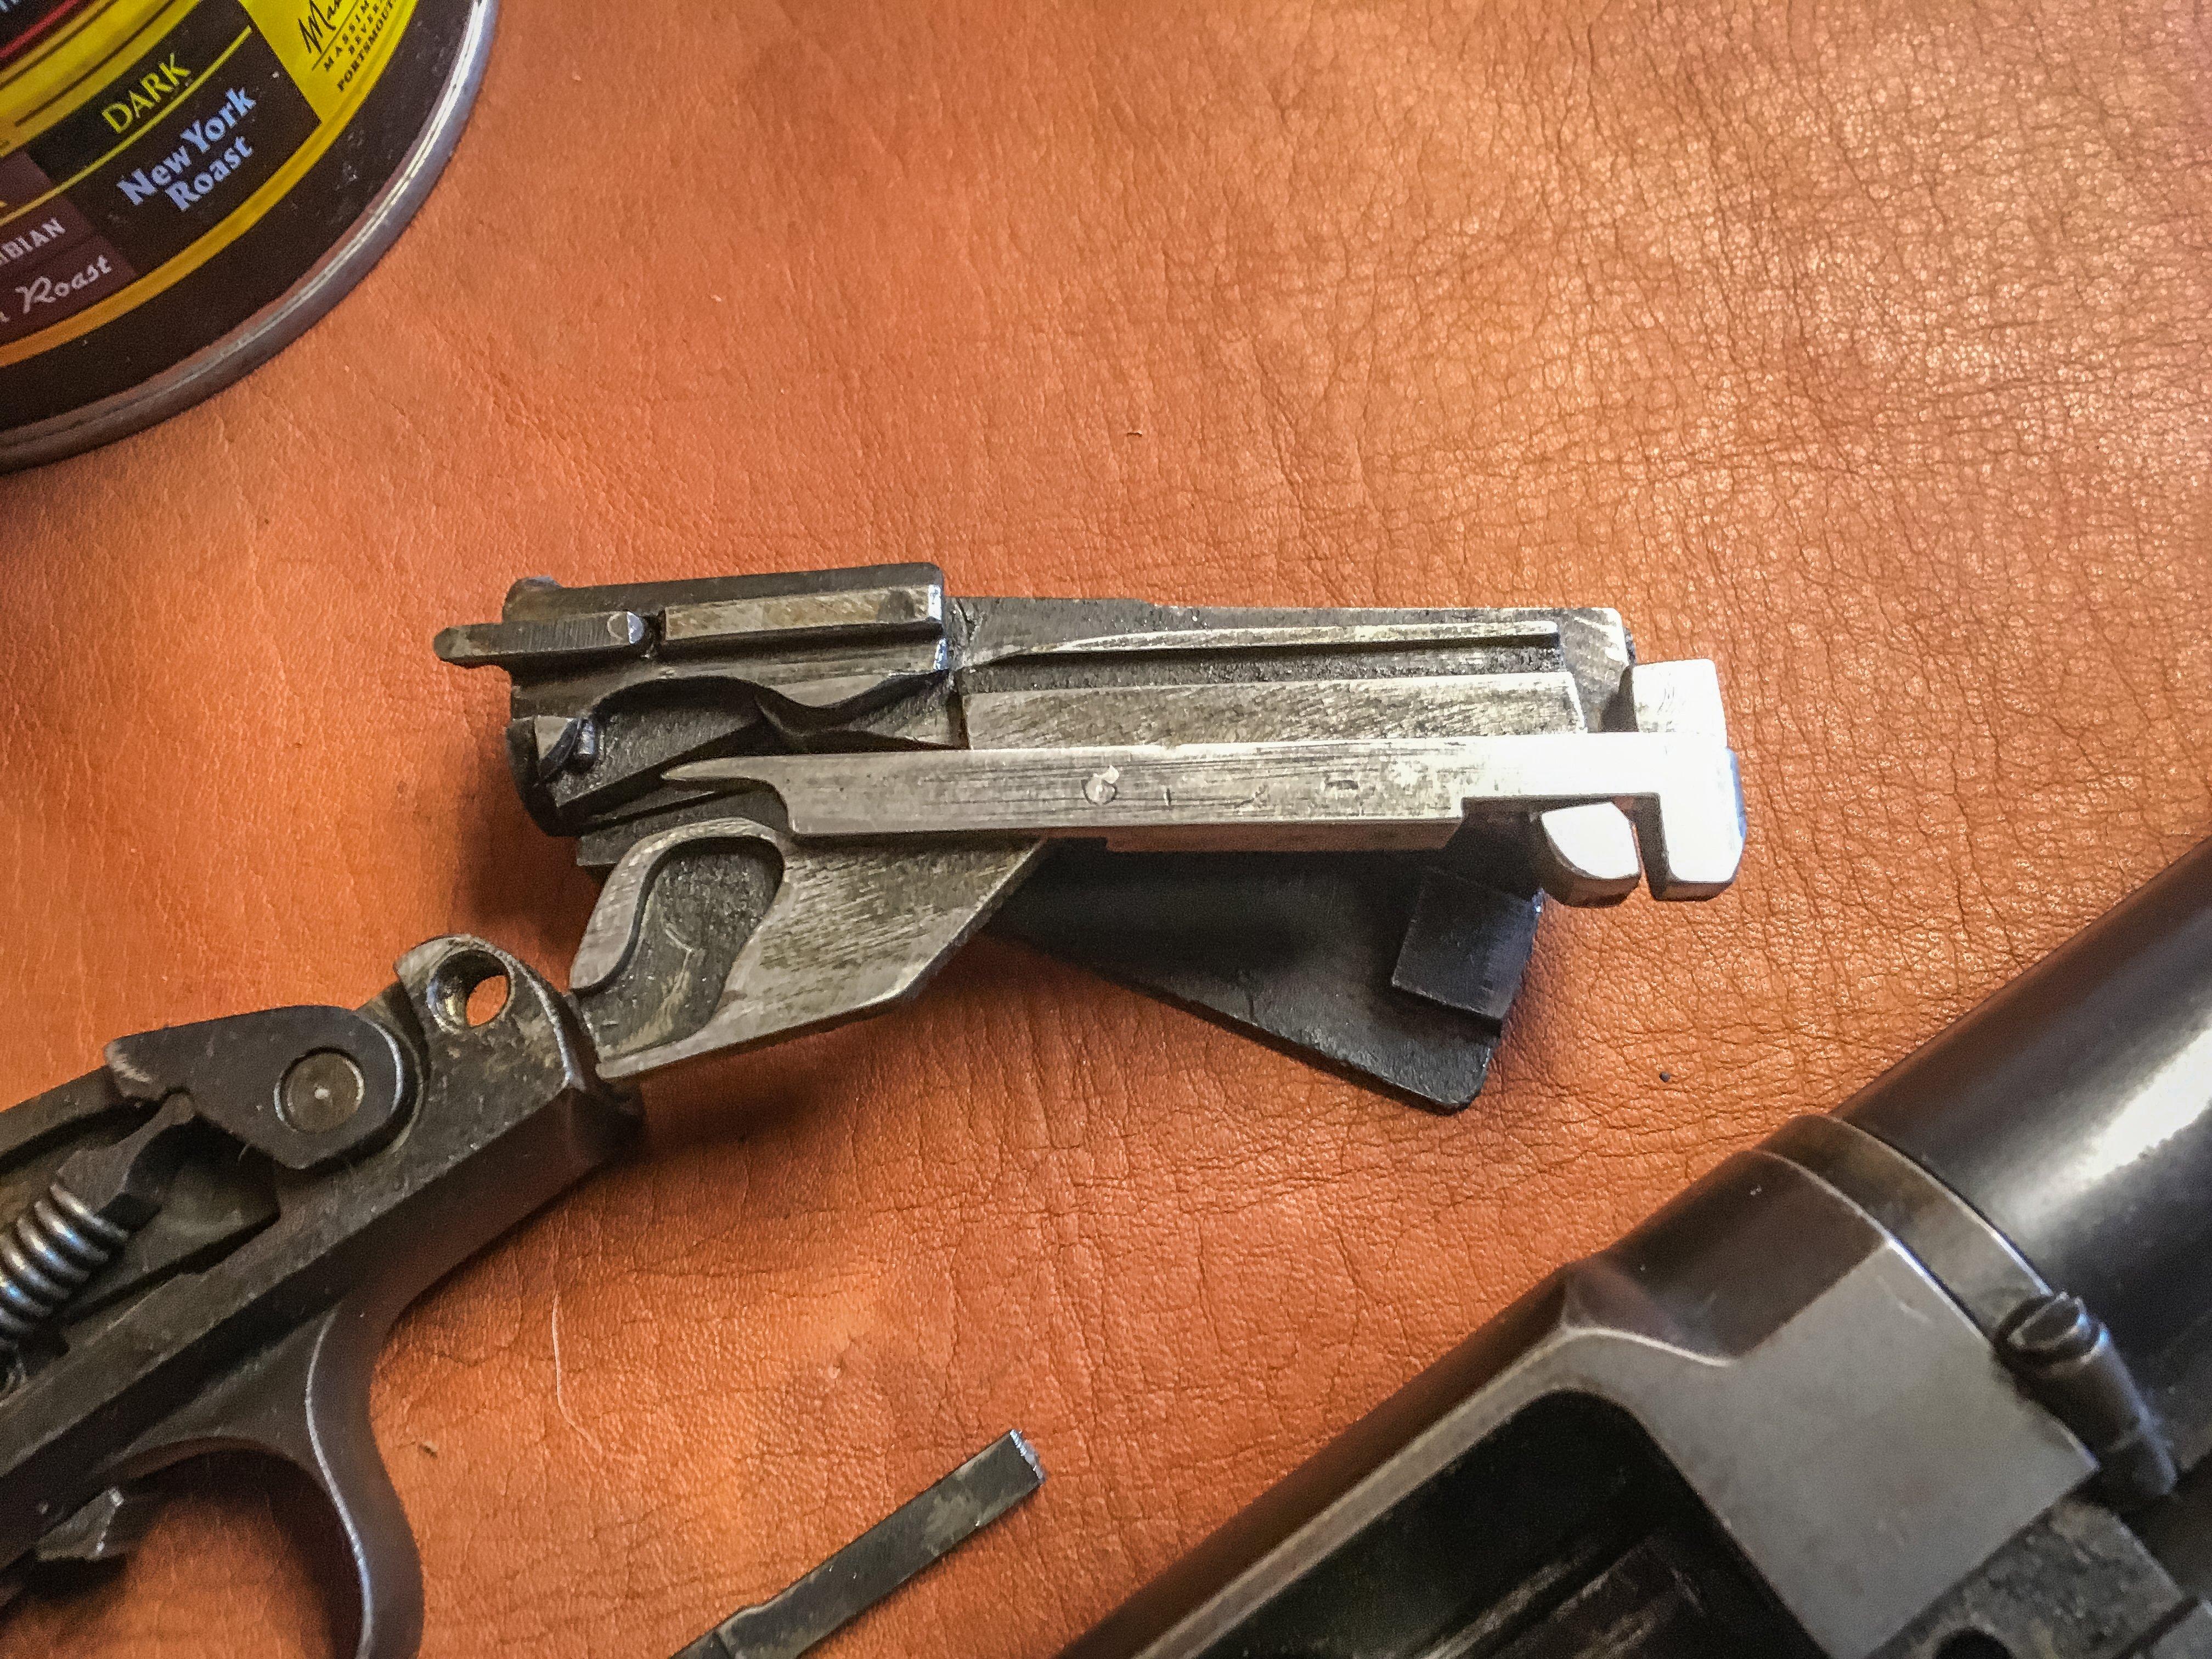
3) Fix Functional Problems
Before you can start making a gun look pretty, you need to get it working properly. Either it doesn’t cycle ammo, doesn’t shoot quite right, or doesn’t even go off. Checking in with the gunsmith is a good start if the gun doesn’t cycle, shoot quite right, or even go off, but some of the more common problems can be solved at home with the right tools.
Barrel Issues
The barrel of a shotgun or rifle is one of the most important parts of the gun. First let’s talk about common repairs for worn-out shotguns. Many choke tubes get stuck because people don’t oil them regularly. You can try soaking a frozen choke tube in Kroil or PB Blaster for a few days to break it free. If that doesn’t work, you may need to have the barrel cut and rethreaded for new chokes.

The barrel of a rifle or shotgun is one of the most crucial components to a fully functioning firearm.
Shotgun ribs can also get dented. This can be fixed easily with a special tool for pulling out dented ribs. Beads can also fall out, but they’re easily replaceable with new beads from a gun parts supply store like Midway, Brownells, or Jack First. You might also notice pitting in the barrel. This isn’t a dealbreaker as long as it’s not too deep, but you should try to either polish it out yourself or take it to someone who can.
For rifles, one of the common problems is leading, which is when too much lead accumulates in the rifling. This can be fixed with plenty of elbow grease, a bore brush, and some Hoppes #9 (but be forewarned, it takes a long time). You may also have a damaged crown, which can be repaired with a crown-cutting tool. Rifle barrels might also be missing iron sights, which are easy to find from gun parts stores or sources like Skinner sights. If you’ve tried everything and the rifle still won’t group consistently, the barrel could be burned out. In that case, you might as well get rid of it, and either replace it with a new barrel or find a different project gun.
Broken Action
This is where things can start getting tricky for the kitchen gunsmith. A good cleaning will go a long way to improve the functionality of your gun’s action. But if things are still acting funny, you might want to consider replacing the springs. For coil springs are usually easy, and there are many replacement spring packs for guns available online. Leaf springs are a little harder and might need to be made by a professional. Again, sometimes you just need to ask yourself if you want to spend the money or quit trying to fix a gun.
A broken or non-functioning action may require the services of a professional gunsmith.
What you’re looking for when you’re done is for the action to function perfectly. Test that it locks up and cycles smoothly with dummy rounds before running live ammunition. And if you have any doubts, check with a gunsmith.
The Trigger
Don’t mess with an existing trigger. If you’re thinking about getting out the Dremmel or a set of Arkansas stones to do a “trigger job” on Grandpa's old rifle, don’t do it! Successfully executing a trigger job is like repairing a Rolex. Only a few people can do it, and it doesn’t always work. Unlike the Rolex, a bad trigger job can seriously hurt or kill someone, so you need to either leave it to the absolute pros or don’t do it at all.
The good news is, there are a lot of really nice aftermarket triggers from companies like Timney or Trigger Tech. You still need to be careful when adding accessories like an upgraded trigger pack, but it’s a great way to either repair or enhance a worn-out old gun.
4) Fix Cosmetic Damage
With the major issues worked out, it’s time to pretty up that old gun. Some people like the patina of an old rifle or shotgun, and I’m one of them. But there is a point where patina reaches a tipping point. It's kind of like a pair of jeans with a hole in the knee. One day the hole gets too big, and that’s it. Sometimes you need to refinish a gun. Make sure you know how much your gun is worth before refinishing it because, even if you do a good job, refinishing can actually degrade the value of an old gun.
Wood/Furniture
The wood is one of the most enjoyable parts of a gun to refinish, and the most satisfying. If you’ve got damaged checkering, you can re-point it with checkering tools. You can also strip and refinish a gunstock with a hand-rubbed finish, which is time consuming but rewarding. For cheaper guns, using a finish like Minwax can also work, but it just doesn’t feel the same as an oil finish.
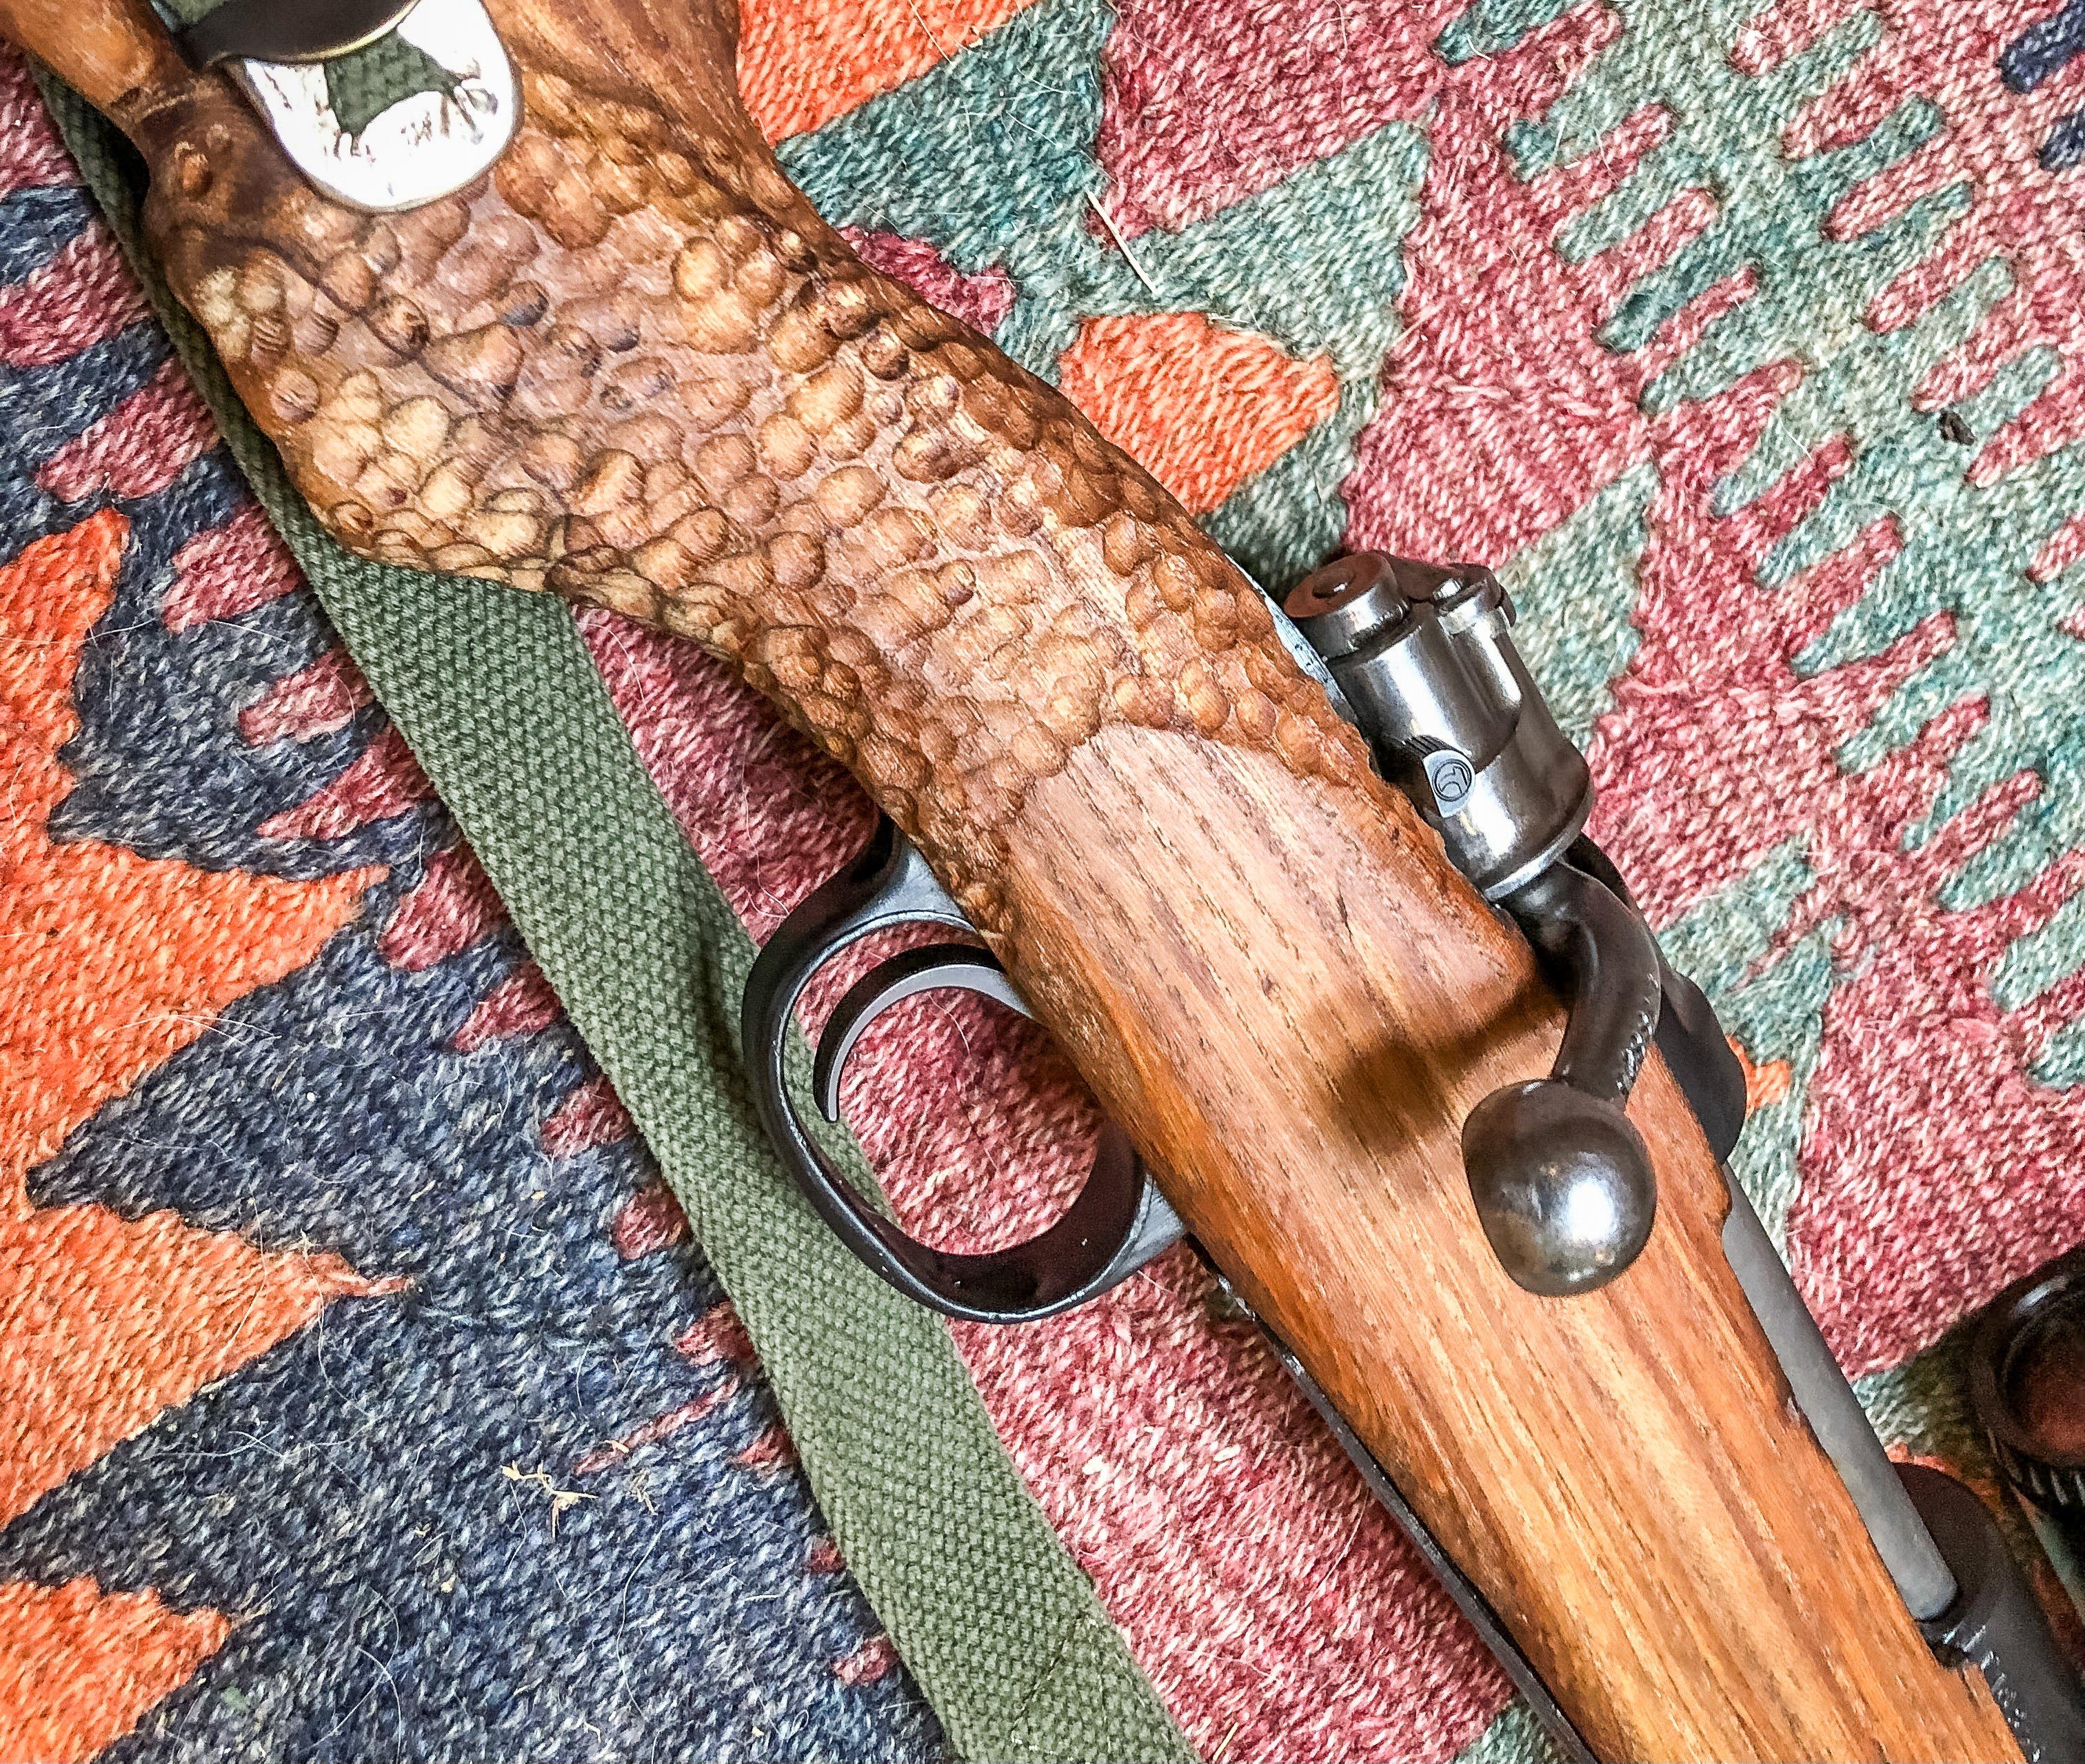
Refinishing a wood stock can be one of the most satisfying parts of restoring a gun.
Also consider glass bedding a rifle if you’re going through the trouble of refinishing the stock. Glass bedding will improve accuracy. You could add personal touches like carving and inlay, depending on how ambitious you are.
If you realize your gun stock is too far gone, or cracked beyond repair, consider replacing it. Companies like Boyds make stocks for a wide range of guns, or you might be able to buy OEM furniture from the factory. I’ve also had luck finding old stocks on eBay that are more than adequate. Older and more rare guns will need to have furniture carved and hand-fitted by a pro. The more money you can spend on this, the better it’ll turn out.
Don’t Miss: MYTH OR FACT? EXAMINING 16 PIECES OF TURKEY HUNTING FOLKLORE
Metal
Small rust spots can be removed using vinegar or Coca-Cola and a piece of aluminum foil. Just dip the shiny side of the foil in Coke or vinegar and rub the rust spot until it goes away. You could also try doing this with gun oil and fine steel wool, but be careful and go slow. Once it’s dry, clean with water and add a little cold blue to prevent more rust.
For bigger pitting and rust issues, you’ll need to polish the gun. Gun polishing is an art. Essentially, you’re sanding the metal with abrasive papers and oils until you get the desired finish. You’ll need to keep edges crisp and barrels straight when doing this. I suggest checking out some of Larry Potterfield’s refurbishing videos on YouTube for inspiration. You could also sandblast a rusty old gun for a nice, uniform finish. This will give you a matte finish and it can be great for those who don’t have the time or skills to polish, as long as you don’t mind a rougher finish.
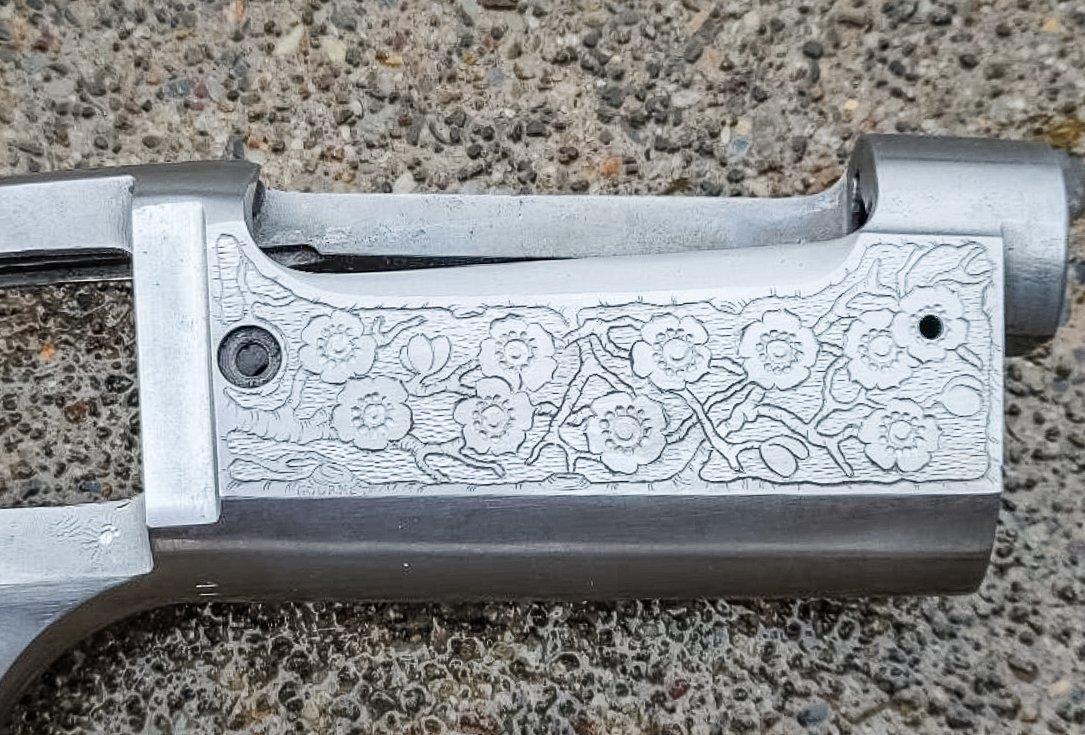
YouTube videos are a great resource for refinishing the metal parts of a firearm without damaging it.
If you do strip a gun to bare metal, you’ll need to re-blue it or paint it with something like Cerakote. For each, I suggest sending the gun out. It’s a lot to go into here, but essentially, you probably don’t want to invest in all the necessary tools to do either. Cerakote applicators can be found on the Cerakote website. For bluing, check for local gunsmiths. For each application, you’ll want to make sure your bare-metal gun doesn’t rust before it can be covered. When you’re done polishing or sandblasting, coat the gun parts liberally in oil, wrap in newspaper, and put in a plastic bag for transport.
Hardware
The most common issues with gun hardware are missing hardware and bunged-up screws. For the missing stuff, just replace it with parts from a supplier. Use an exploded gun drawing to reference the correct part and order it. Bunged screws are screwheads that are damaged or stripped. This happens when you don’t use the proper-sized driver head to remove a screw from a gun. They can sometimes be repaired through polishing and bluing, but you’ll have better luck just buying replacements. You can pick up kits of screws from gun parts suppliers or find specific screws for your gun. Usually, they’re sold “in the white” and will need to be blued again. You can use cold blue for this in a pinch.
Don’t Miss: ARE REG CHANGES HELPING WITH A SOUTHERN TURKEY COMEBACK?
5) Put it All Back Together
The best way to fix a worn-out old gun is to not let it get worn out in the first place. That starts the first time you put it back together. Going back to the proper tools you used to take the gun apart, you’ll want to use those same tools to re-assemble it. Always use the right size screw driver for each screw, don’t bang on metal parts with a steel hammer, and take your time. If you get stuck, call for help from (you guessed it) a gunsmith.
Use proper tools to take down and reassemble firearms to prevent damage.
When I’m working on a gun, I like to make sure my entire work area is clear on the table and the floor in case I drop a small part. I also work on guns on top of an old towel, both to protect the finish and keep pins and springs from rolling around. As you put the gun back together, use the right amount of oil for each part, grease parts where they need to be greased, and tighten screws to proper torque specs if you have that info available. Give the whole thing one last pass with a clean cloth and store the gun in a dry safe place. With any luck, it’ll be your great-grandkids who have to fix it the next time it gets worn out.
SIDEBAR: Custom Camo Your Favorite Gun
Hydro-dipping allows you to customize your gun in your favorite camo pattern, like this Beretta in Realtree Legacy.
If you want to take your old gun project over the top try hydro-dipping it, which is the best way to apply camo patterns or any other kinds of graphics directly to your gun. Like bluing and Cerakote, it’s best to work with a pro. Immersion Graphics, located in Columbus, Georgia, supplies film to processors all over the globe. The hydro-dipping process is pretty cool: you bring the dealer your gun or just the parts you want a graphic on, and they dip them through a film of the pattern in a water tank. When they pull the gun out, you’re left with a perfect, direct transfer of whatever camo pattern you want wrapped completely around your gun. Personally, I think a duck gun with Advantage Classic metal parts and restored wood furniture would look pretty cool. And I might just have an old 870 lying around that would fit the bill.