Snapping turtles make great eats, but skinning them isn't easy. Break out this handy garage tool to make the task quick and easy
Snapping turtles are tasty. You can fry them up or make one heck of a pot of soup with them. Good as they are on the table, turtles grow slowly, and a snapper that’s gotten large enough to clean and eat has been around for a while. So I only clean them on occasion. But that occasion is always enough to remind me that a snapping turtle might be the most difficult critter on the planet to skin — and I’ve separated skin from meat on a lot of critters.
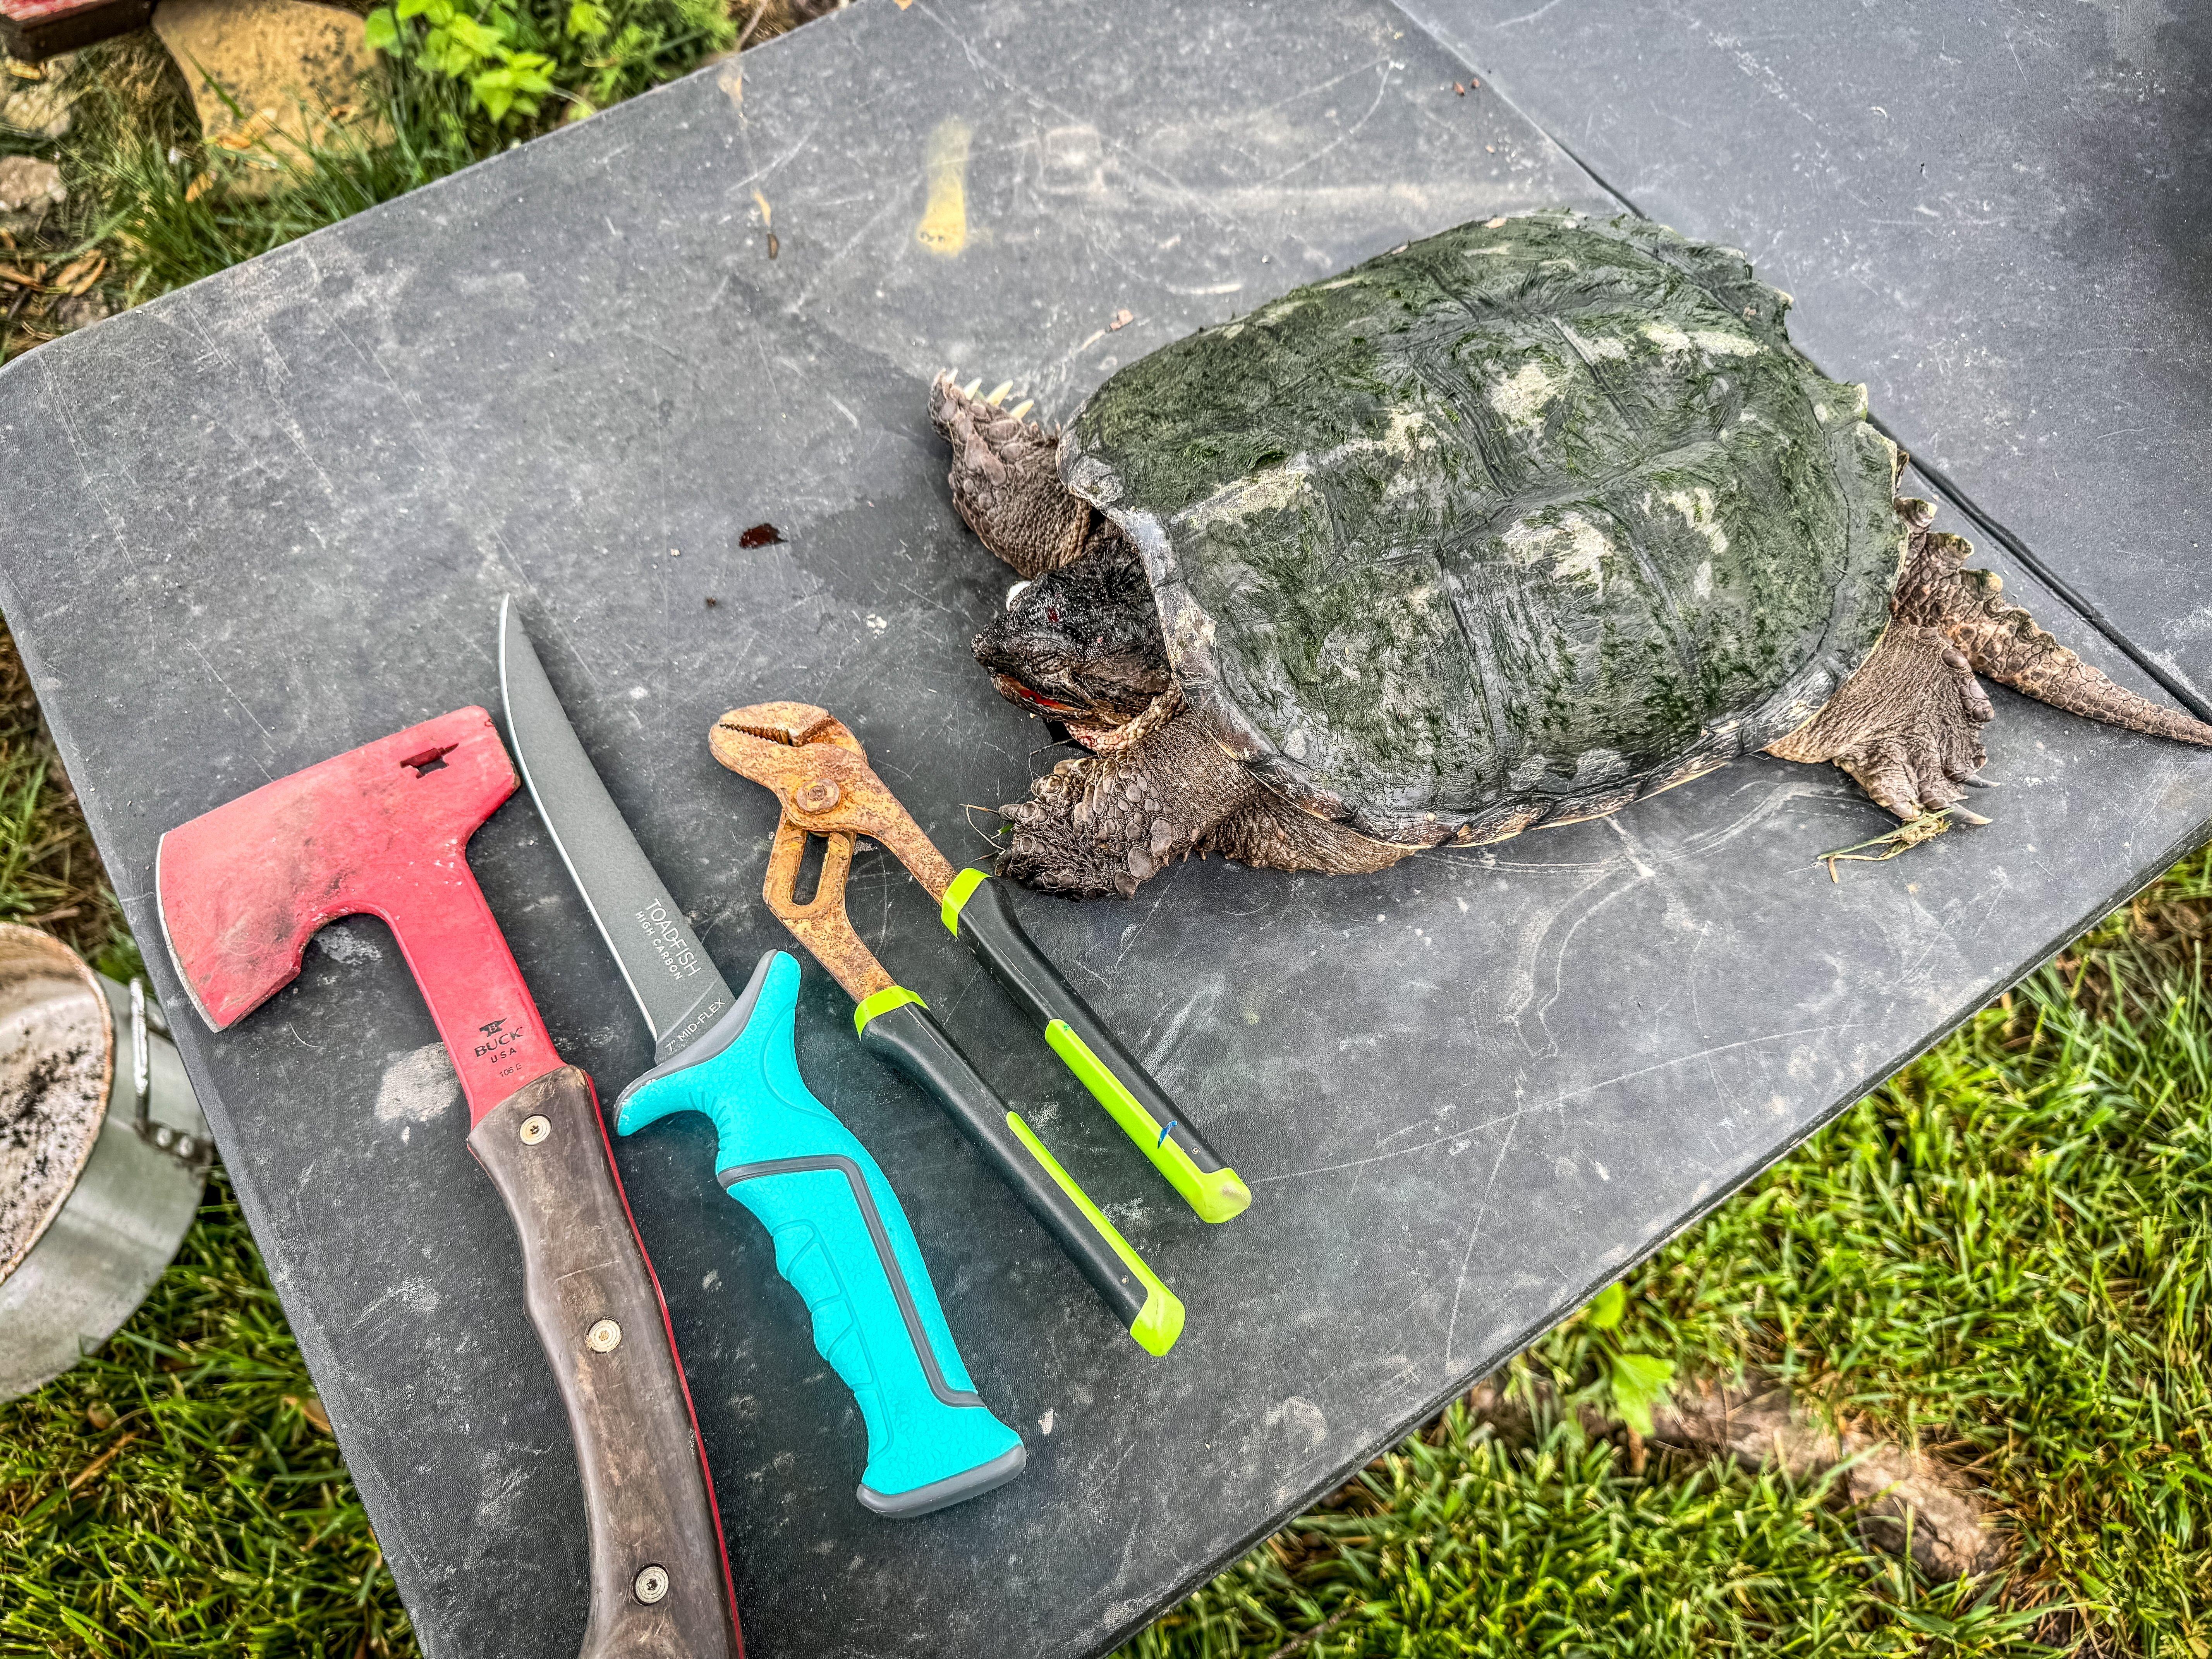
I like turtles and only clean them on occasion, but a big snapper is delicious on the table. All images by Cheryl Pendley
It isn’t that a turtle’s skin is particularly tough or thick, it just that it doesn’t peel away from the meat easily. In the past I’ve used water pressure to help skin my turtles. That method works, but it’s also messy.
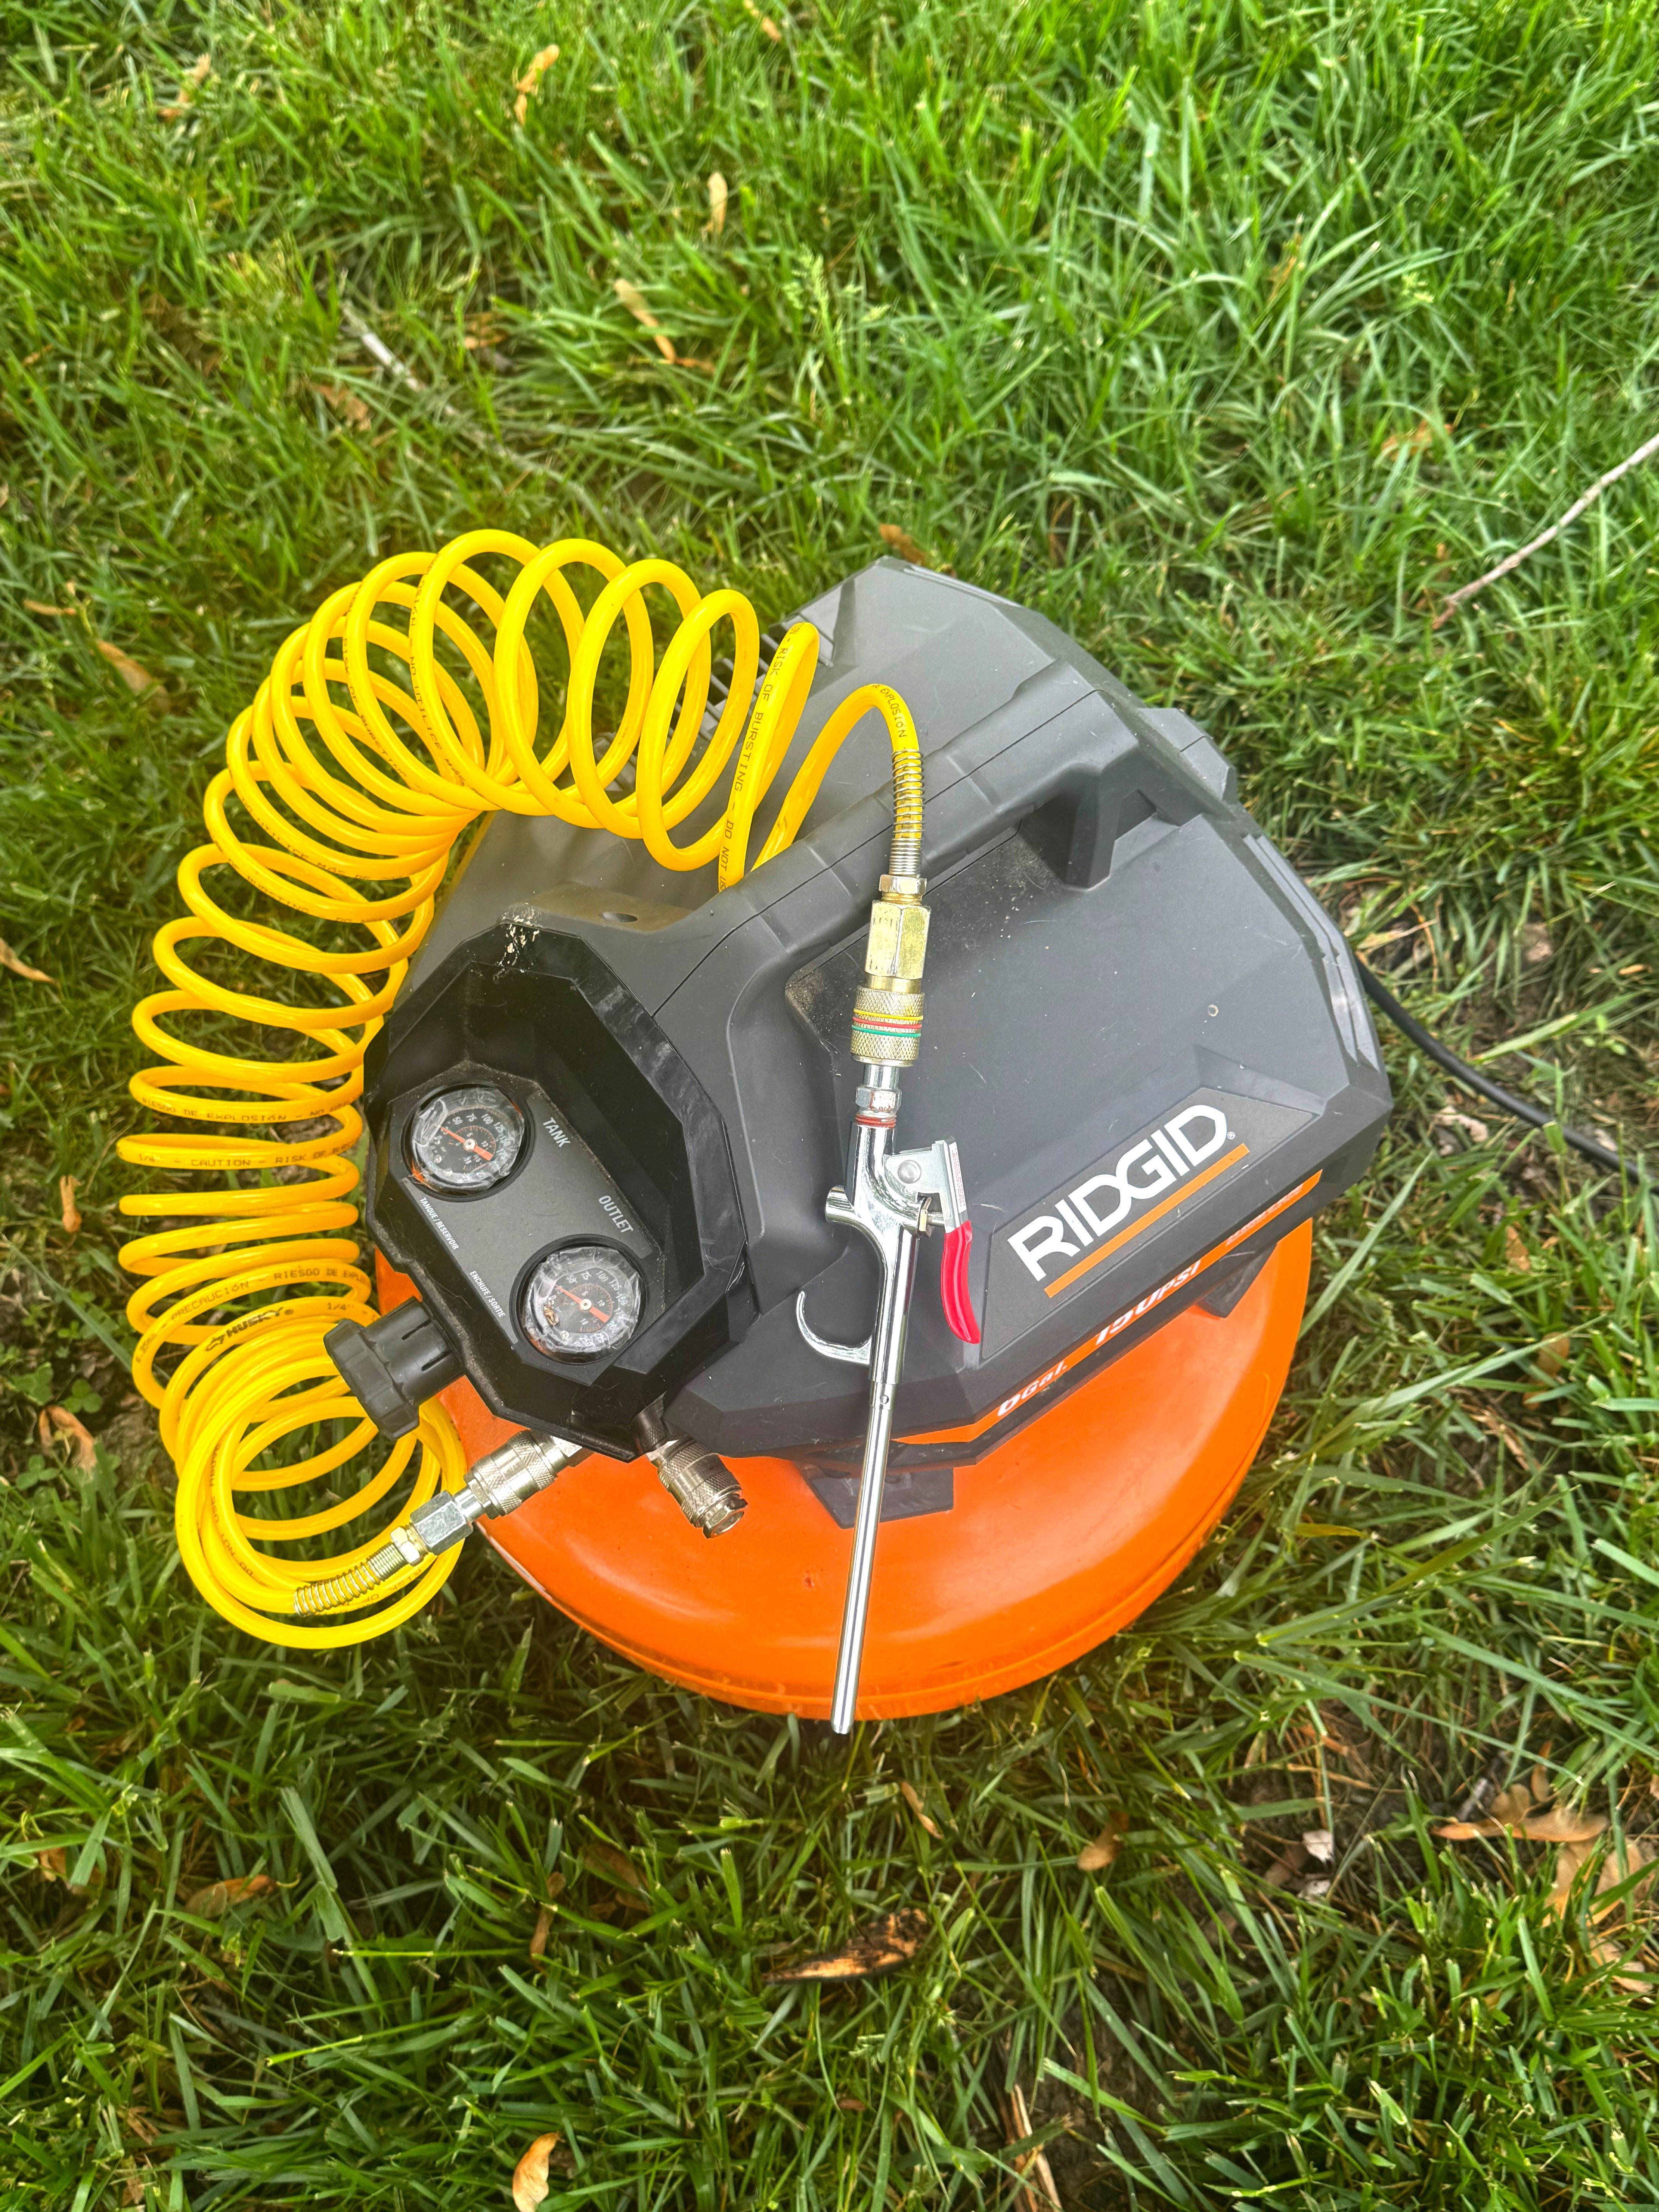
All you need is a standard air compressor with a nozzle attachment, a knife, a pair of pliers and maybe a hatchet.
Here lately, I’ve turned to a handy shop tool to get the job done. An air compressor fitted with a blow gun wand works like a charm. You can blow up the turtle like a balloon, separating the skin from the meat and making the cleaning task much faster and cleaner.
Don’t miss: HOW TO SKIN A SNAPPING TURTLE THE TIMBER2TABLE WAY
Step 1: Dispatch the turtle. I’m a big fan of a .22 for this task. A hatchet works as well. Snapping turtles have incredible bite force and they don’t mess around. Keep your fingers away from the beak. They can move surprisingly quickly. Don’t take your eyes off the turtle while any valuable body parts are near its head.
Step 2: If you didn’t dispatch with a hatchet, you need to remove the head for the next step. It’s easiest to grab the lower jaw with pliers and extend the neck for doing this. Use a sharp knife to cut around the base of the skull. Don’t go too far back because on a big turtle, there is quite a bit of meat on the neck that you will want to save.
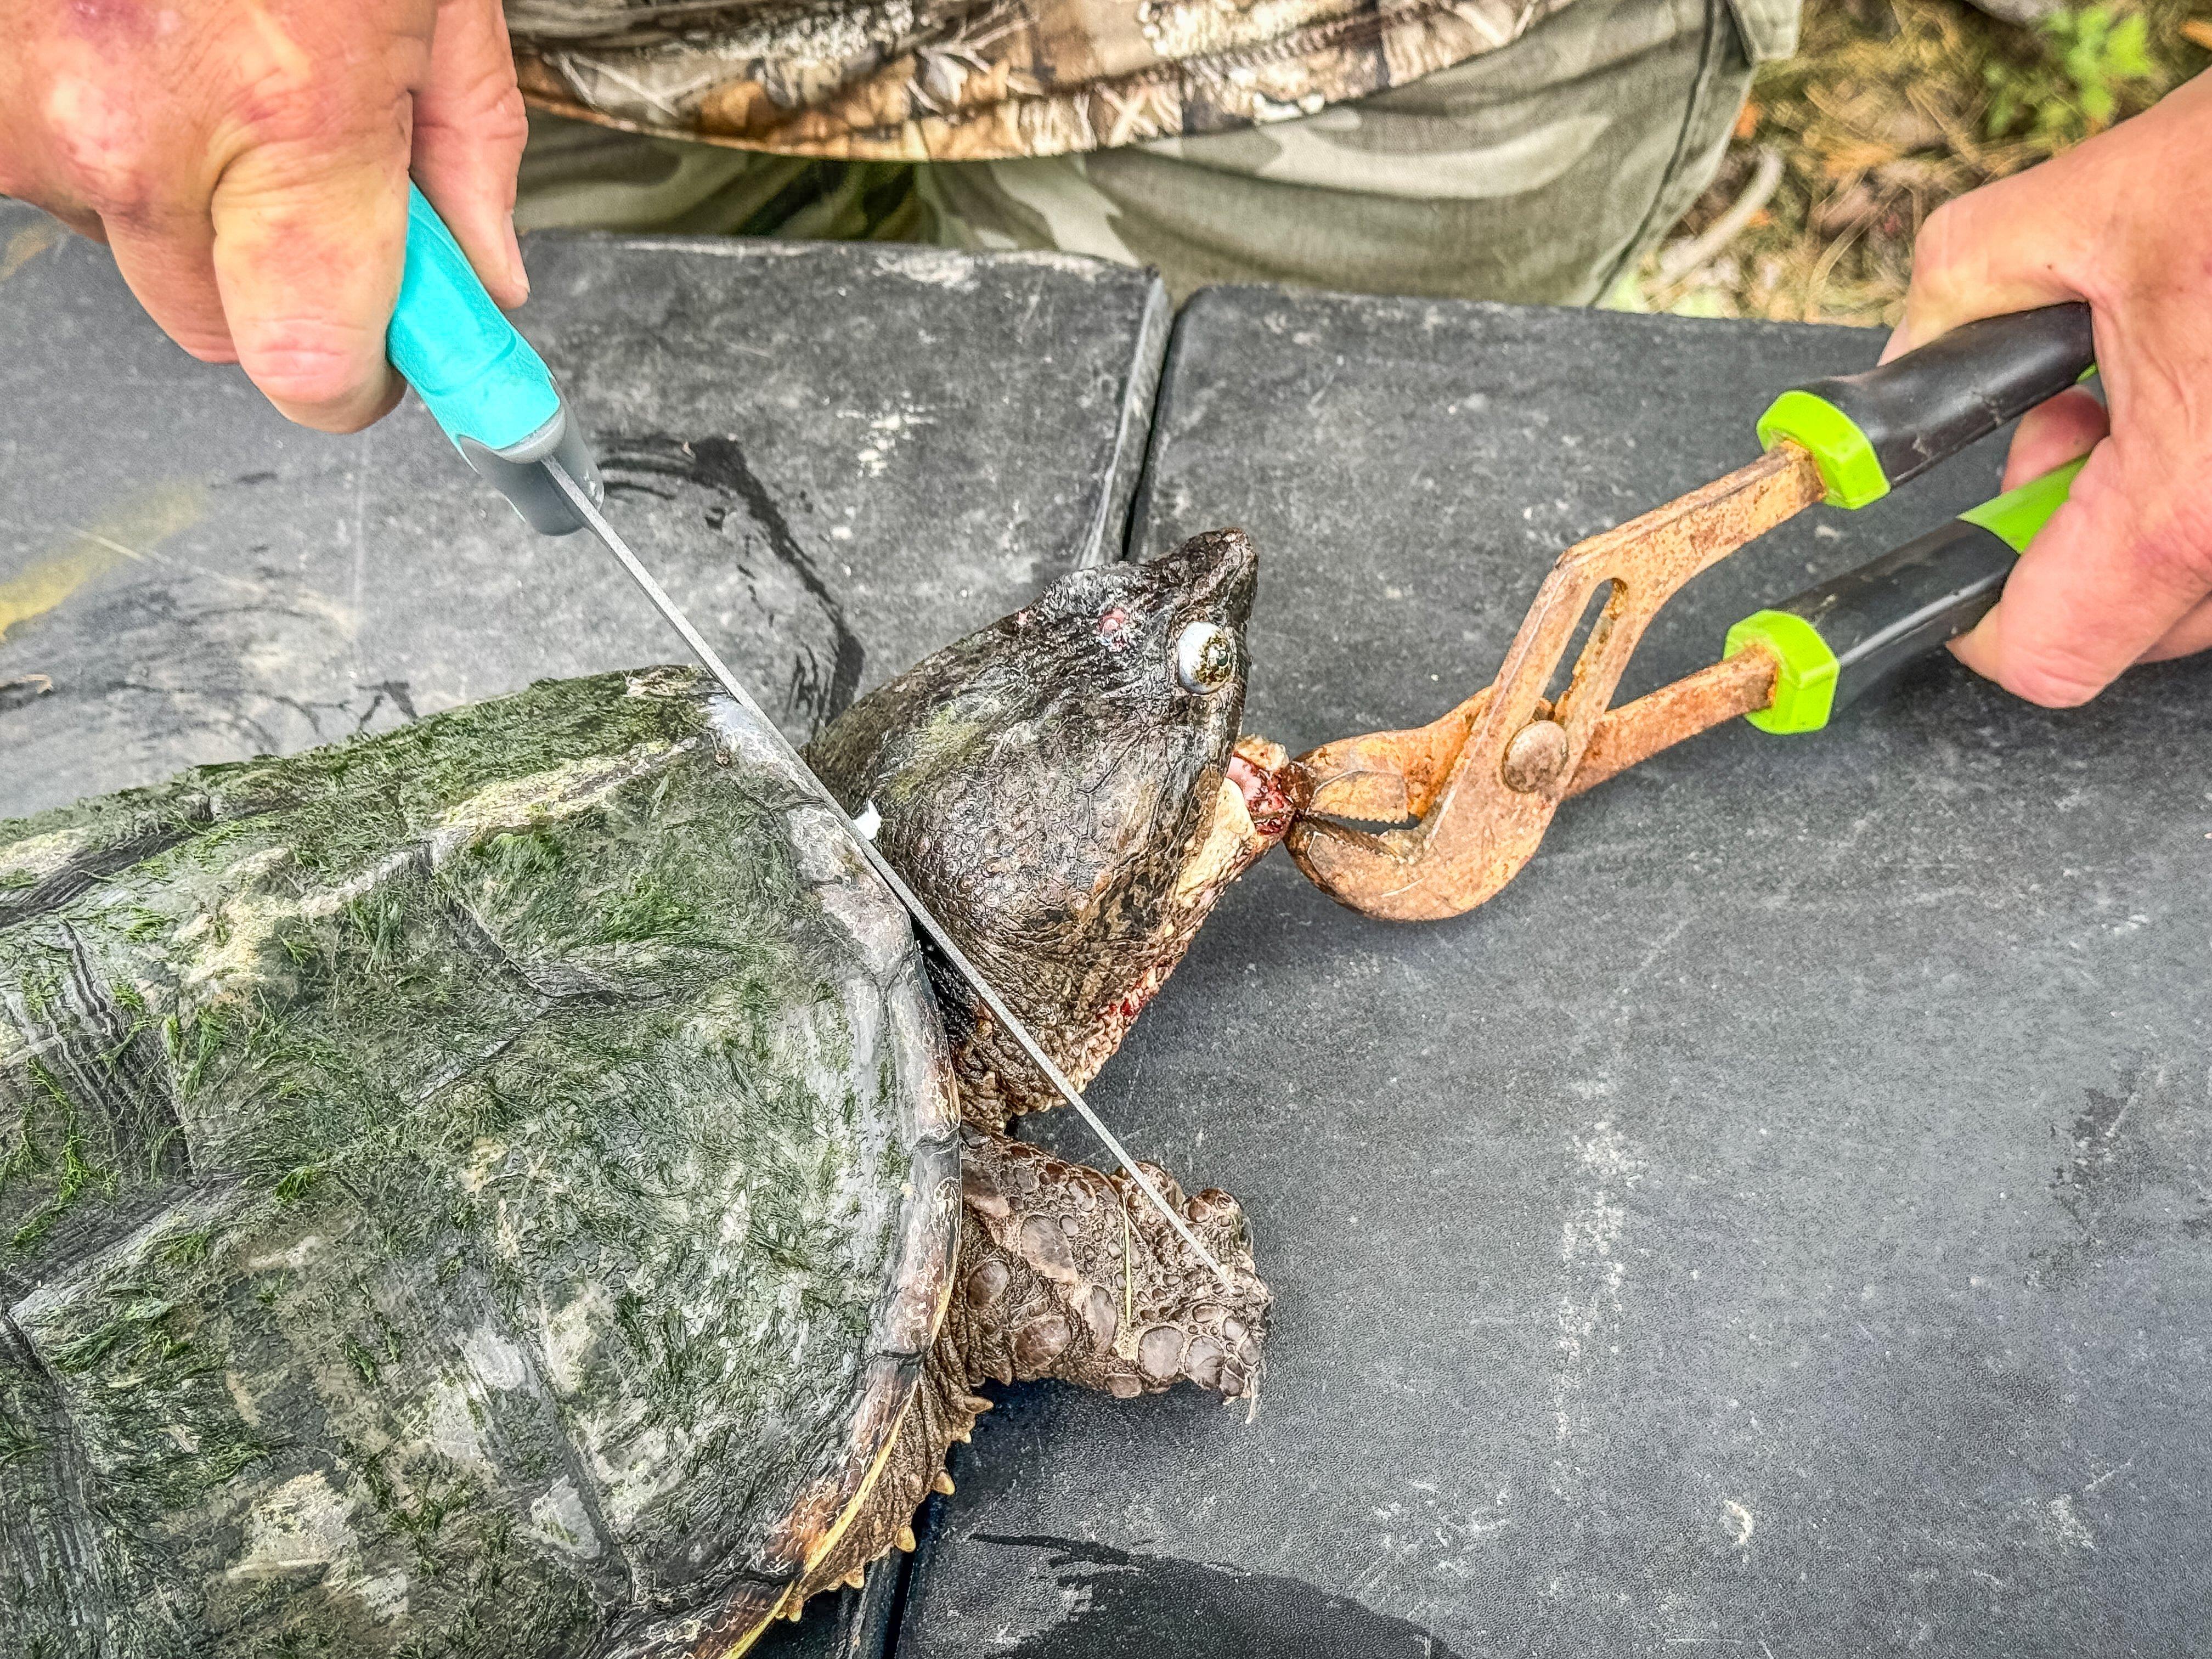
After dispatching the turtle, remove the business end.
Step 3: Time for the air hose. Make a small slit just above one back foot.
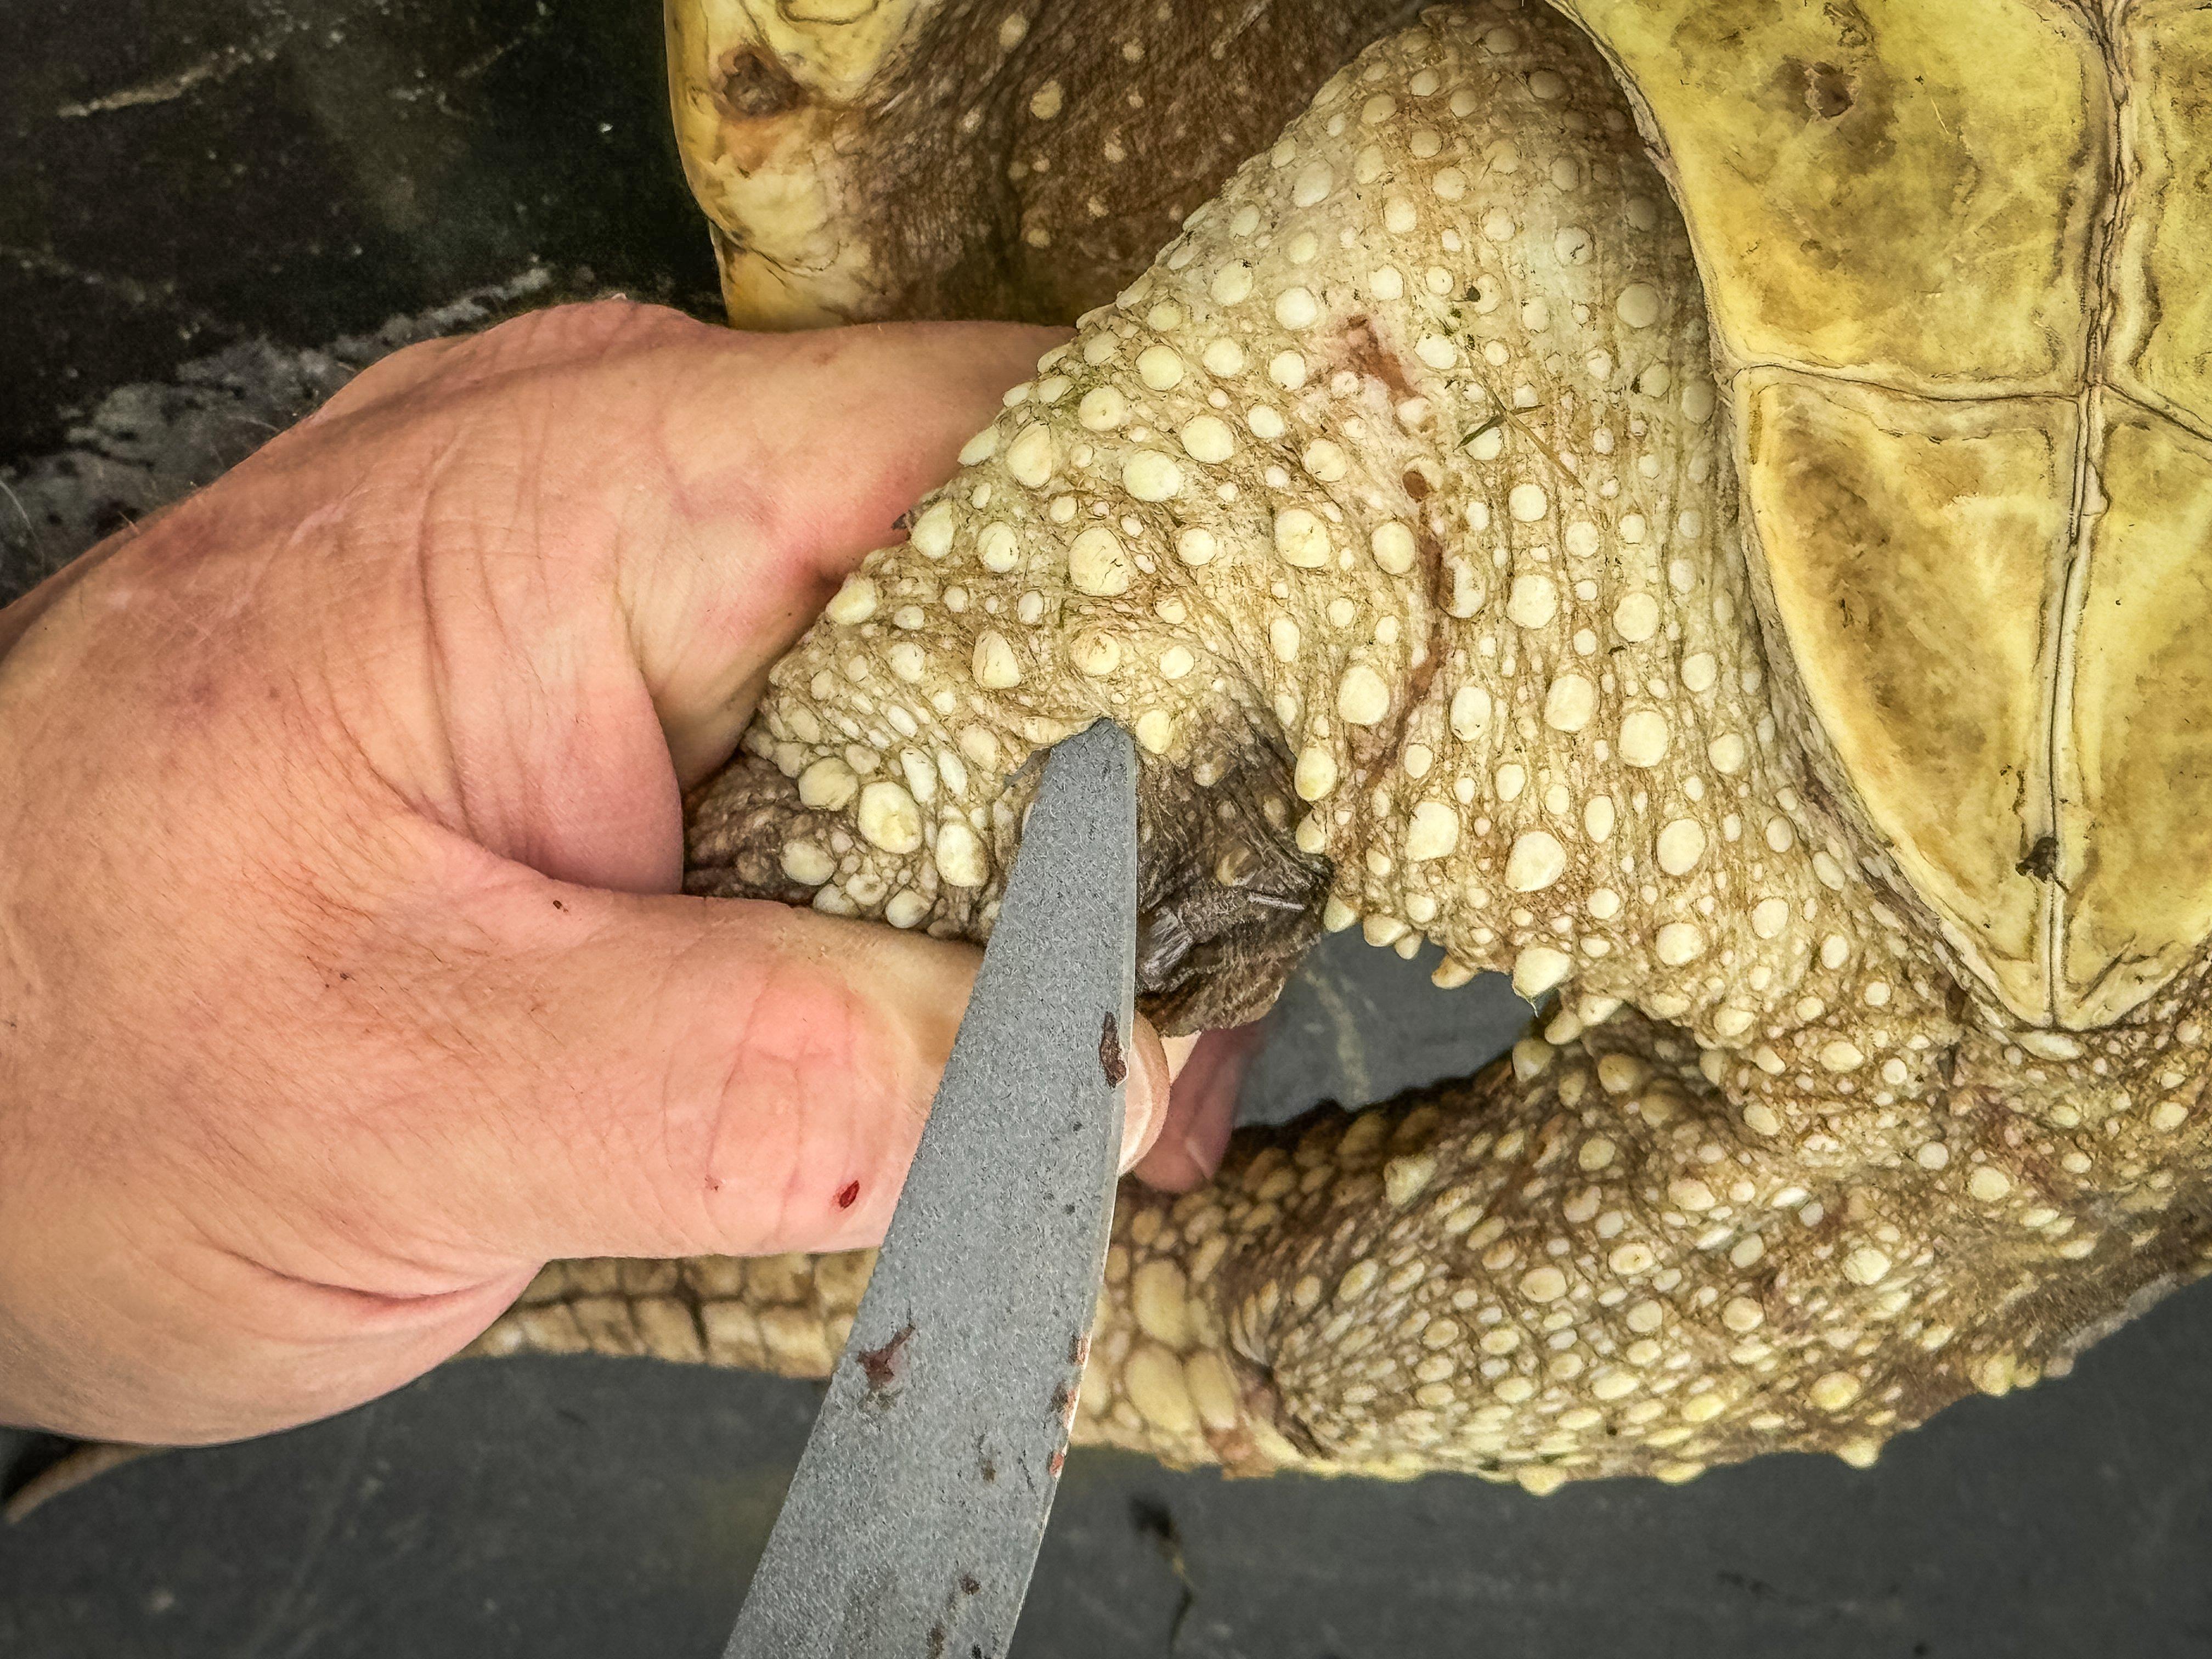
Make a small slit in the skin just above a rear foot.
Insert the nozzle of your air wand an inch or two and grip the skin tightly around the nozzle so that the air is forced into the turtle and not back out of the slit you just made. Now, slowly apply air pressure. Don’t hit it all at once with the full pressure or you might blow out the skin. Slowly continue applying air until you see the skin around both hind legs puff up like a balloon.
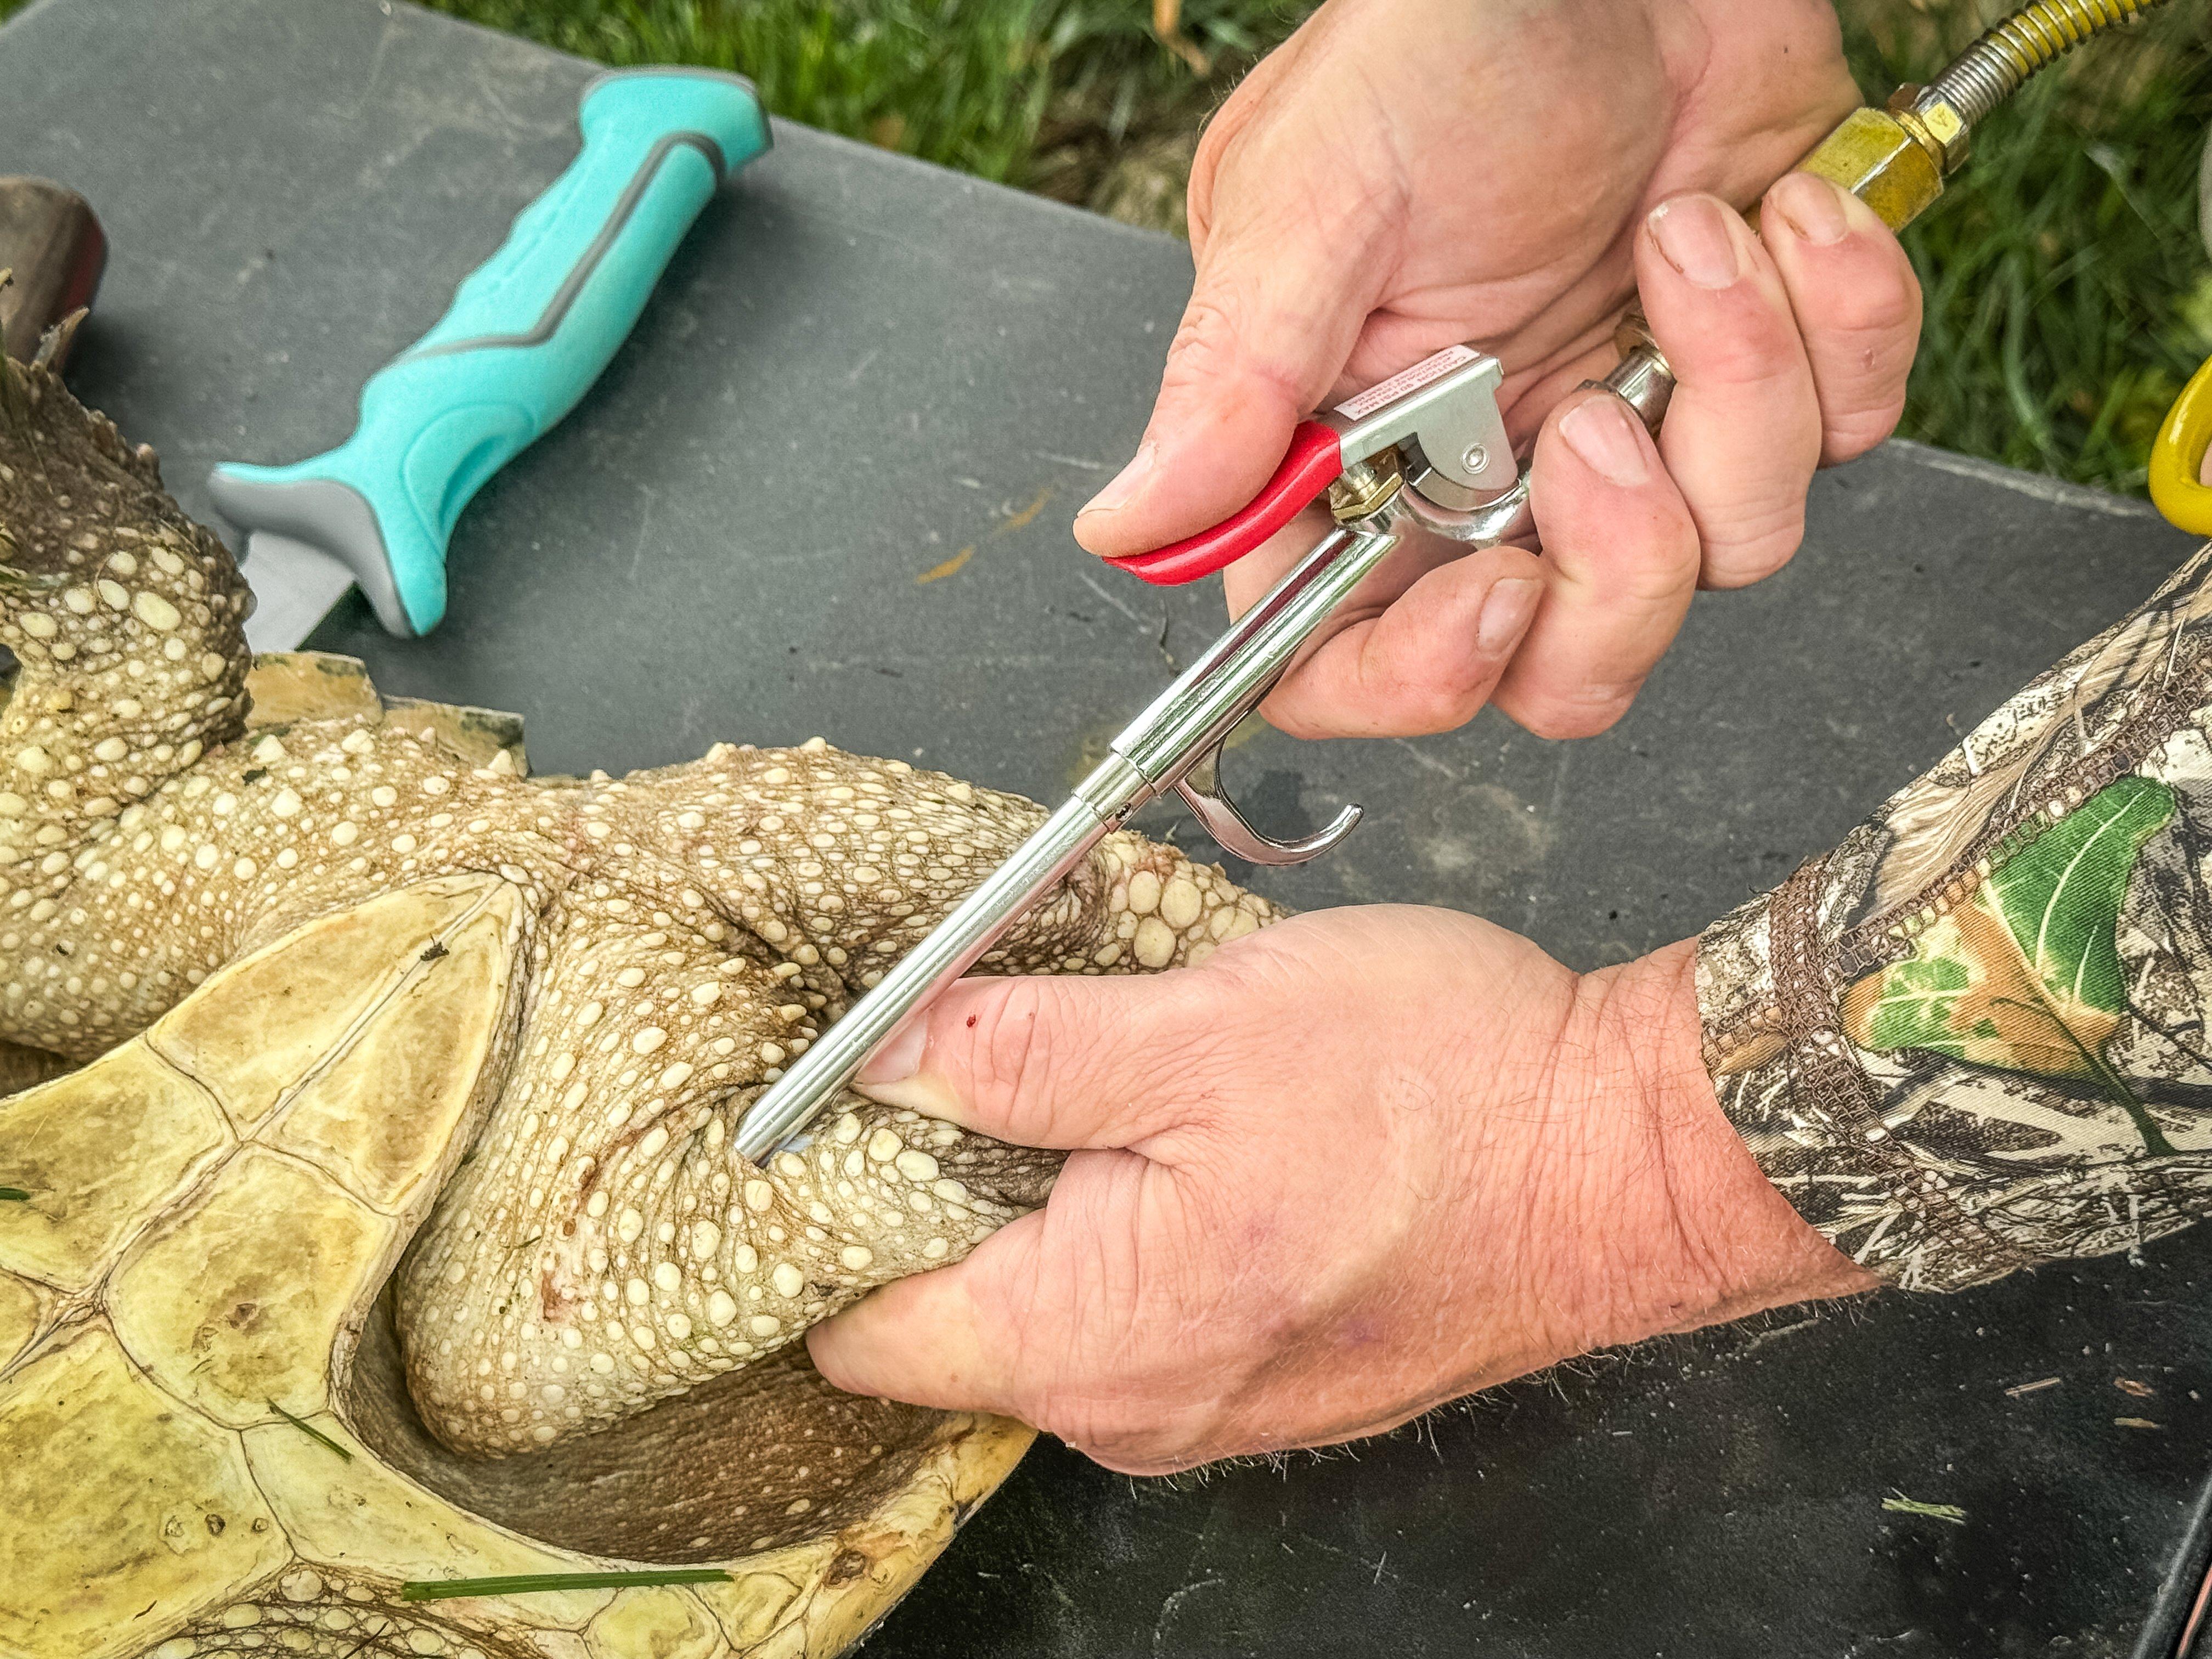
Insert the air nozzle into the slit you made.
Once everything is puffed up and separated, remove the nozzle.
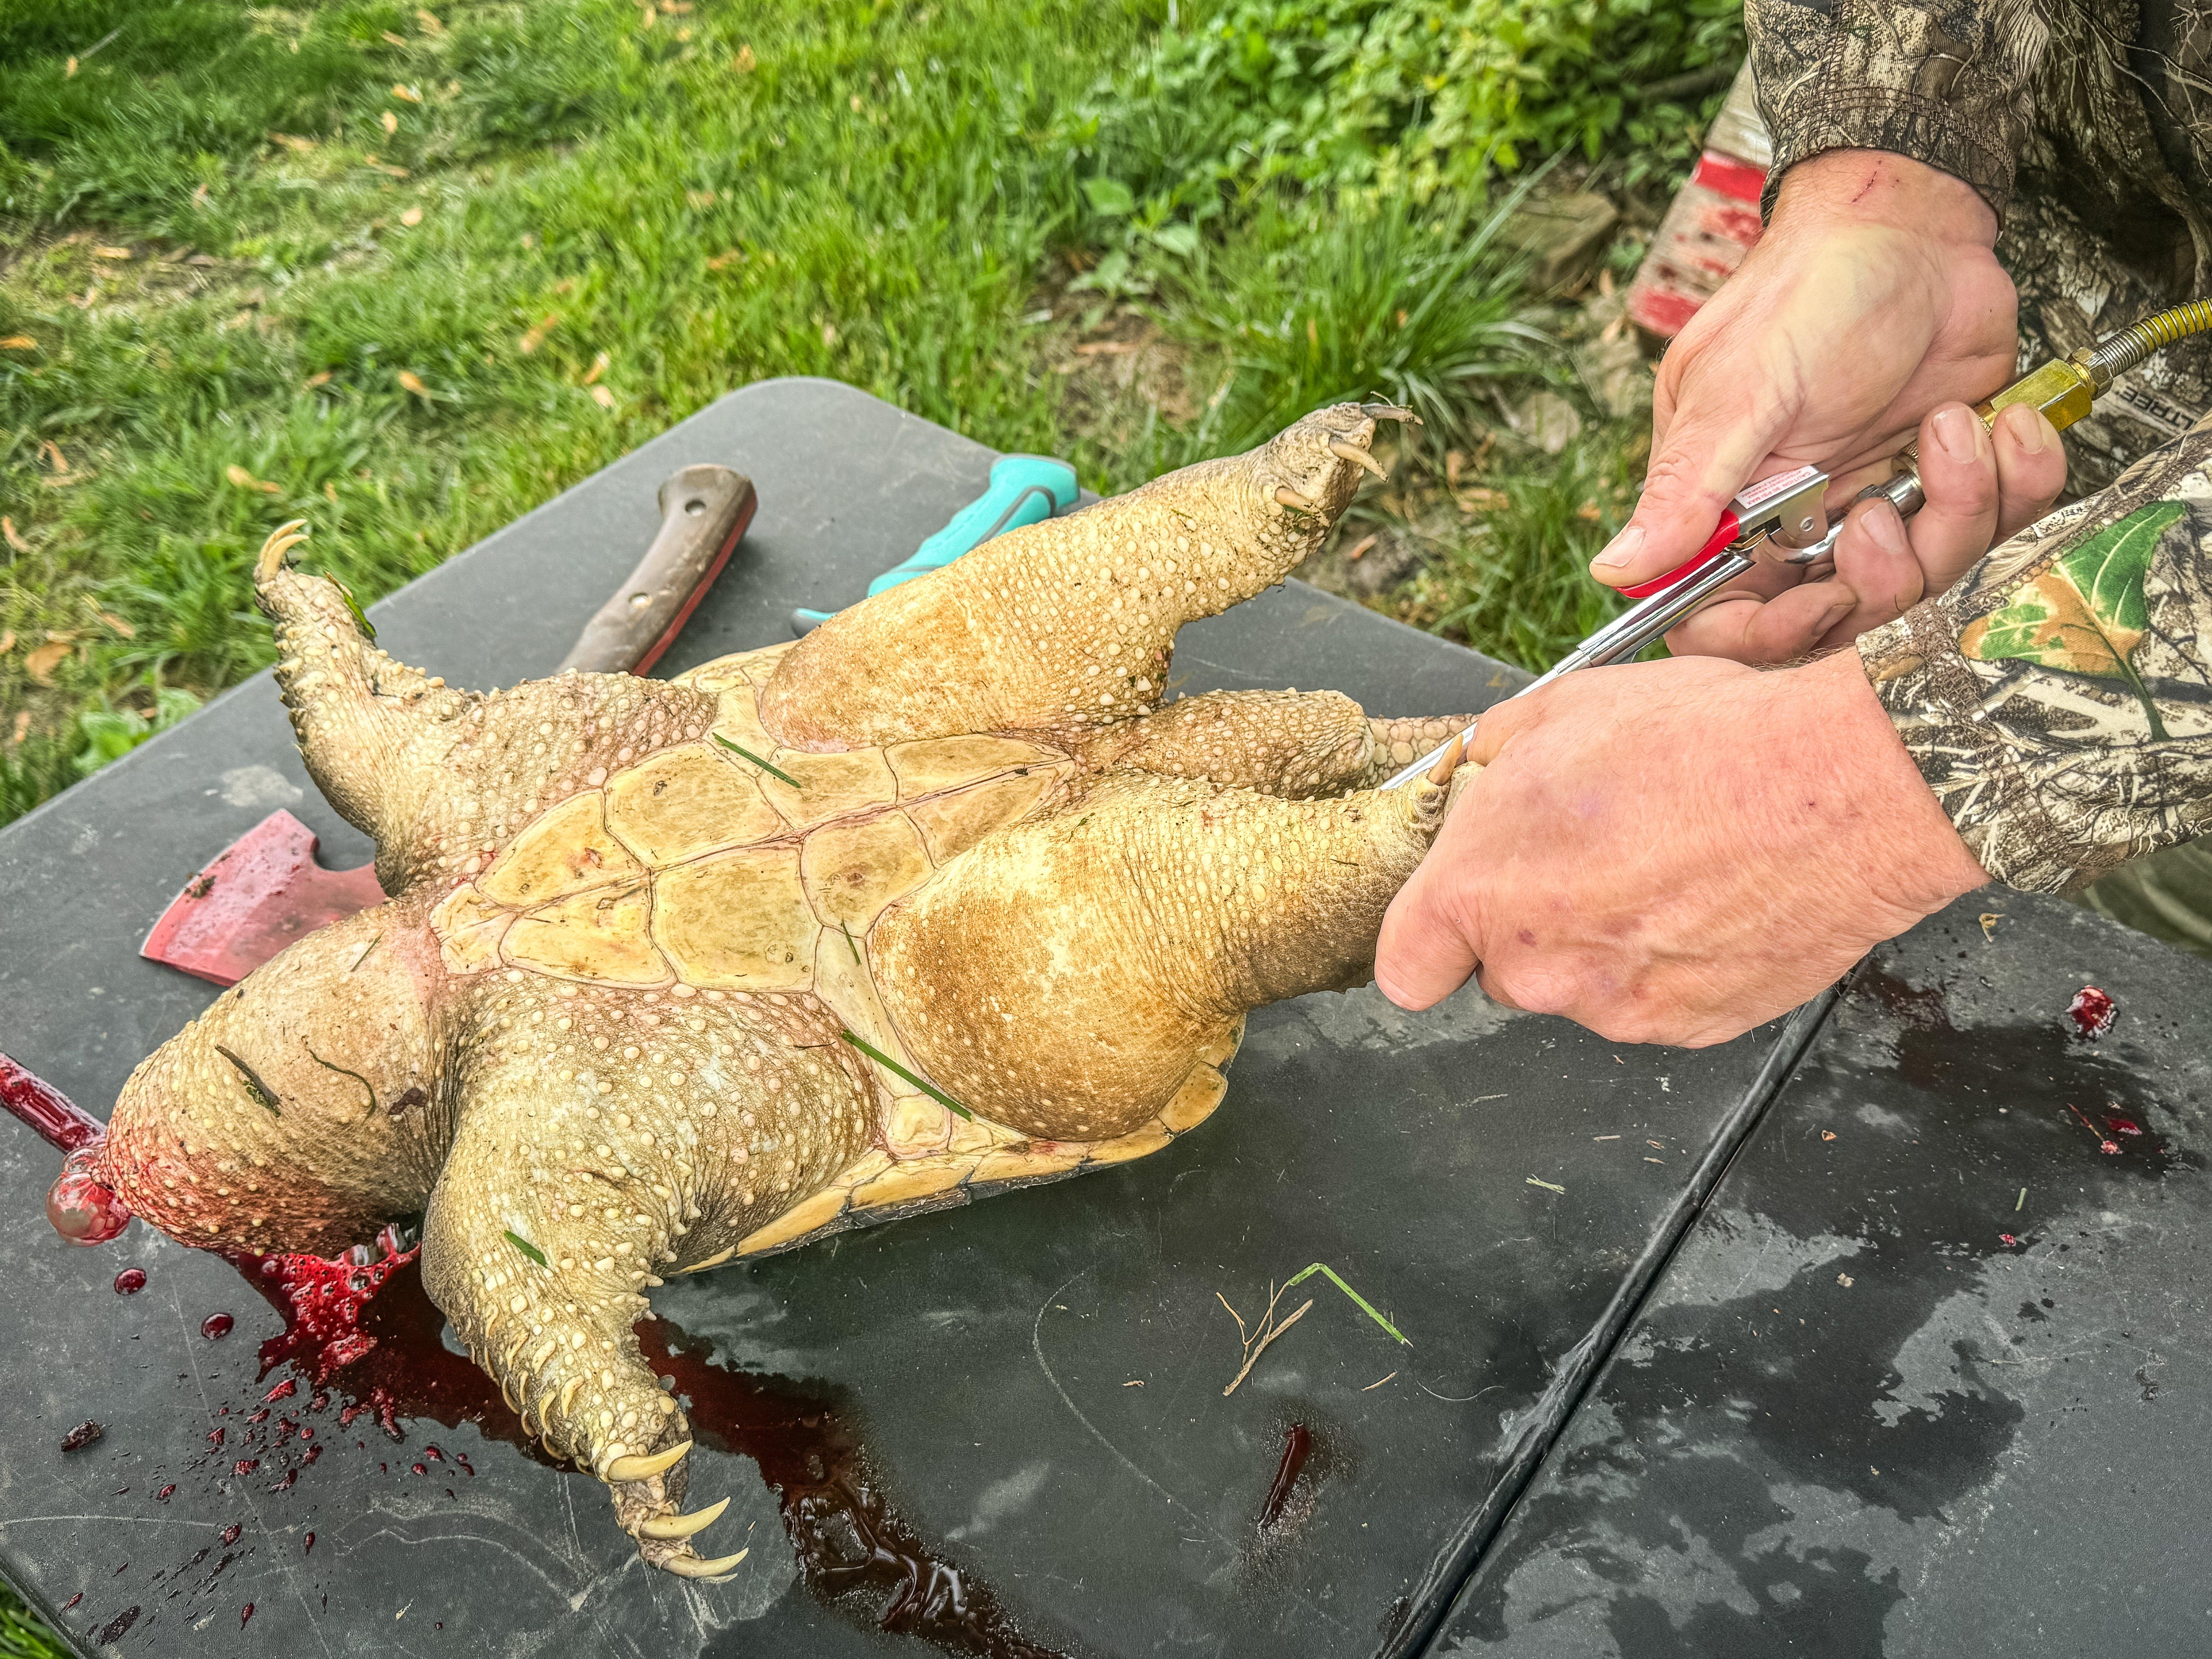
Blow up the turtle to loosen the skin from the meat.
Step 4: Repeat the process on the front of the turtle. You might need to grip the neck where the head was removed if the air escapes there before both front quarters have puffed up. Or you can insert the nozzle on both legs to do both sides separately.
Step 5: Now that you have the skin loose, use the tip of a sharp filet knife to cut around where the skin meets the bottom shell on one of the back legs.
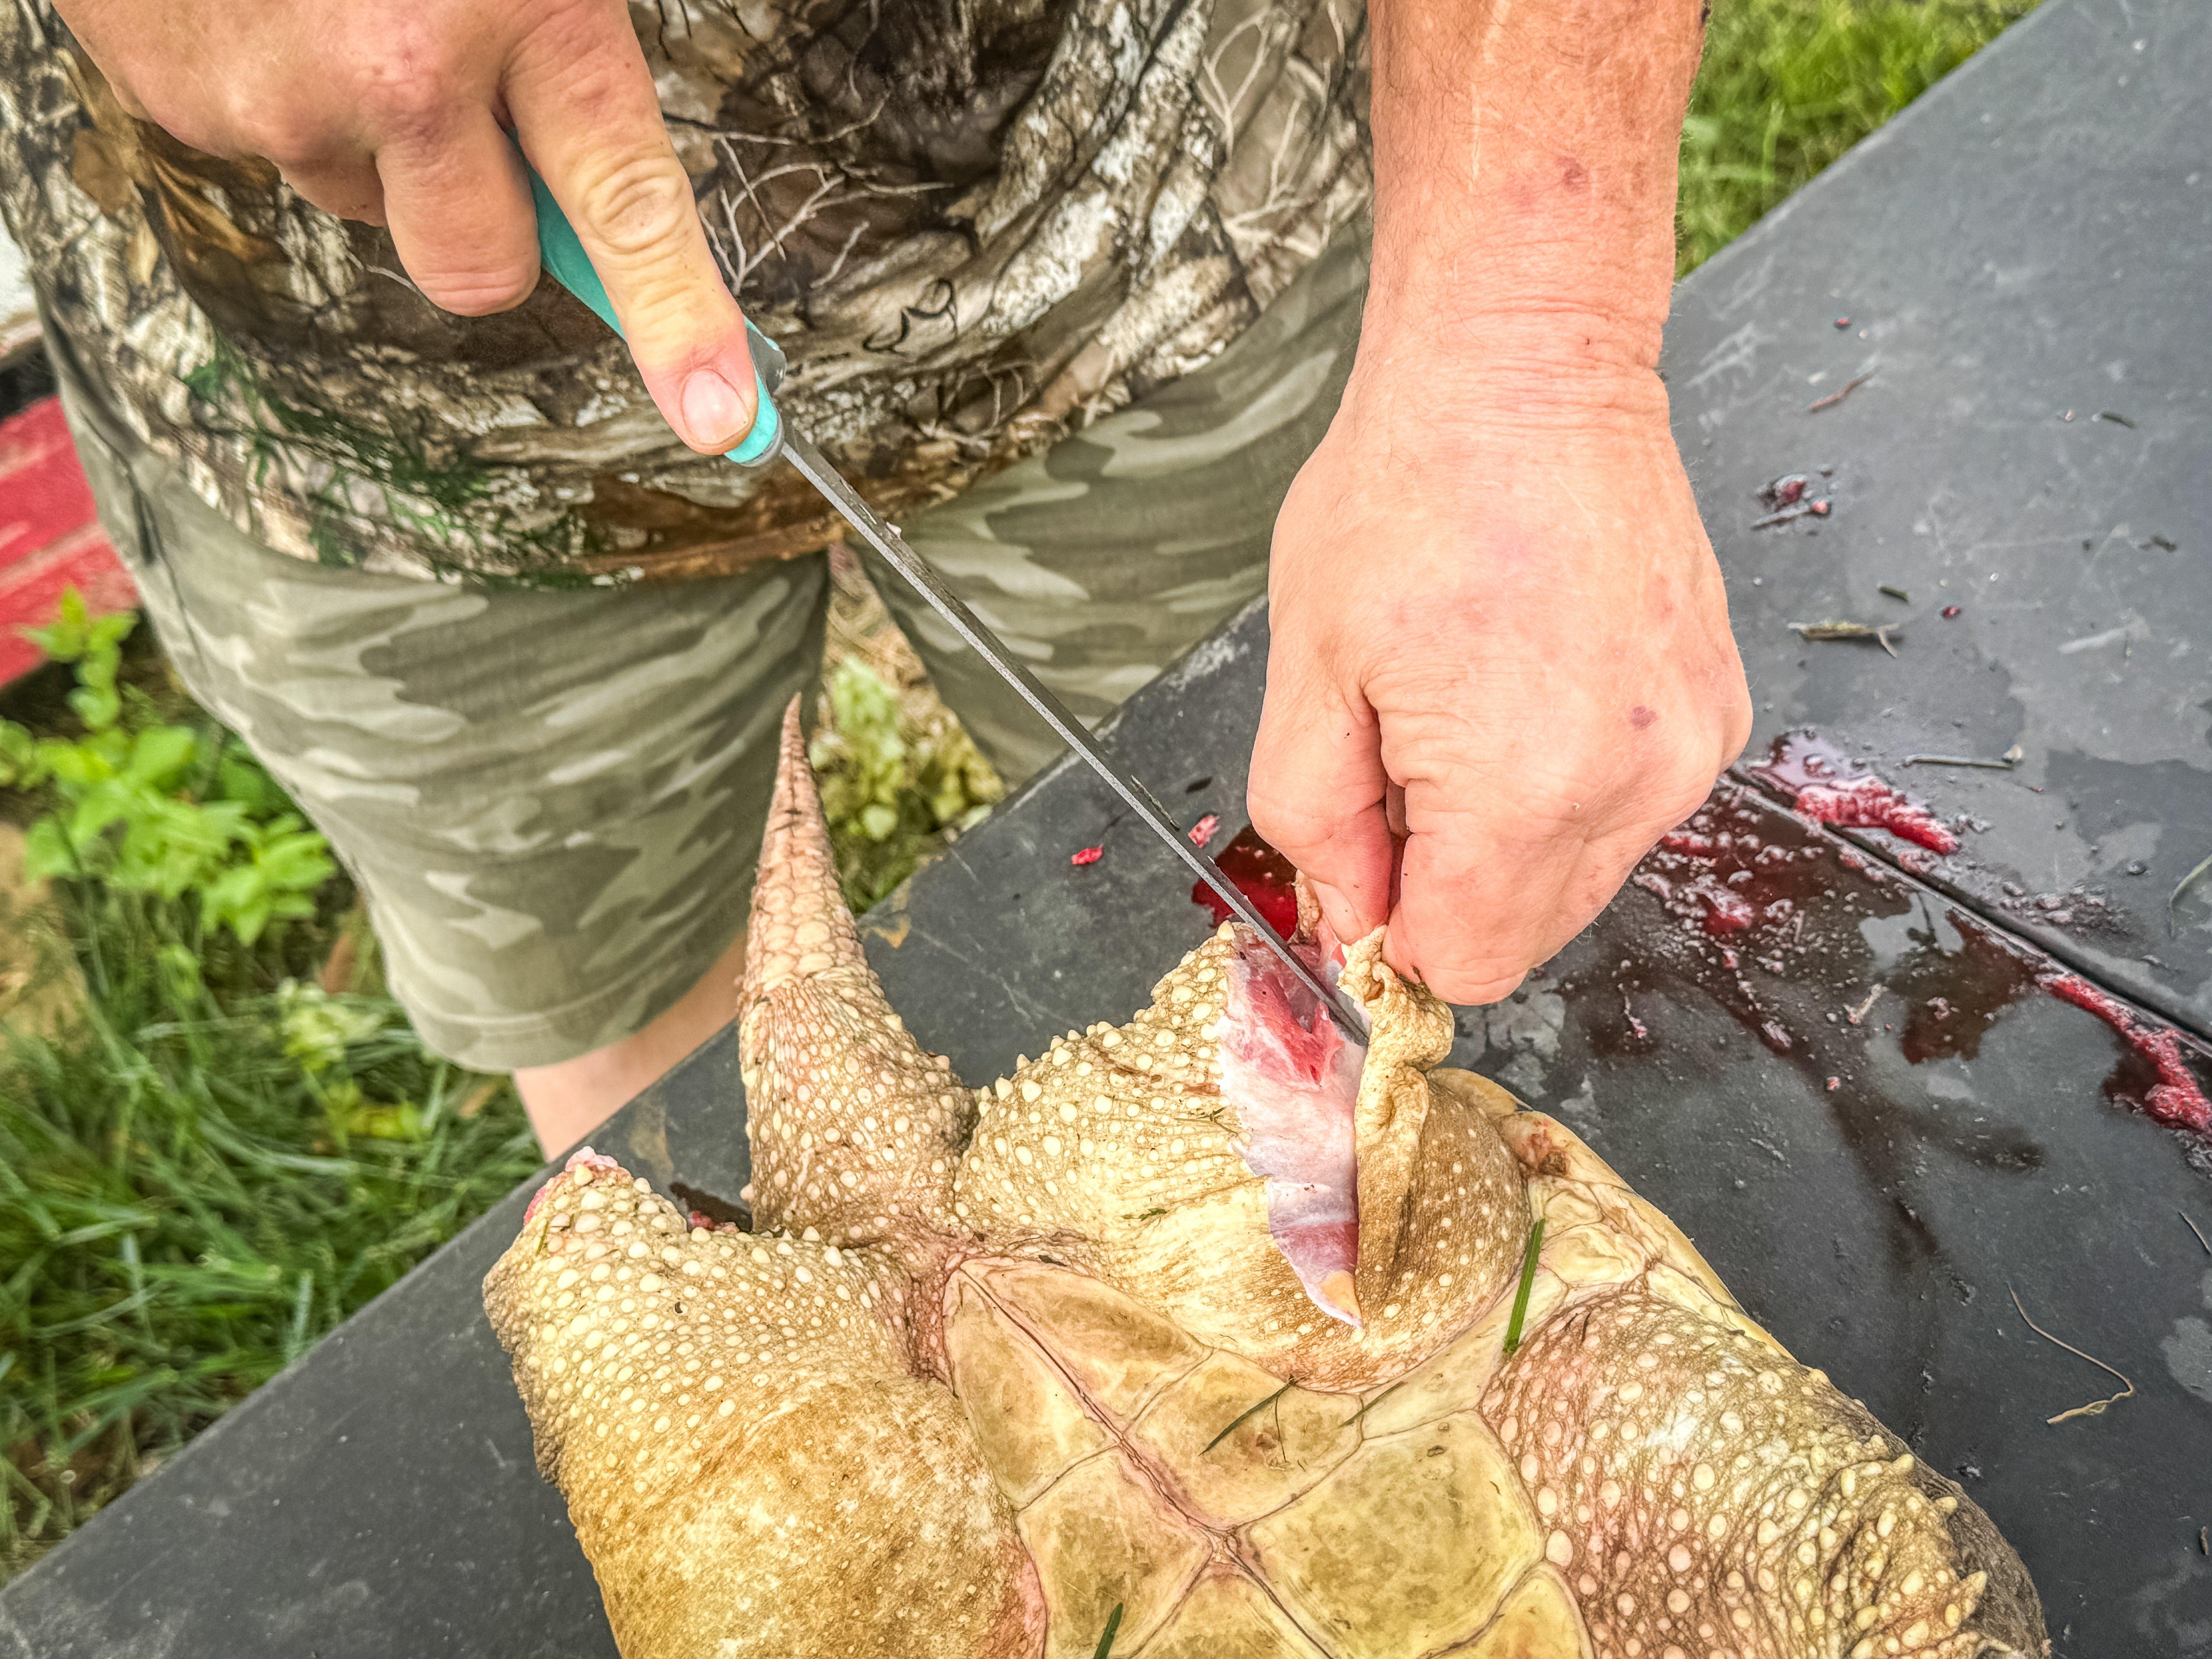
Start removing the skin from where it attaches to the shell.
Now use the knife to remove the skin from the leg quarter. It should be fairly loose and separate easily. Now repeat on the other rear quarter.
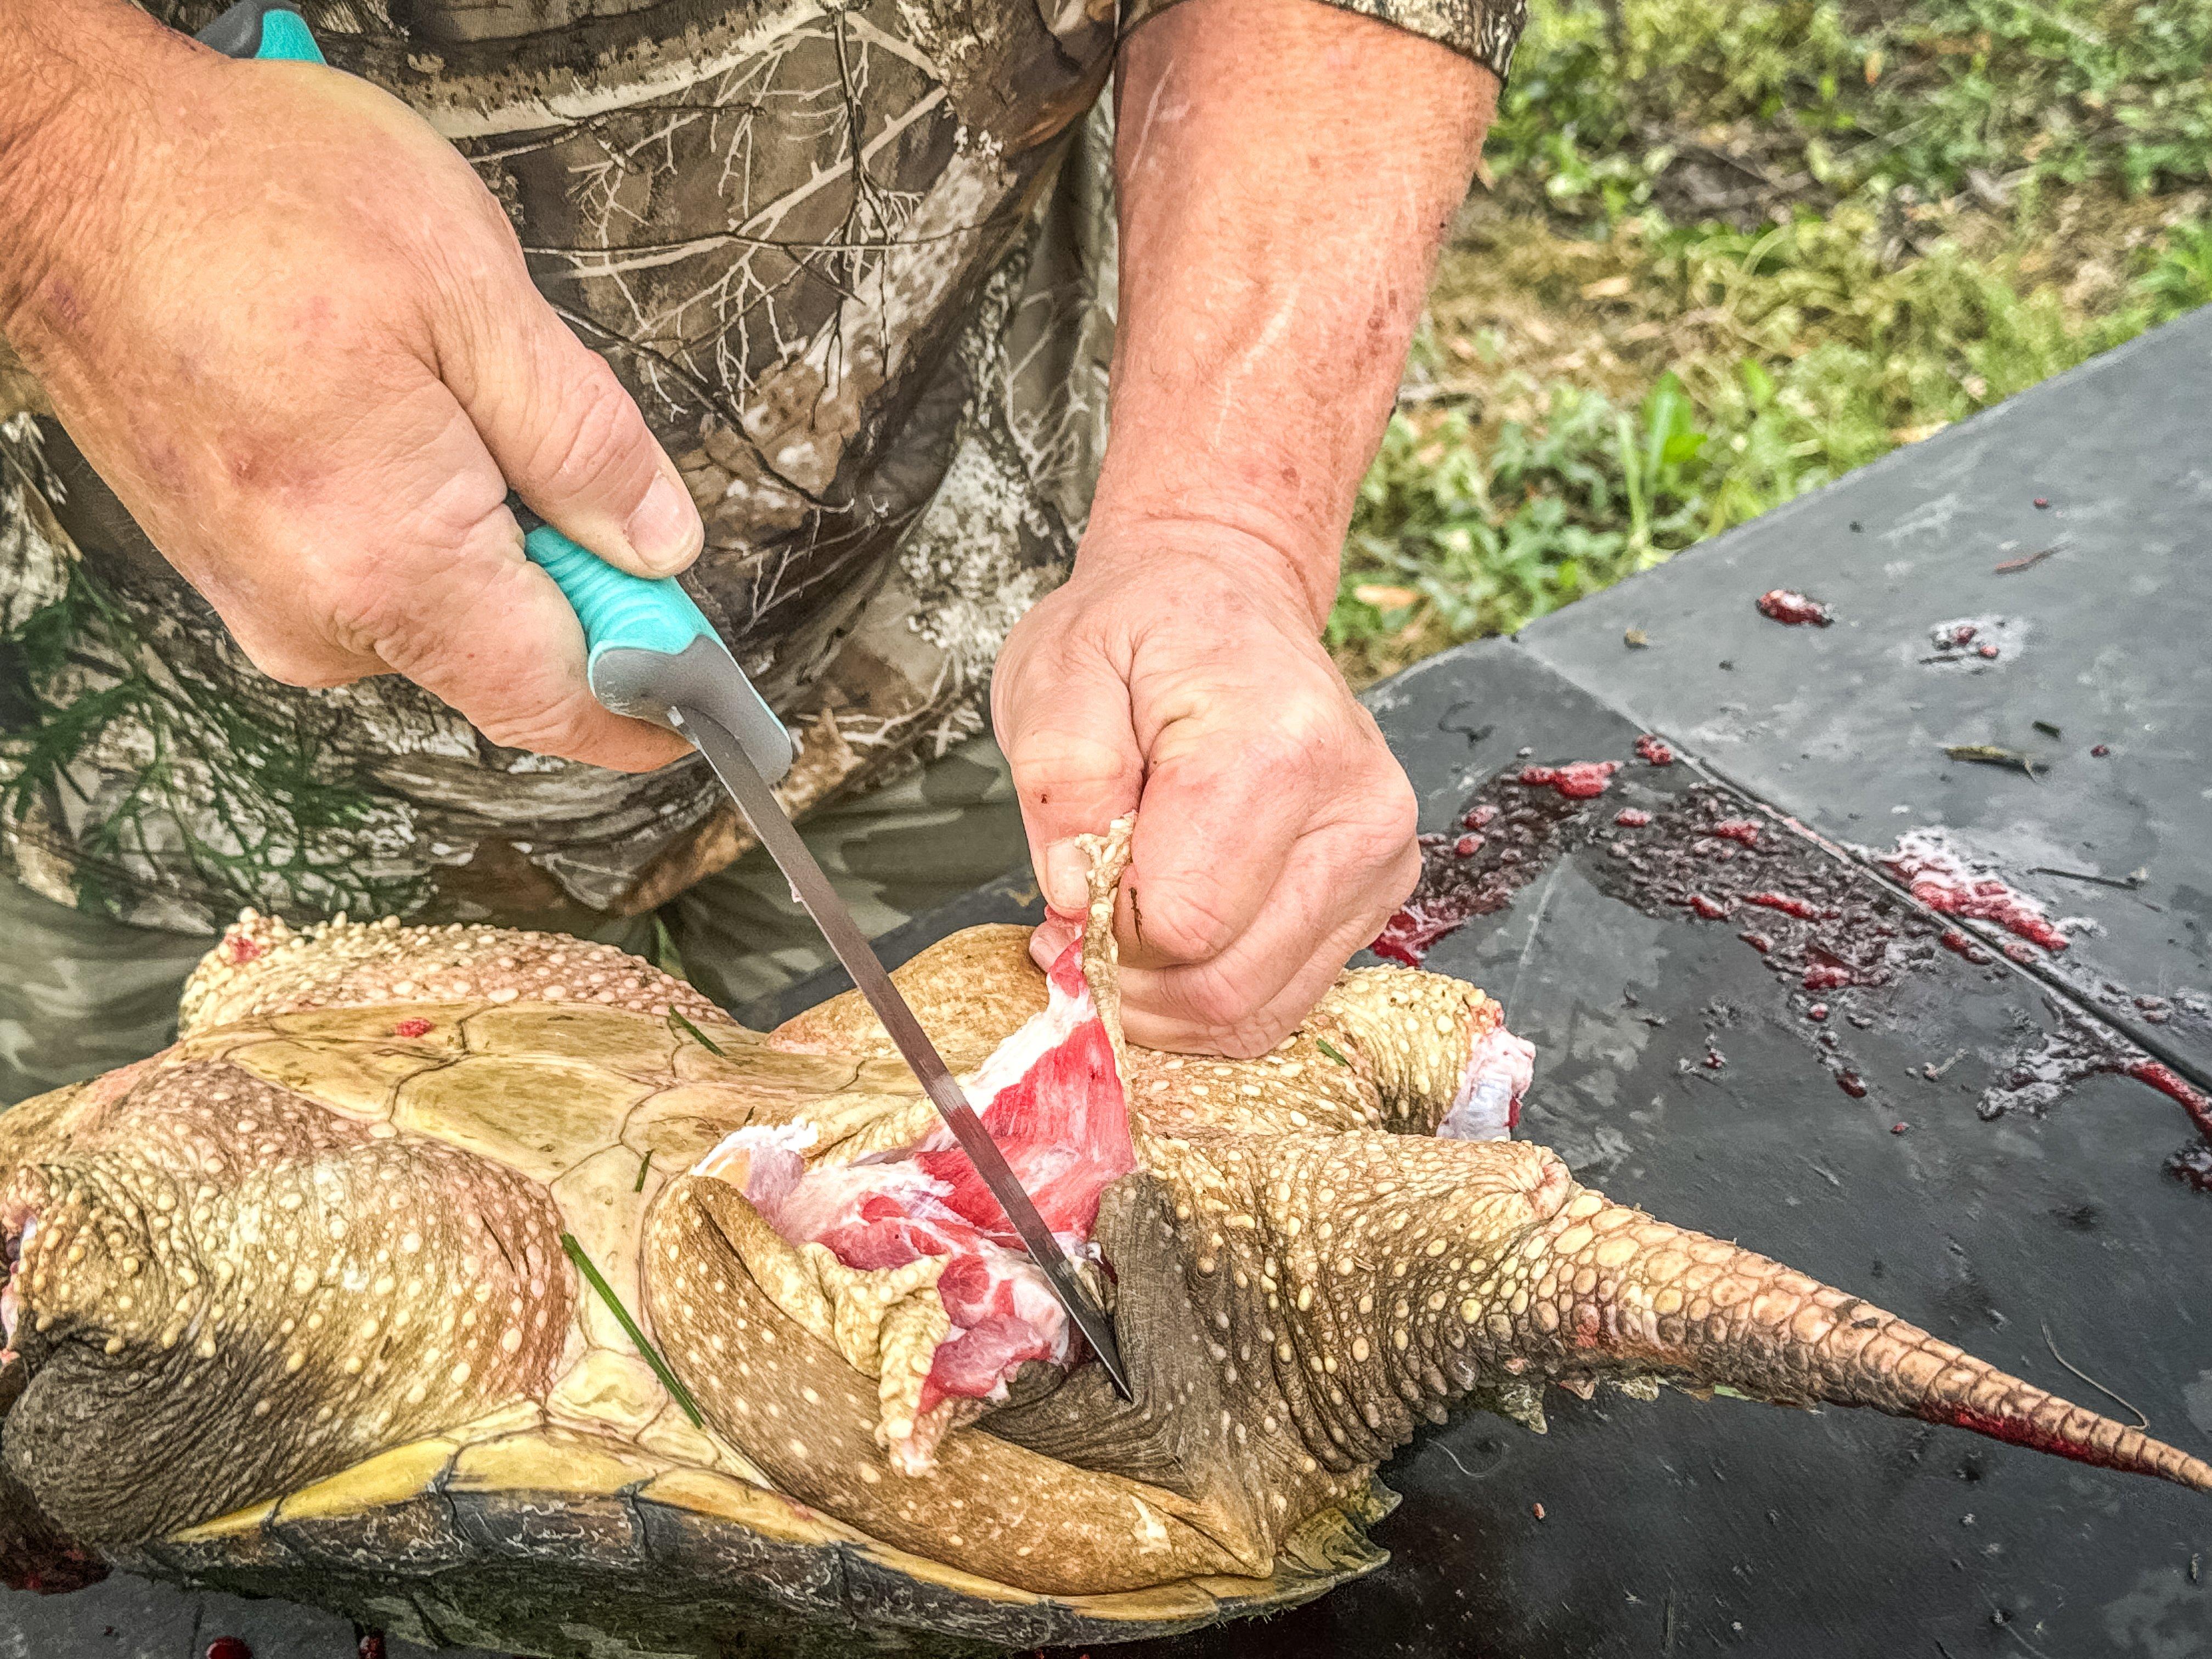
Remove the skin from the quarter.
Step 6: Repeat the process on the front legs, first separating the skin from the shell, then removing it from the legs. Skin the neck while you are up here.
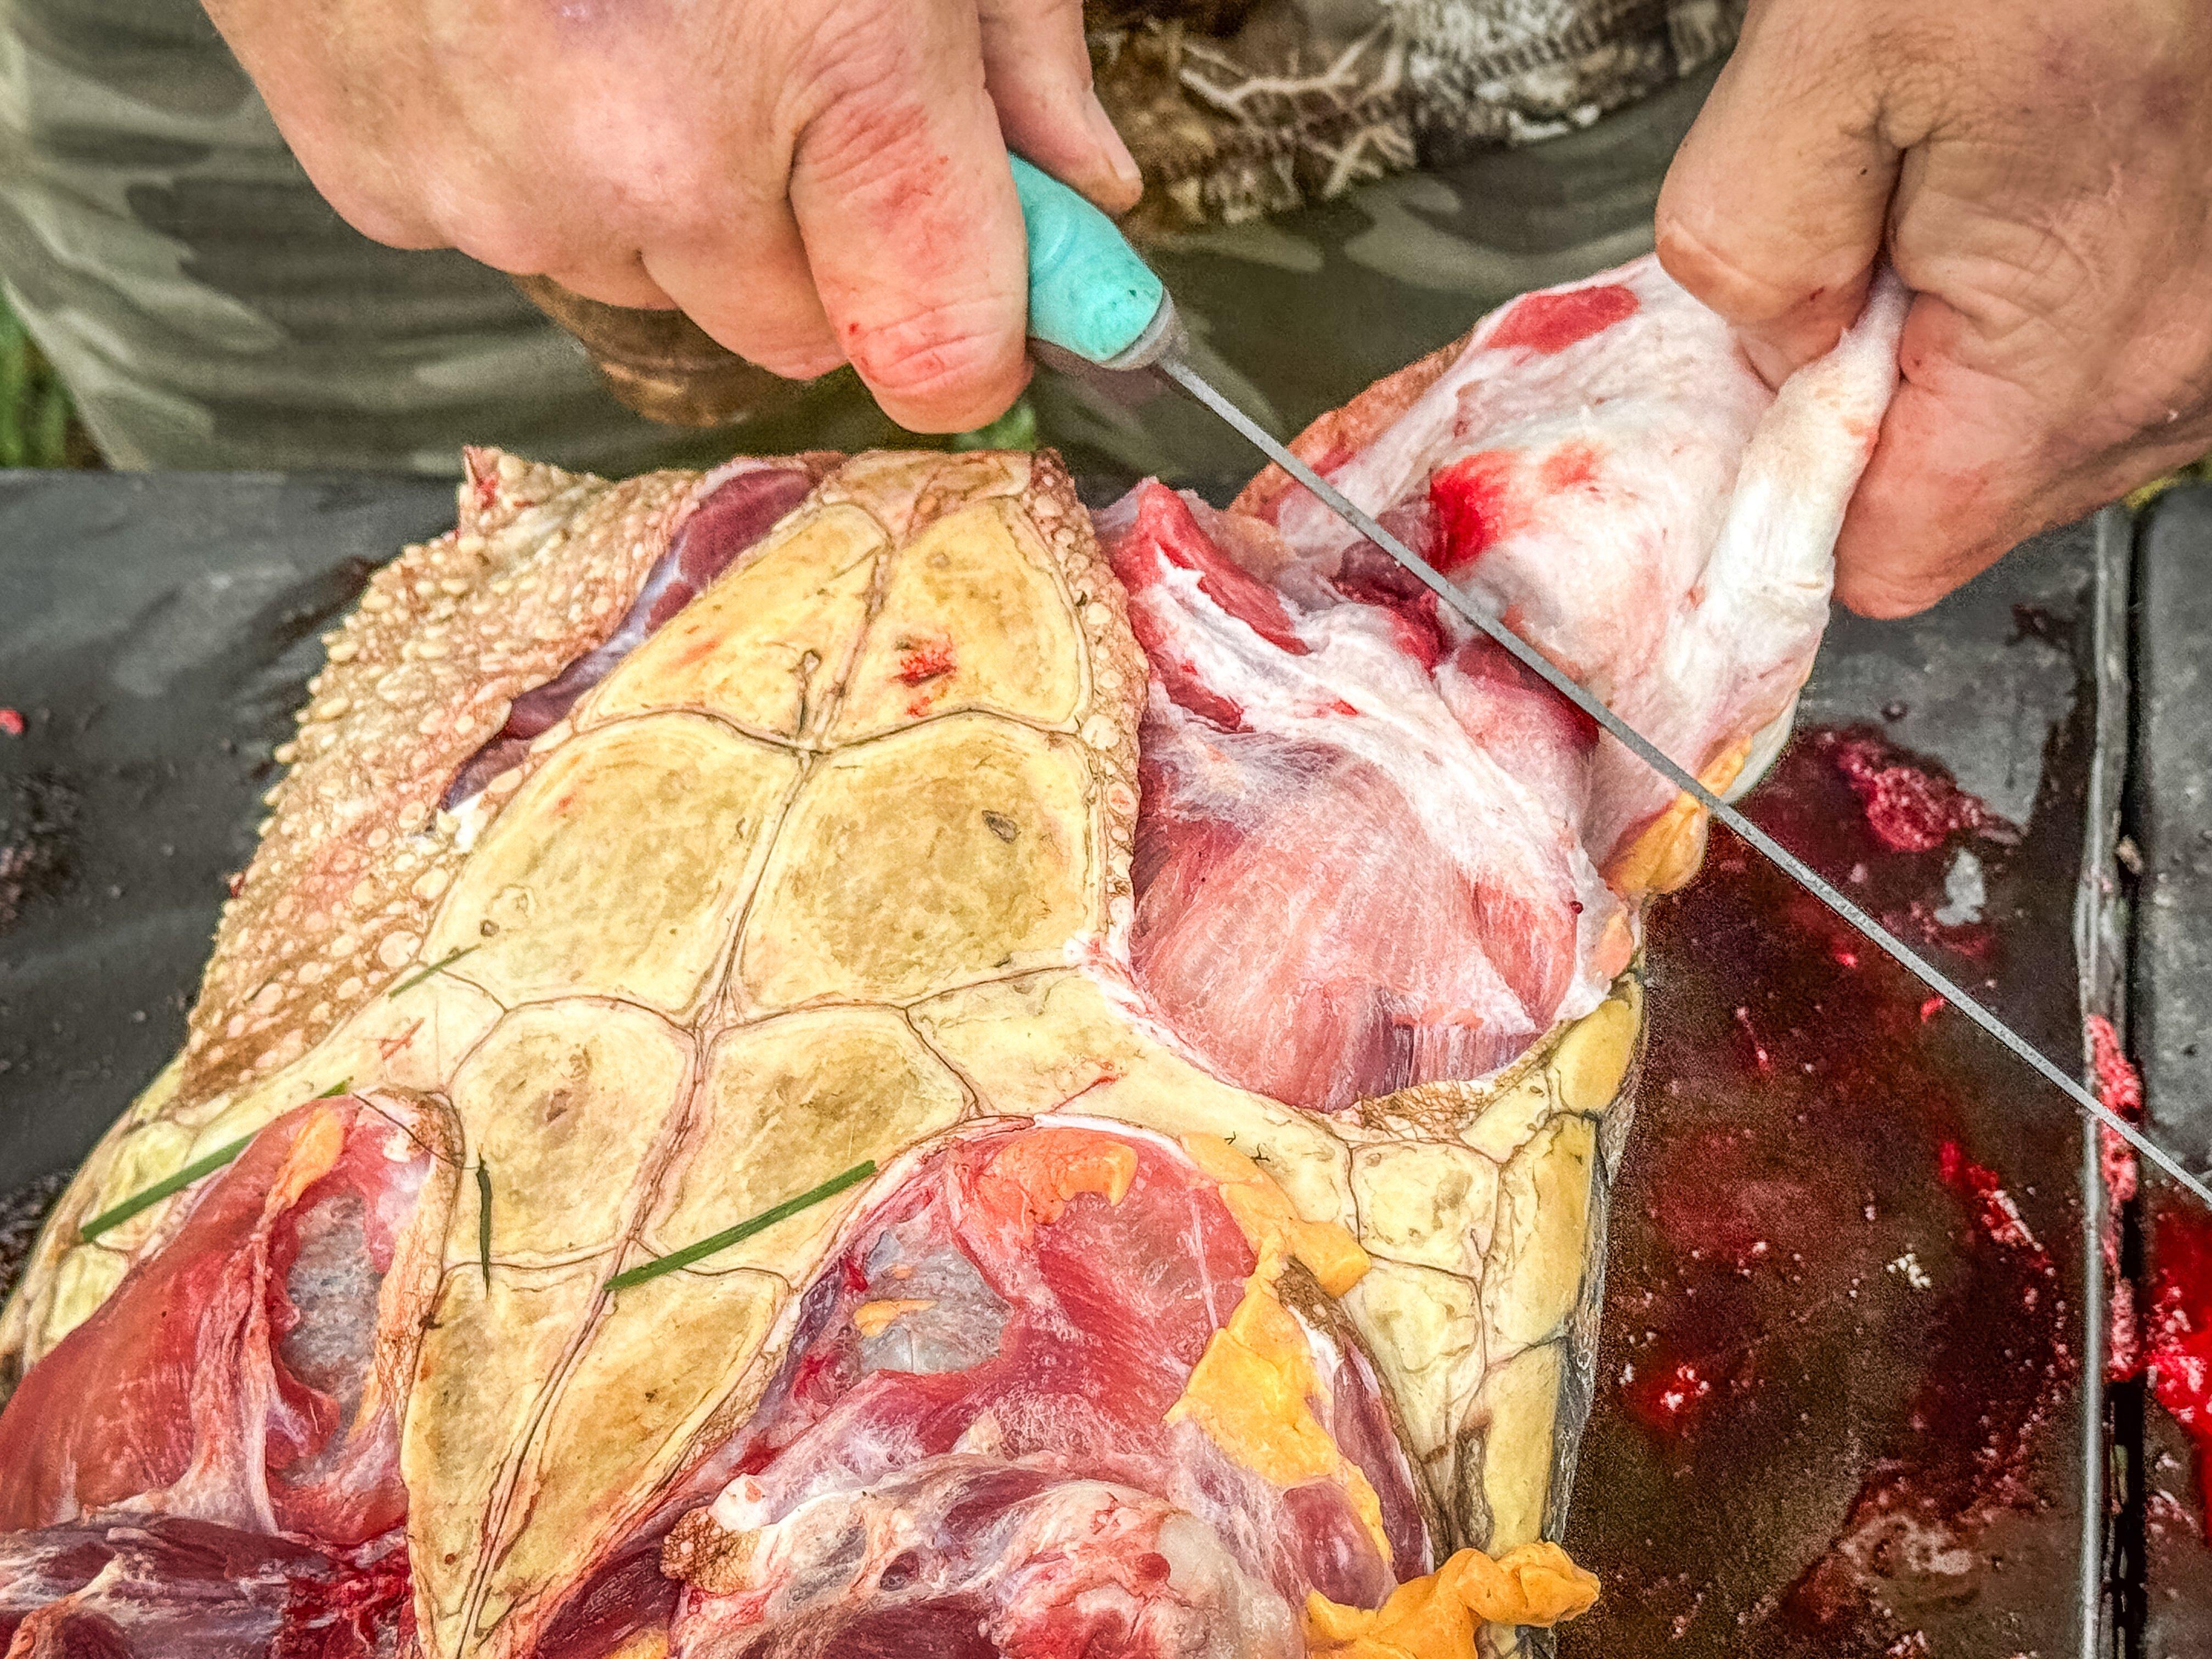
Remove the skin from the front quarters and the neck.
Step 7: Once all of the skin has been removed, the turtle should look like this.
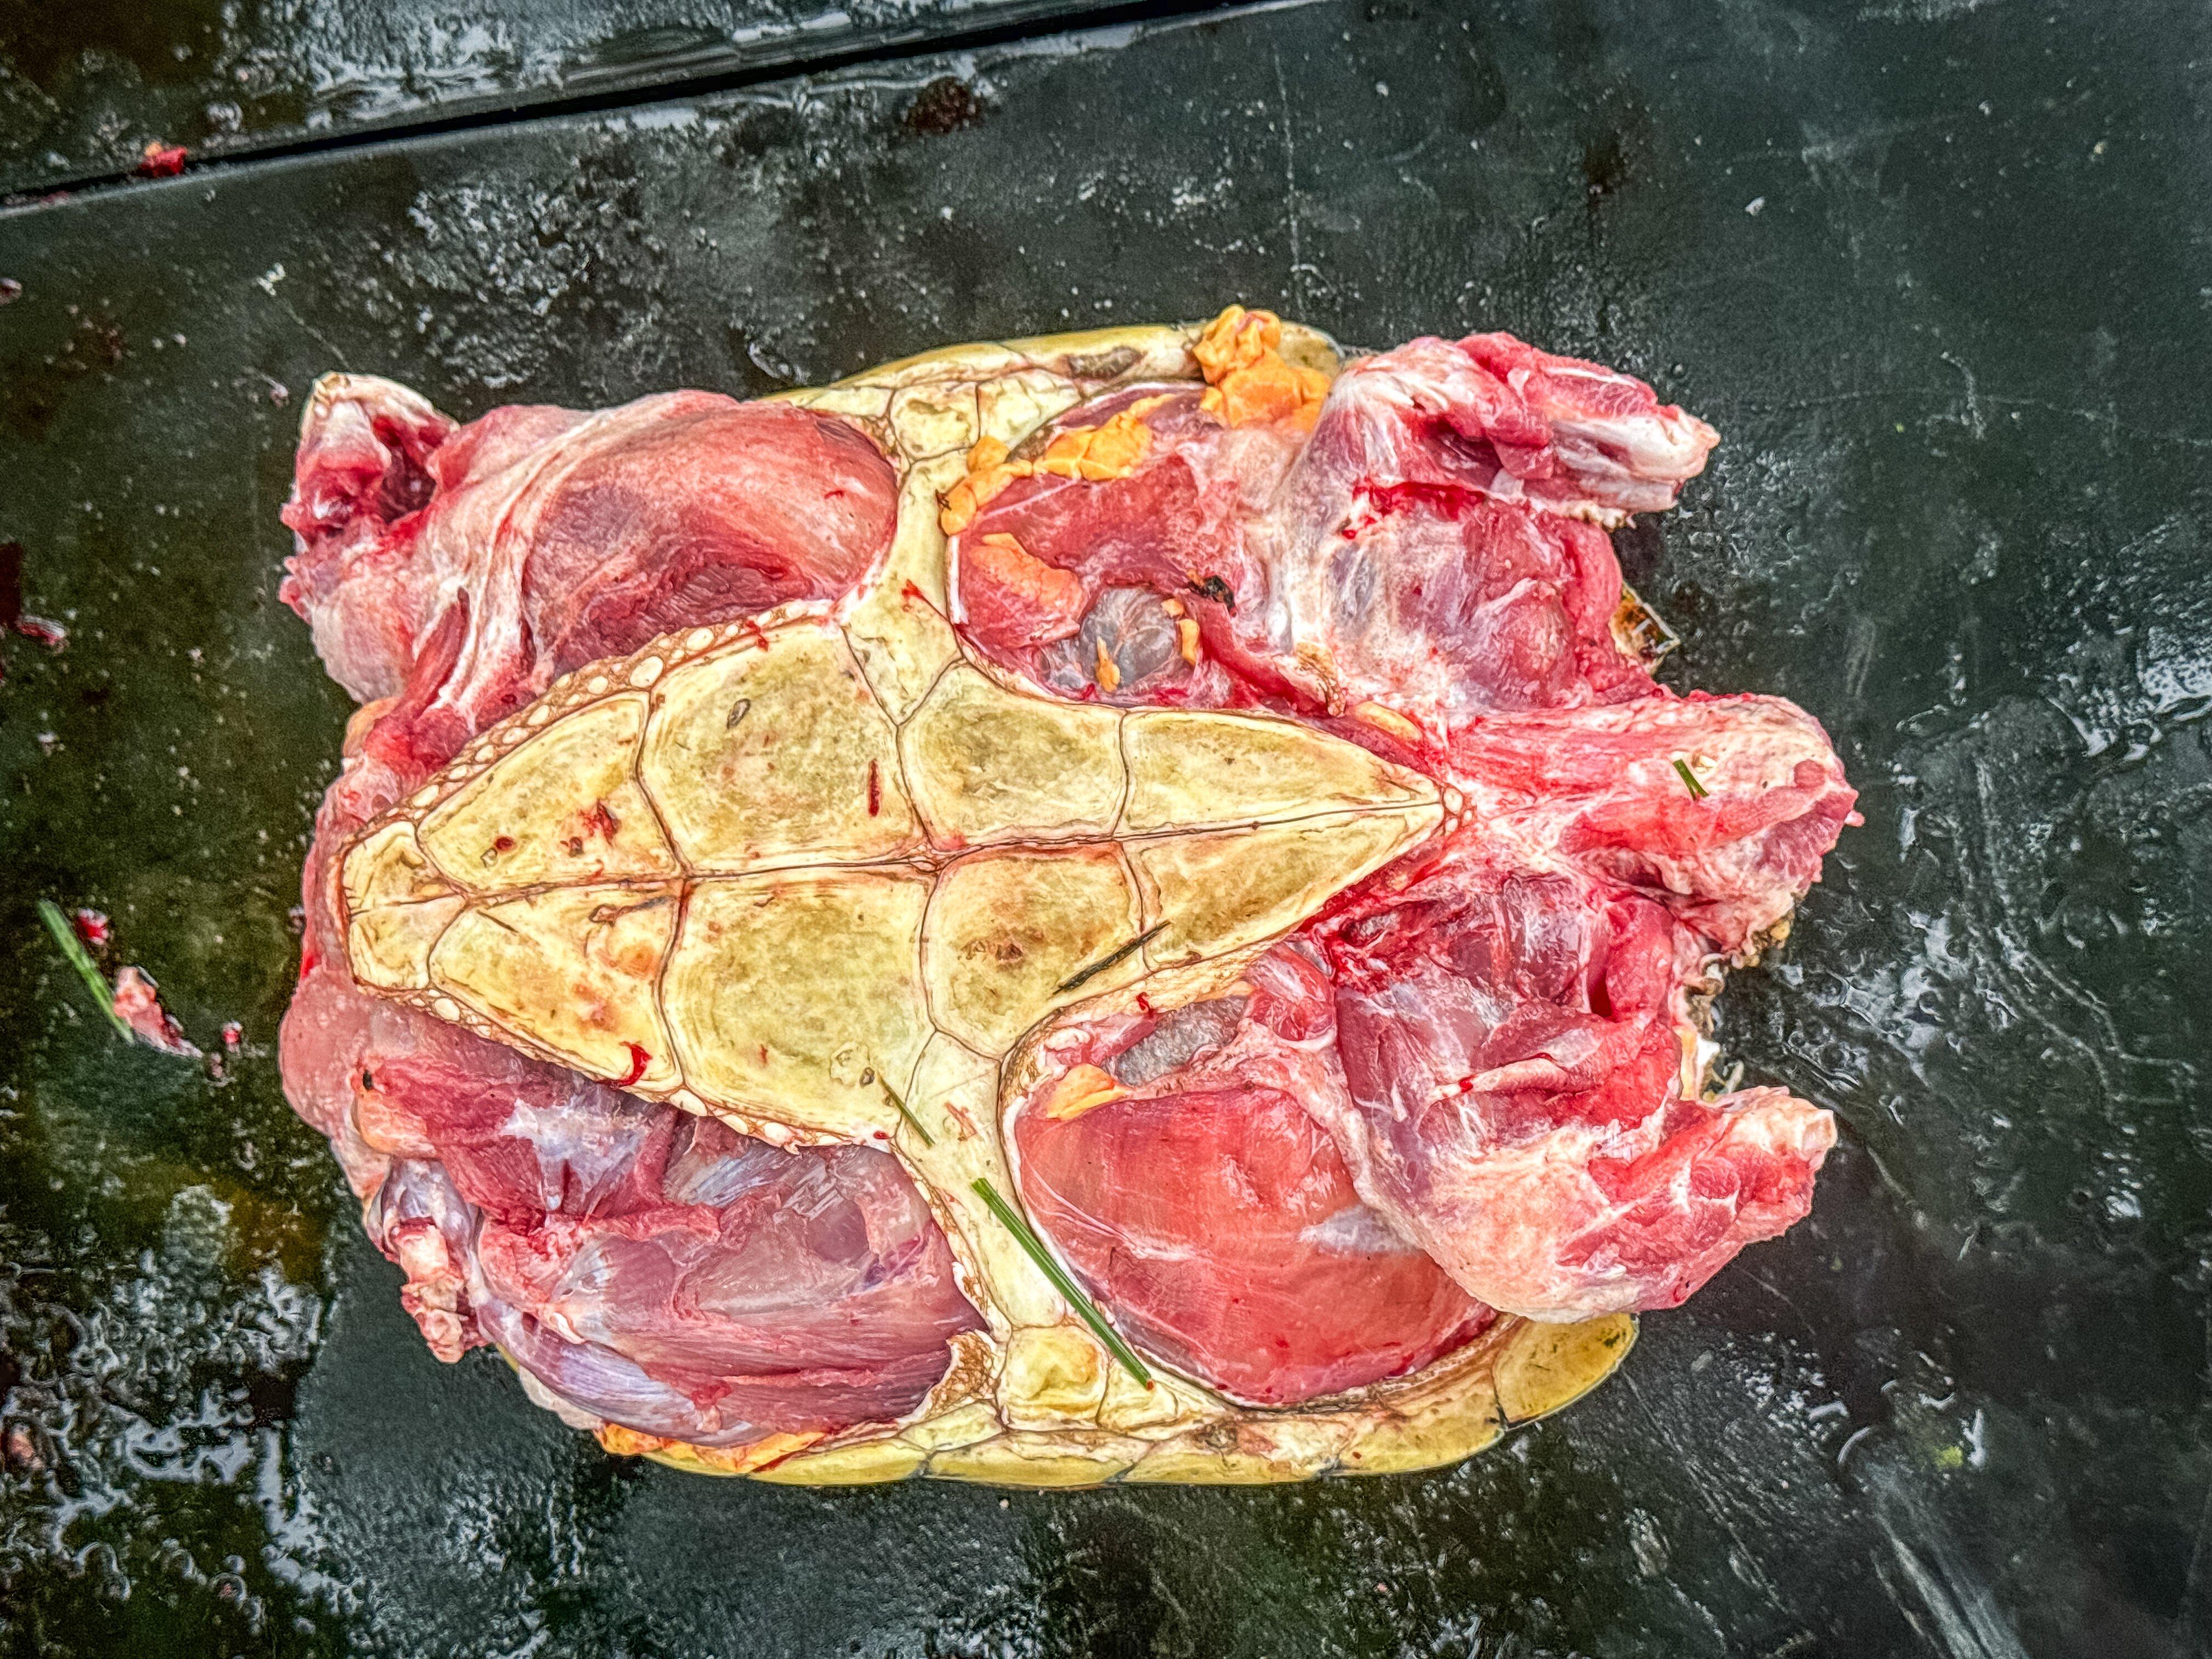
Remove the skin from all four quarters.
Once you have everything skinned, remove the bottom shell plate.
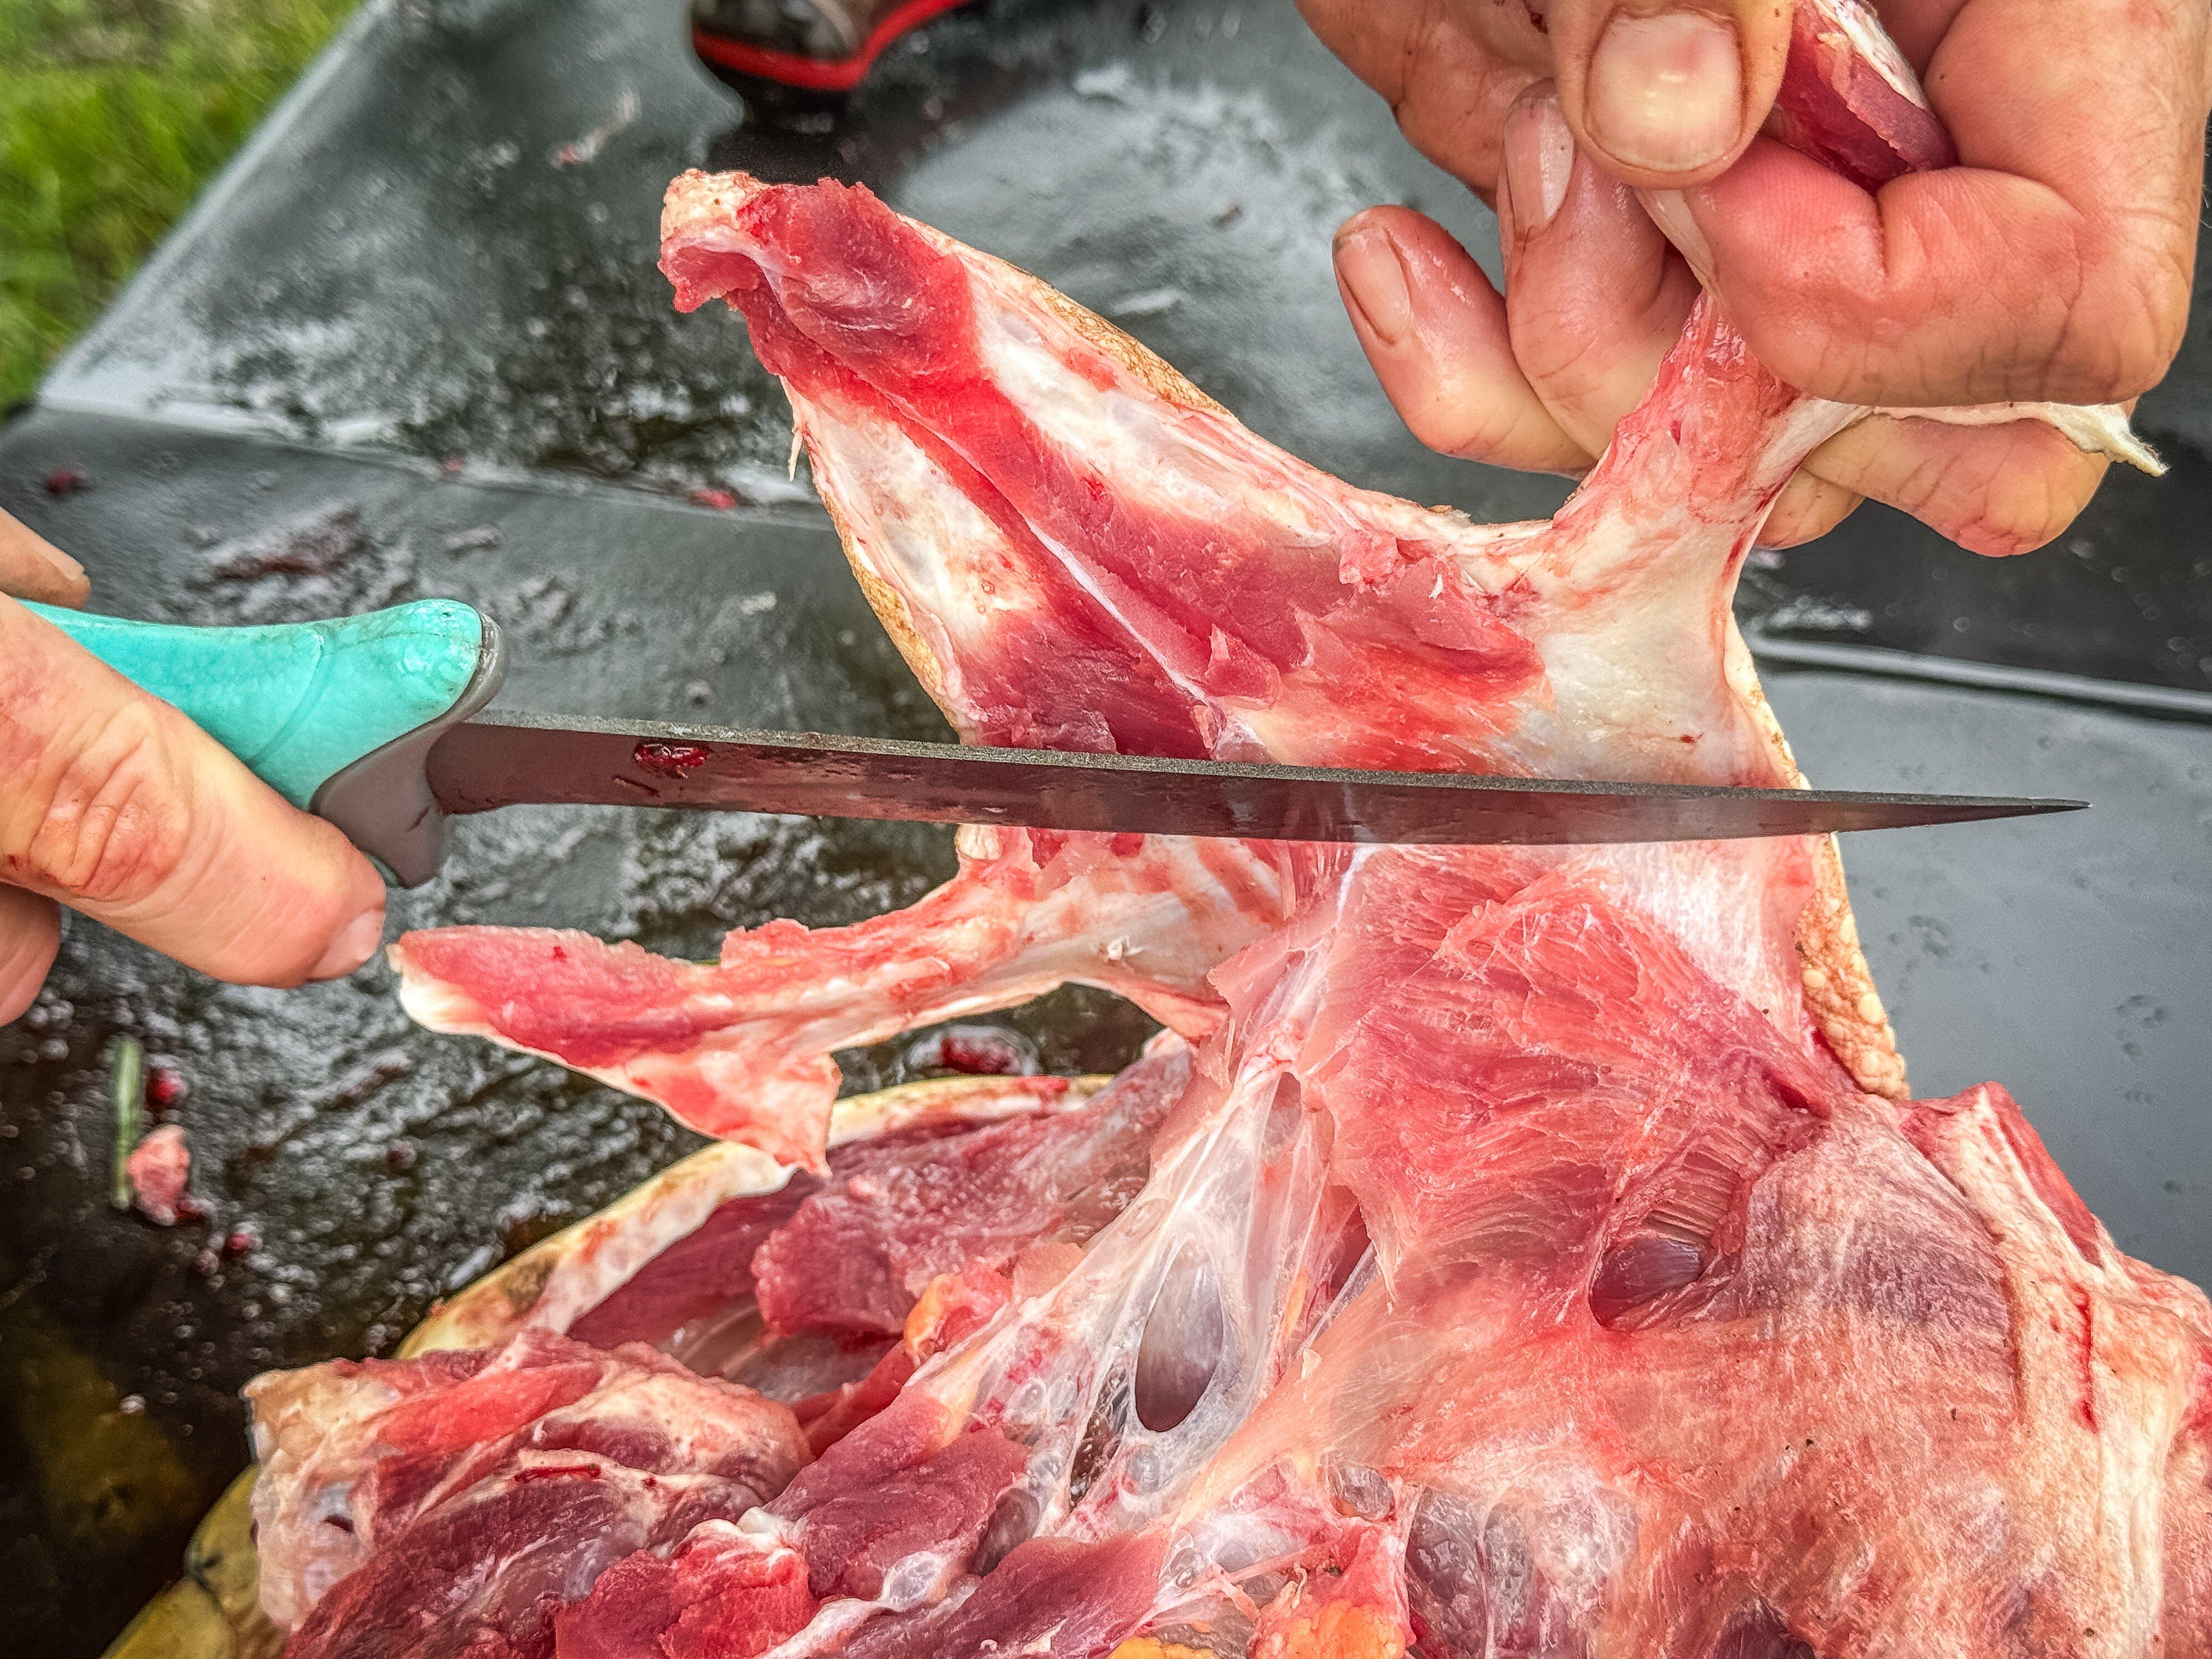
Separate the bottom plate from the shell.
Remove the quarters from the shell. Use your knife to work around the leg quarters, front and rear, removing them from the shell.
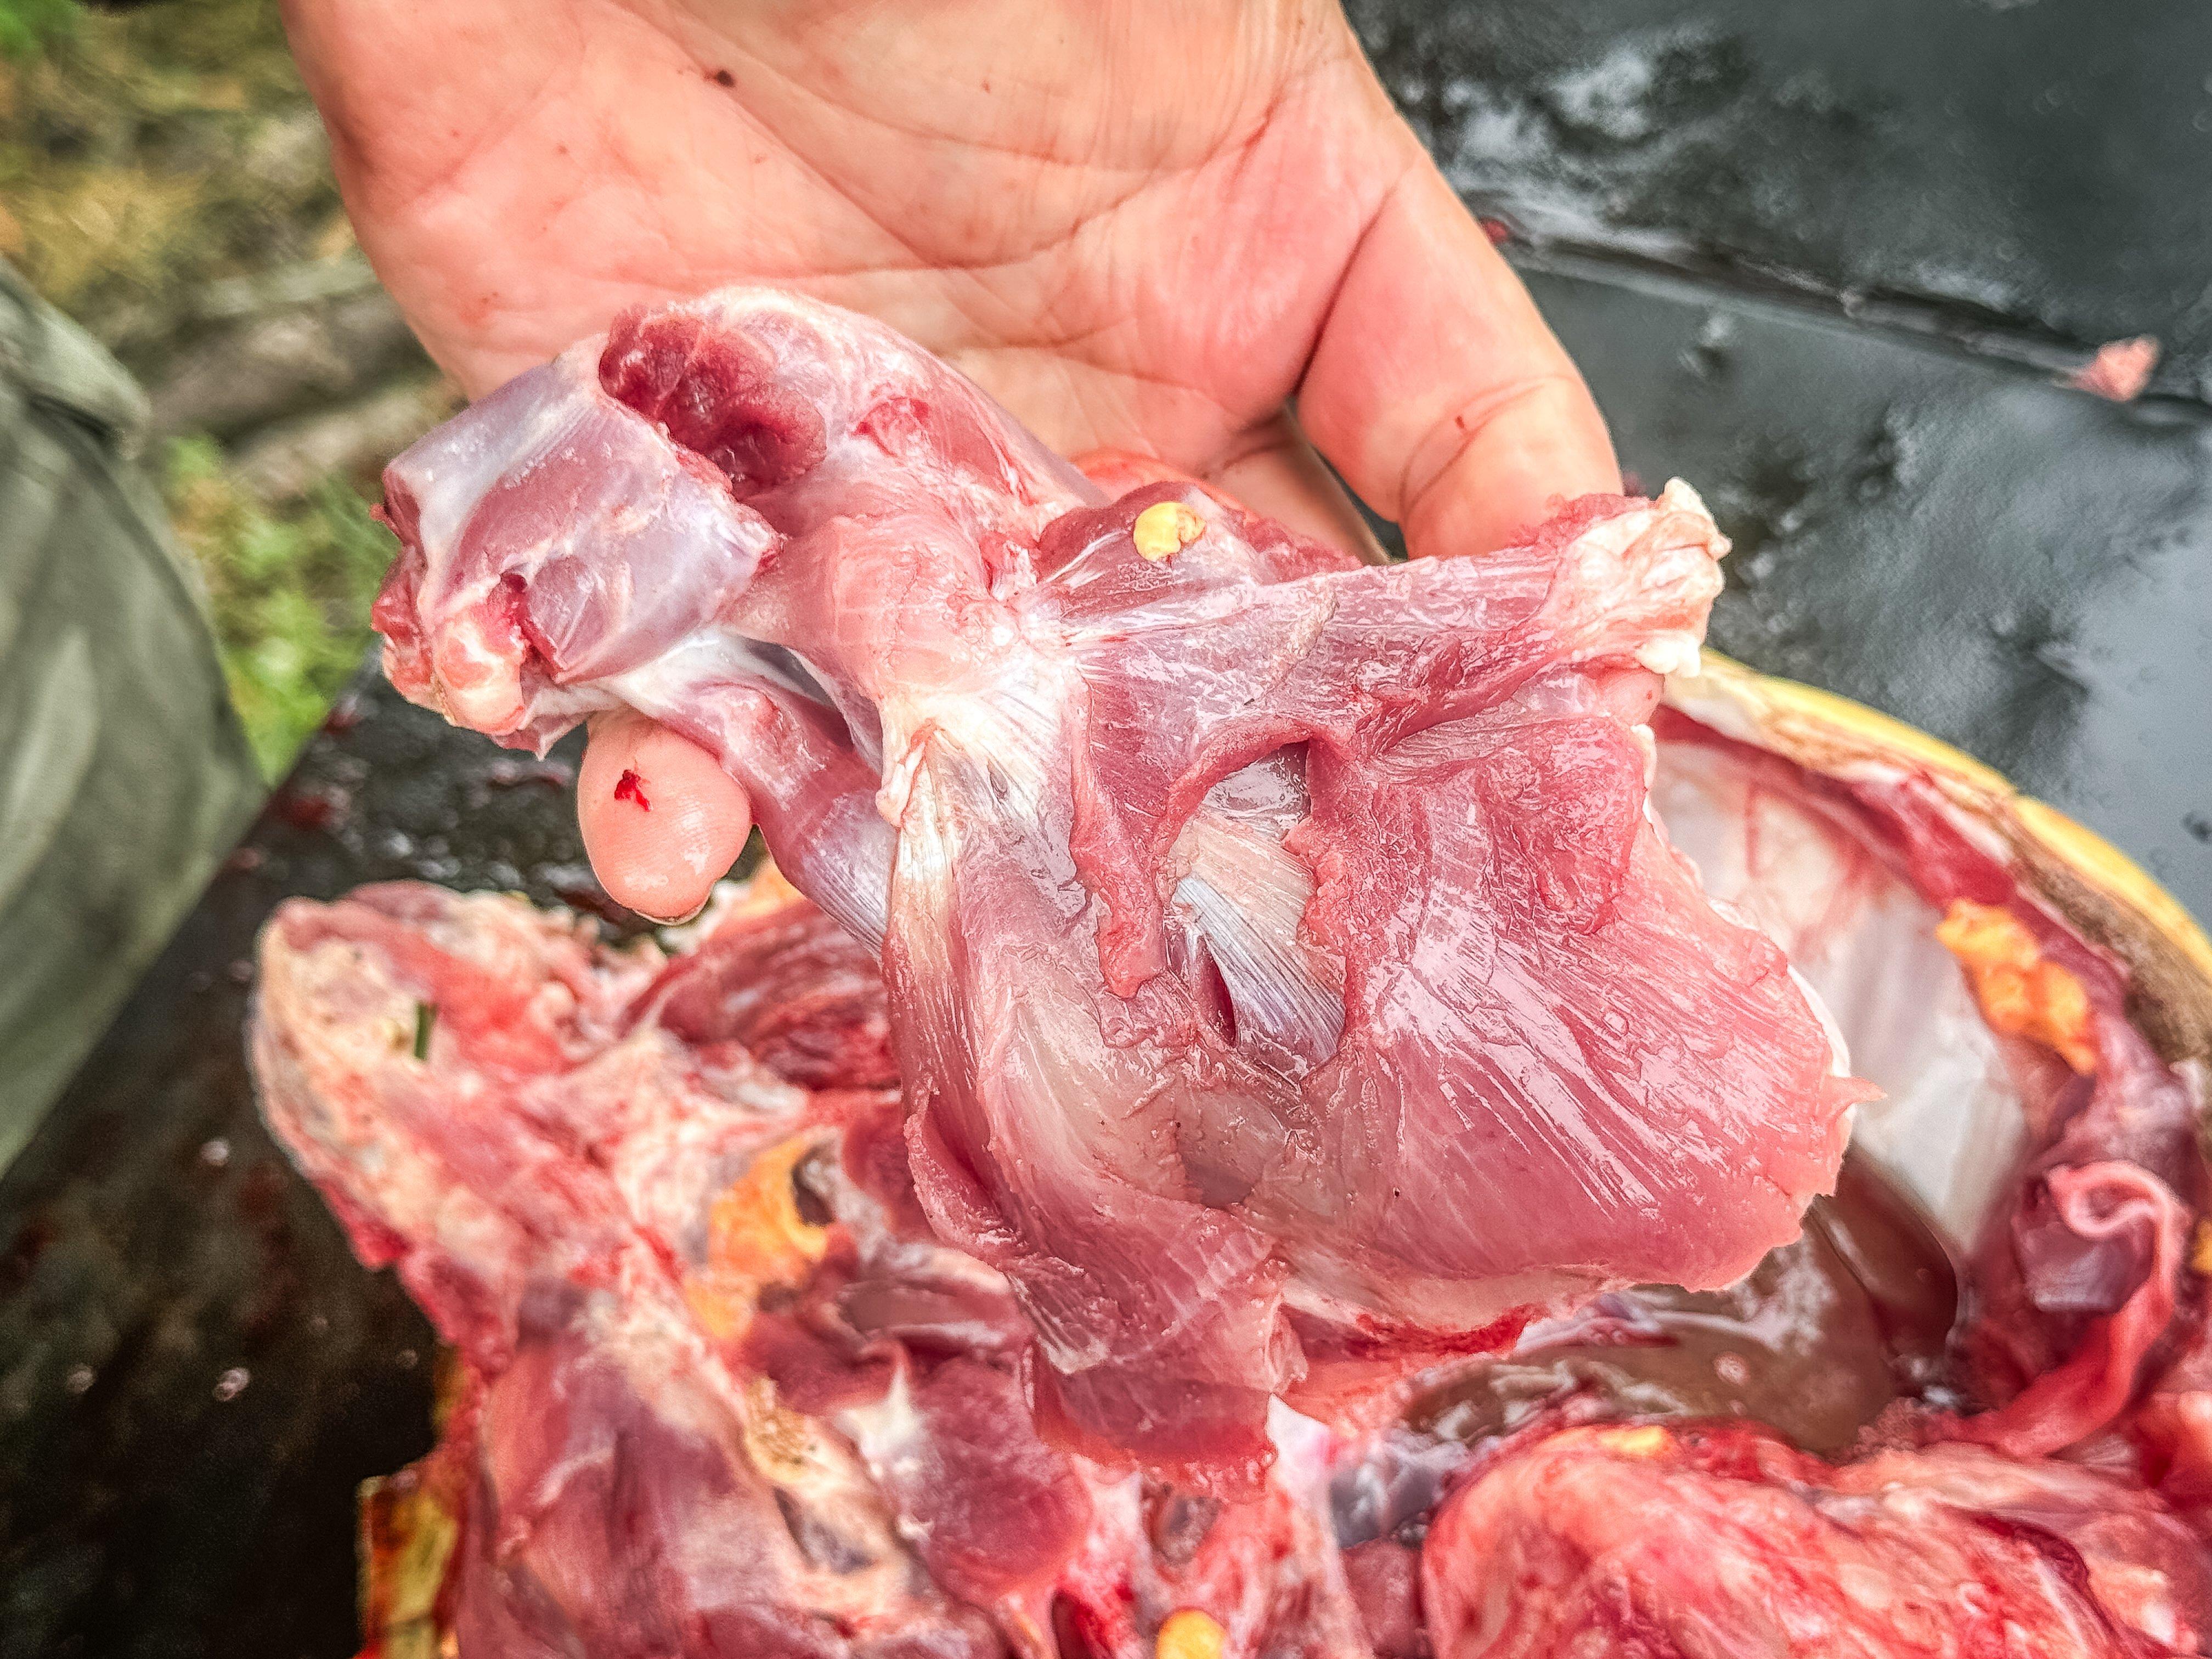
Separate the quarters from the shell.
Step 8: Remove the neck and the first 2 to 3 inches of the tail. Both of these hold quite a bit of meat, especially on a bigger turtle.
Step 9: Get the backstraps. Just like on a deer, hog, or elk, turtles have a pair of backstraps that lie just along the top of the shell. Remove the entrails and you will see them.
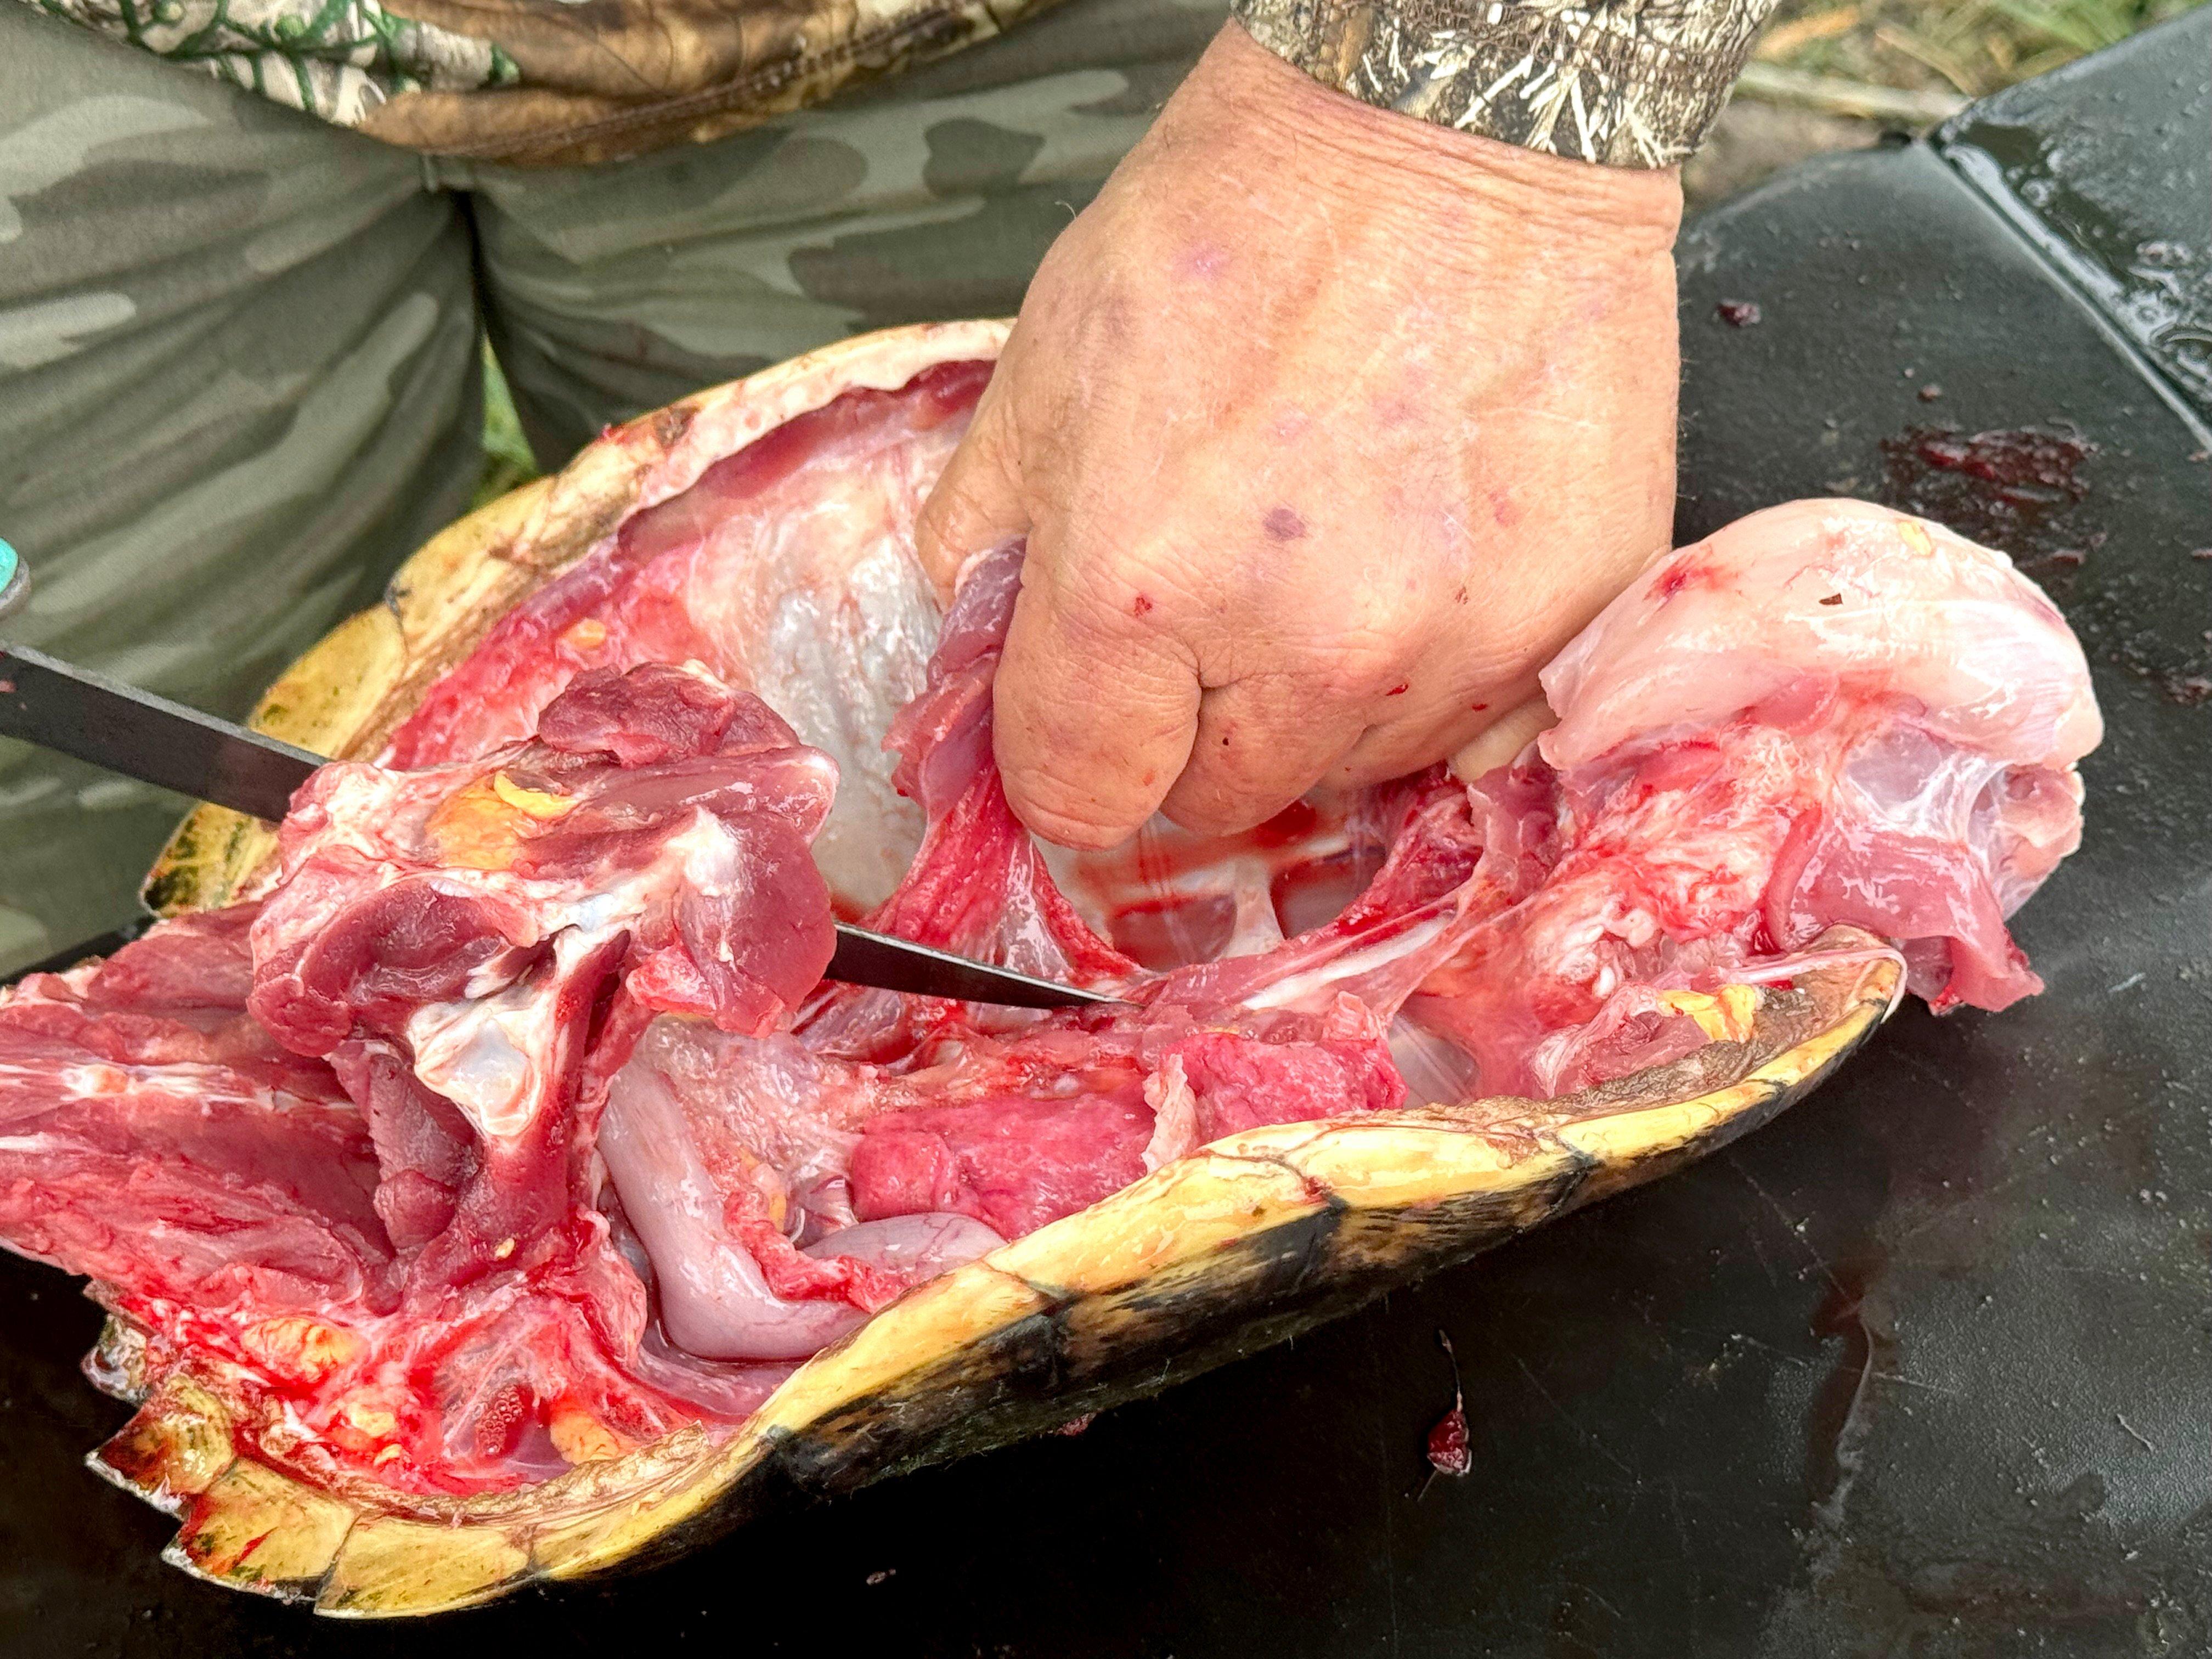
Remove the muscle from the top of the shell.
It is the muscle that attaches the shell to the turtle. Use your knife to scoop these out and add them to the meat bowl.
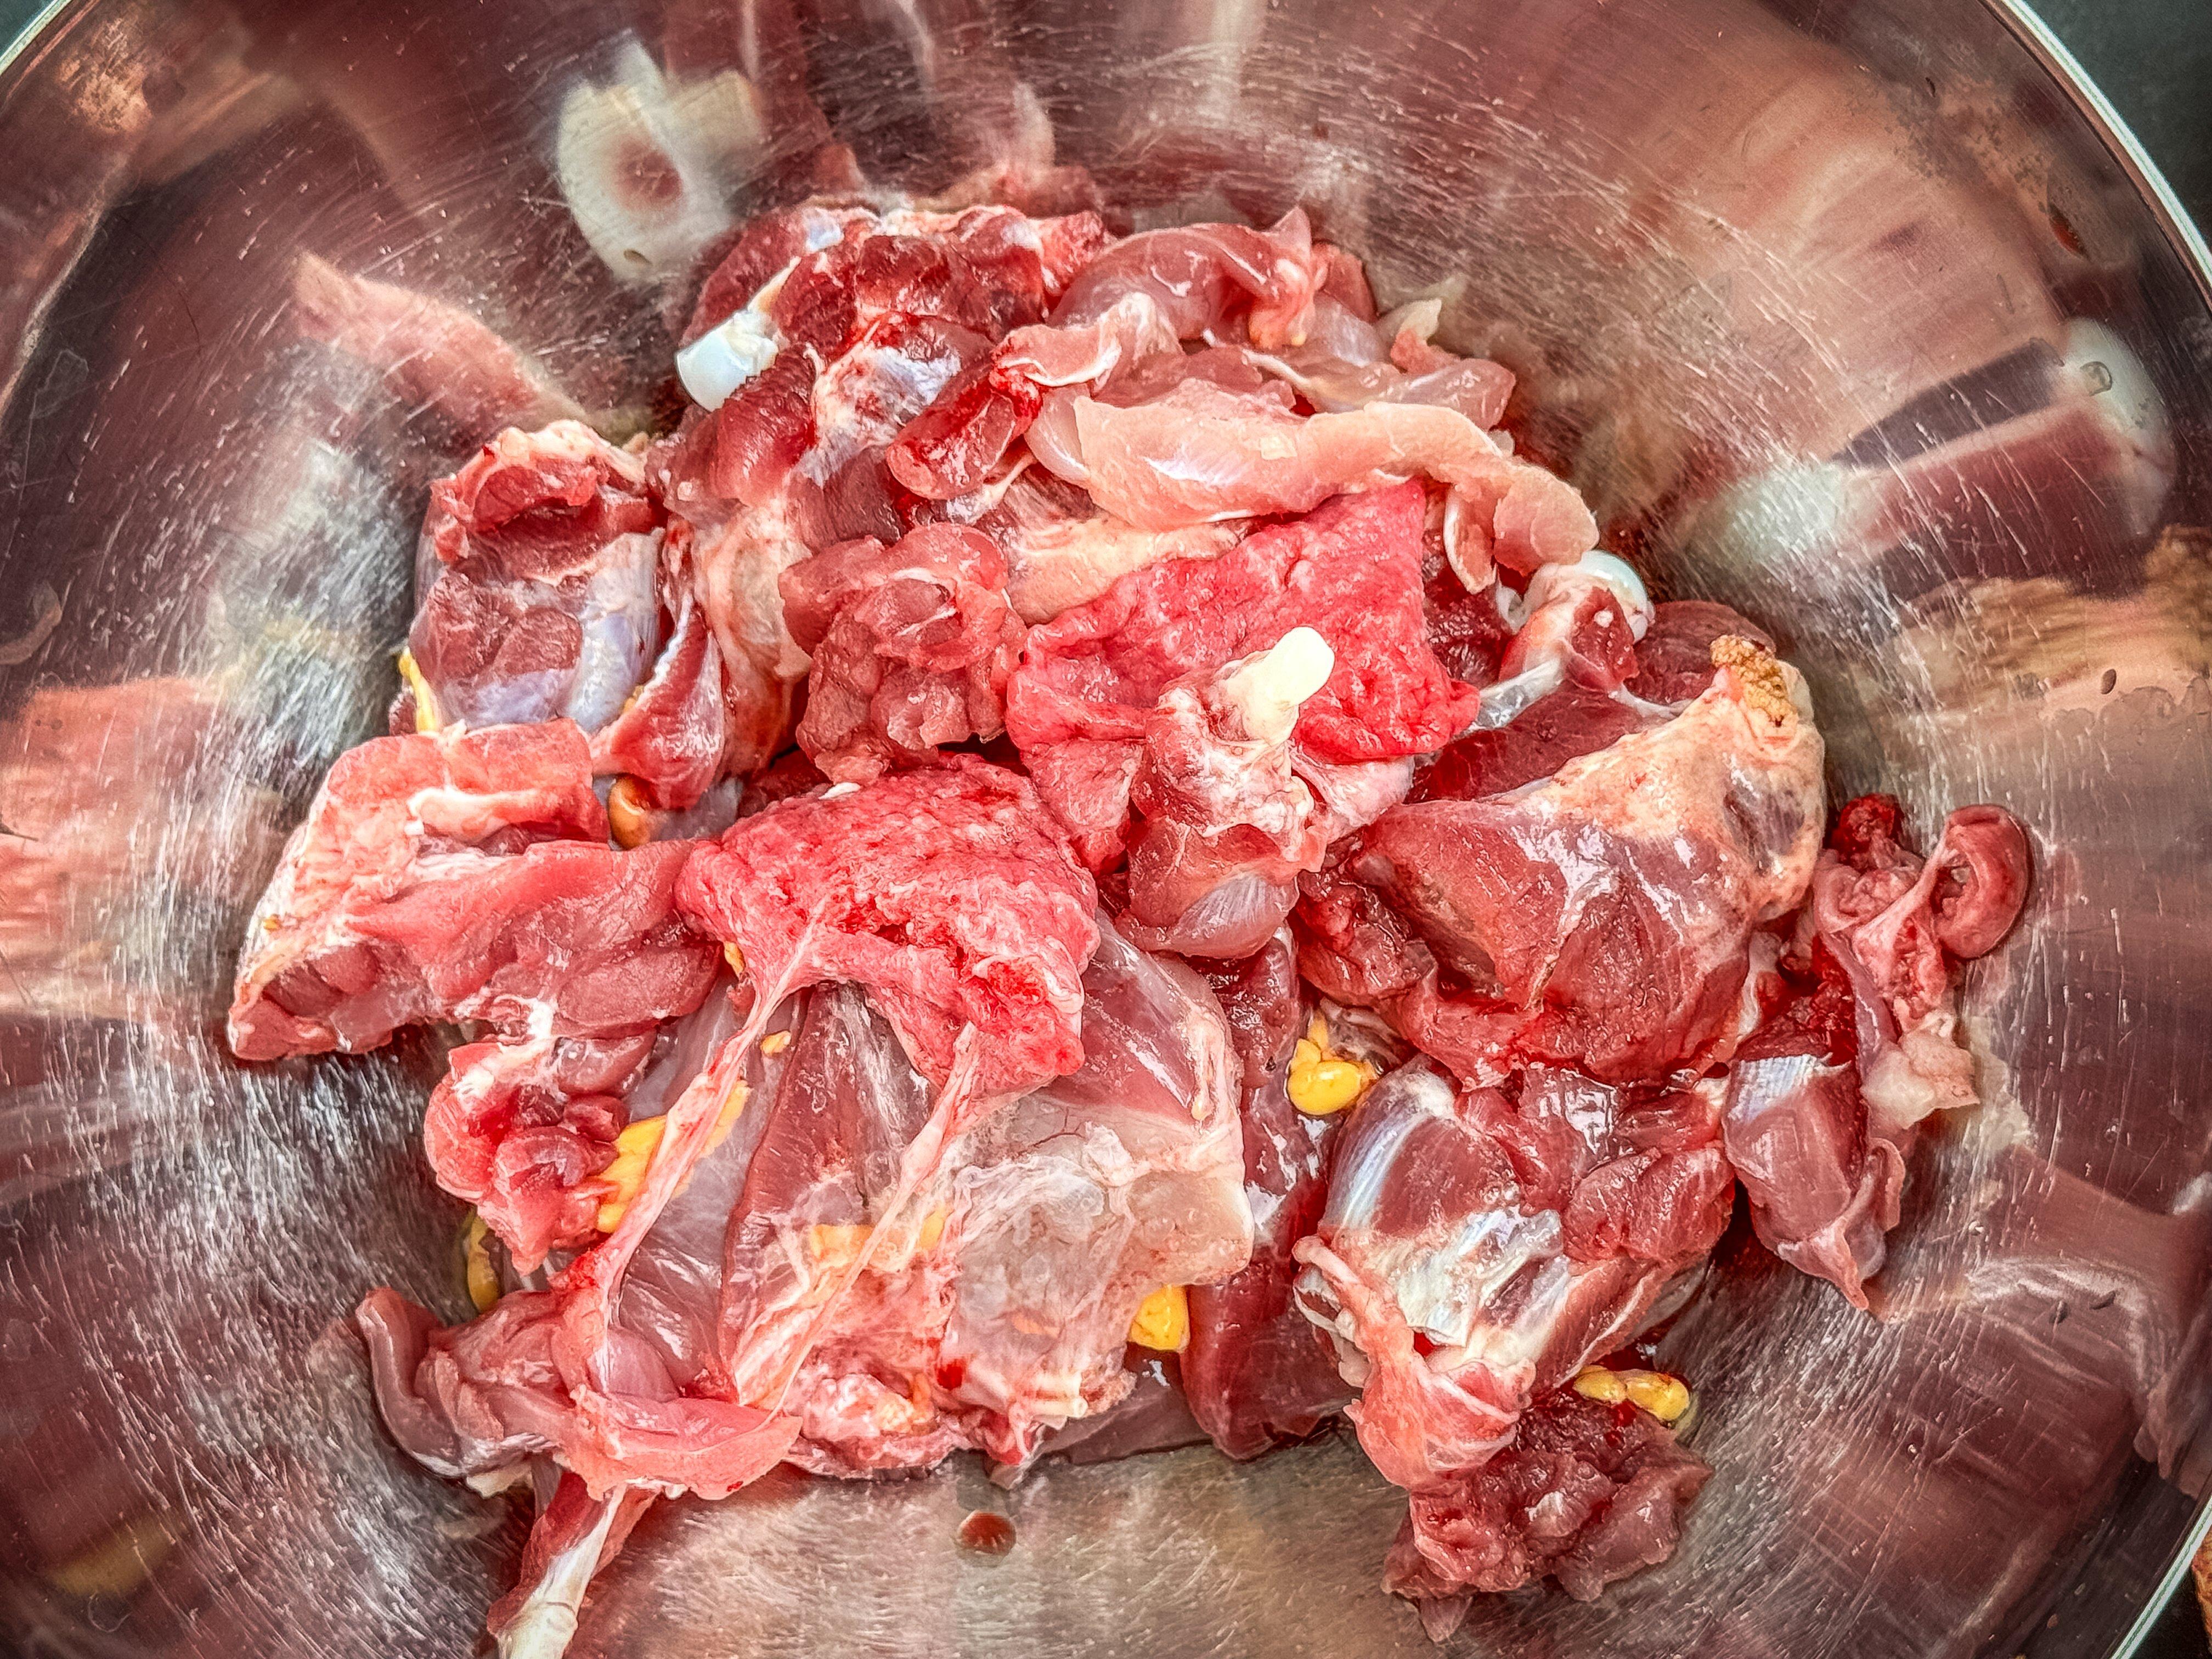
Trim away fat and rinse the meat well before cooking or freezing.
Step 10: Remove any excess fat and rinse everything well before using or freezing for long-term storage.


