How to Make Your Own Turkey Hunting Box Call
Posted 2025-03-26 by
Want a custom yelper without the custom call price? Here's how to make one yourself.
A few seasons have come and gone since turkey hunters discovered that they could make passable turkey noises by dragging a wooden lid across the edge of a hollowed out wooden box. How many are a few? At least 127. Way back in 1897, Henry Gibson was awarded the first patent for what he described as a turkey box call. By the late 1930s and early 40s, Tom Turpin and Mike Lynch were making similar calls on a production basis.
Show any of these early calls to a modern turkey hunter, and they will instantly recognize it. While call companies have experimented with different materials, shapes, and sizes, the basic design for the call hasn’t changed much in the last 100 plus years.
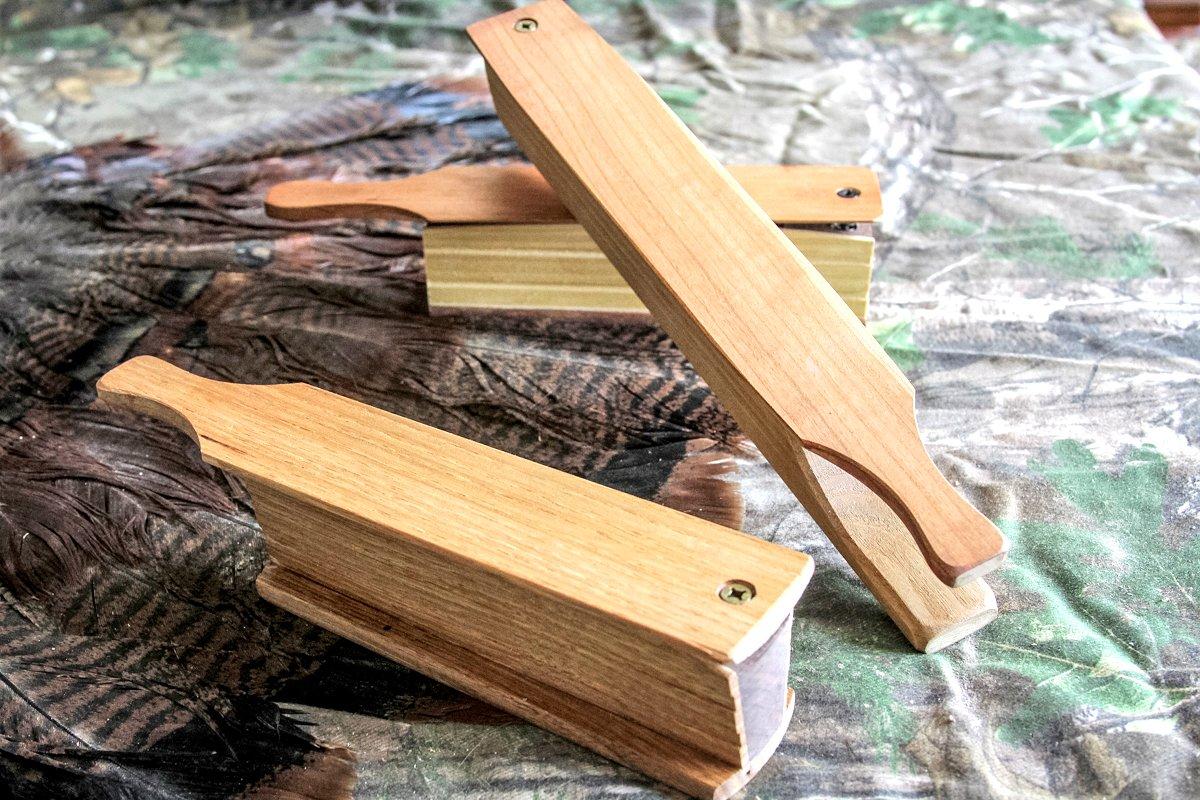
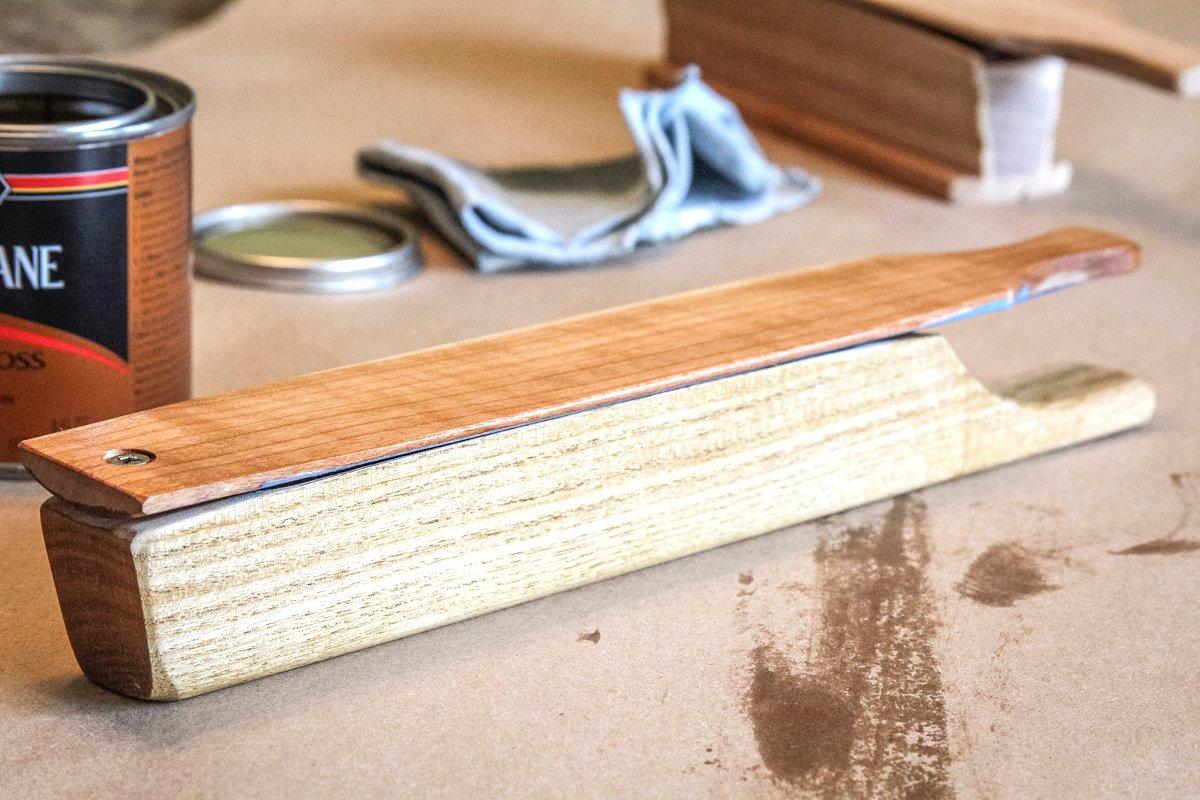
Box call designs haven’t changed much in the past 130 years, but there is no denying that a good one will make turkeys gobble when nothing else will. All images by Michael Pendley
If you’ve ever priced a custom box call, you know they can get expensive. Competition calls in the $500 plus range aren’t uncommon. And, as every good turkey hunter knows, you can’t own just one of any style call.
But you don’t have to spend a fortune to amass a cabinet full of custom box calls. Building your own is a fun off-season project and you get to customize your calls to your own sound and appearance preferences. And you don’t need a shop full of tools to get started.
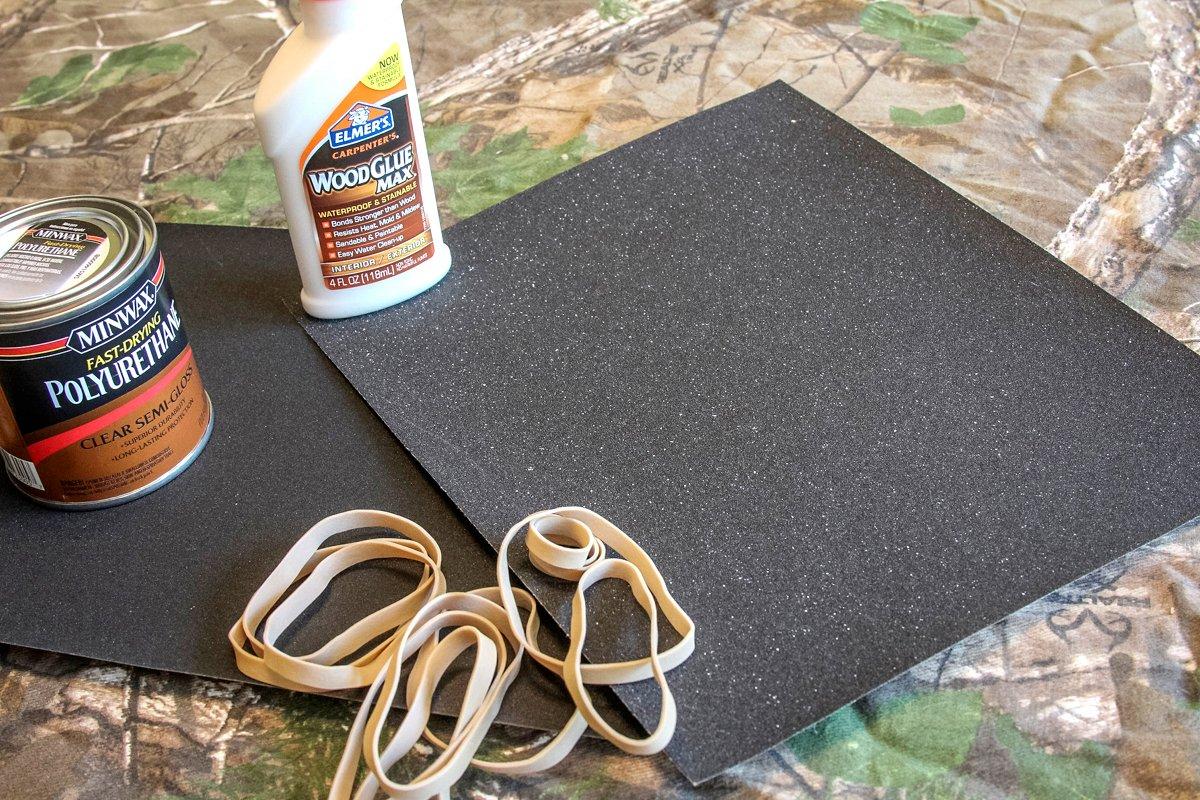
You don’t need much as far as tools and supplies go. Some sandpaper in various grits, glue, finish of choice and a few rubber bands will have you calling turkeys in no time.
The great thing about building box calls is that there is a comfortable level for everyone. From a made-from-scratch custom build, all the way through a nearly finished call that only needs the final fit and finish, everyone can build a box call, no matter what their woodworking skill and experience level is.
Box and pot call kits are perfect pre-season projects for both experienced and young hunters, and are a great way to pass away the time until opening day.
Let’s start with the easiest to build. You’ve seen us use kits from Brookside Game Calls to build pot style turkey calls with the kids in the past. They also offer a few box call kits as well. For the Brookside kits, you choose you can choose the wood variety for both the box and the paddle from a broad list. Choose the same wood for both or choose a different wood for each part.
Kits can be as simple as assembling and finishing a pre-carved solid piece base and the lid of your choice, or as complicated as a bag of parts that have to be fitted and glued.
You also get to choose the style of your box call from five choices. Brookside offers half-moon, large-box, small-box, single-sided, and long-box call kits. We chose a long-box and a large-box for our calls.
Like their pot style call kits, the Brookside box calls are perfect for an off-season project with young hunters. They come with pre-assembled, or in the case of the long-box, pre-sawn (the long-box style is cut and carved from a solid piece of wood instead of cut out and assembled like the other styles) blanks for the body.
To start the assembly on any of the calls, simply smooth the wood with fine grit sandpaper. We started with 150 grit, then moved on to 220 for the final finish. Avoid sanding the edges of the box or the underside of the lid or you may take away to much of the surface and change the angles and the tone of the calls.
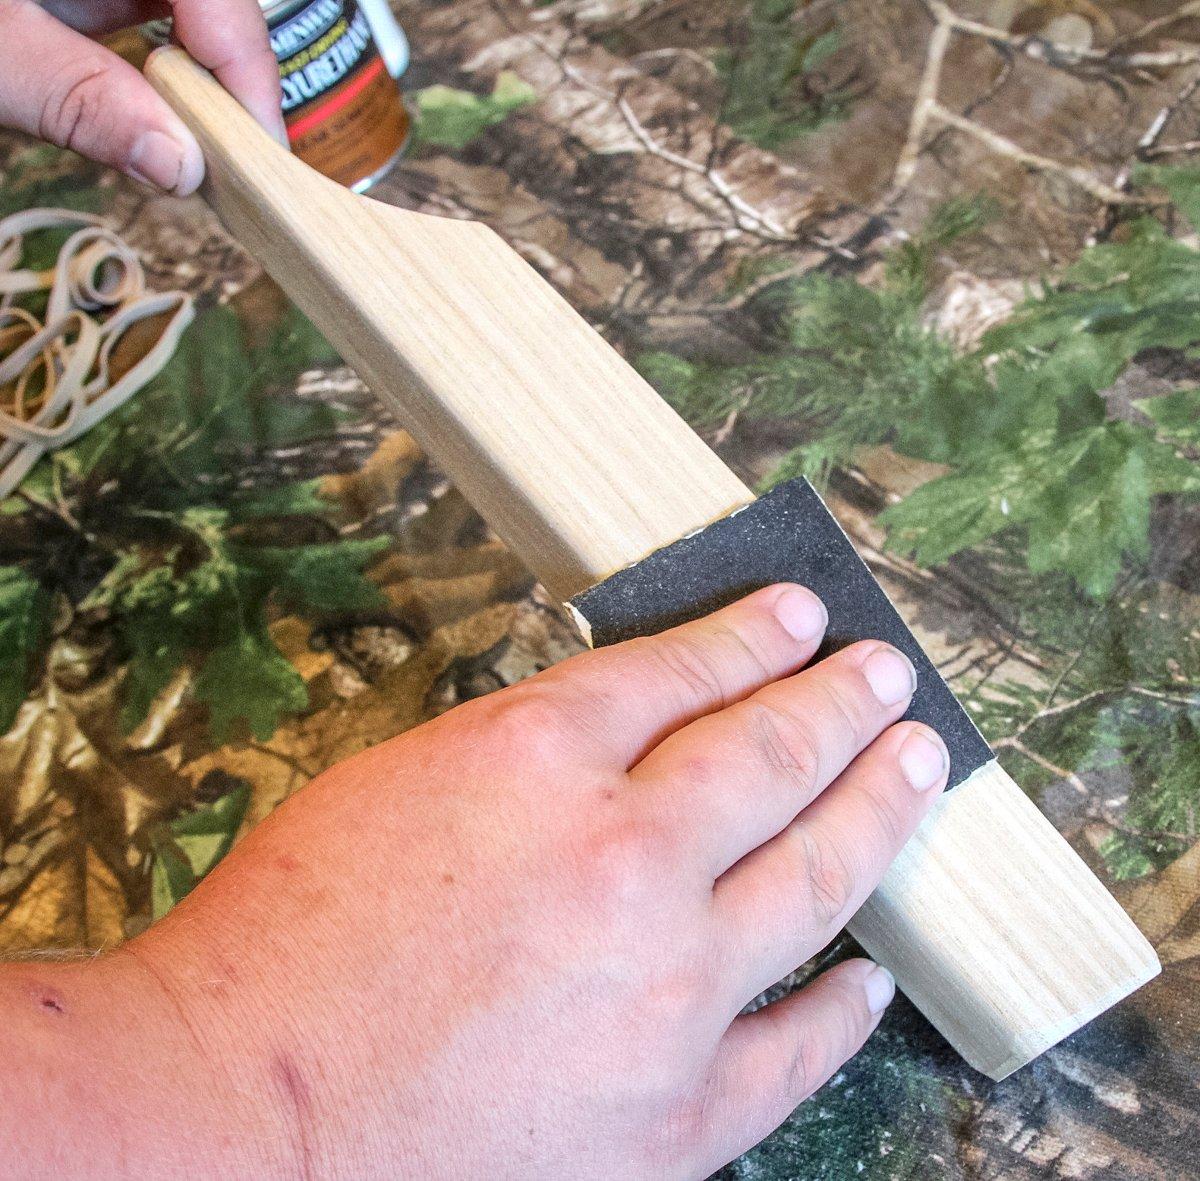
Start with 150 grit sandpaper, then work up to finer grades to finish, taking care not to change the shape of the box edges or the lid as you sand.
Once you’ve made the box and paddle smooth, assemble them by running the screw through the lid from above, sliding on the included tension spring, and then screwing it onto the box.
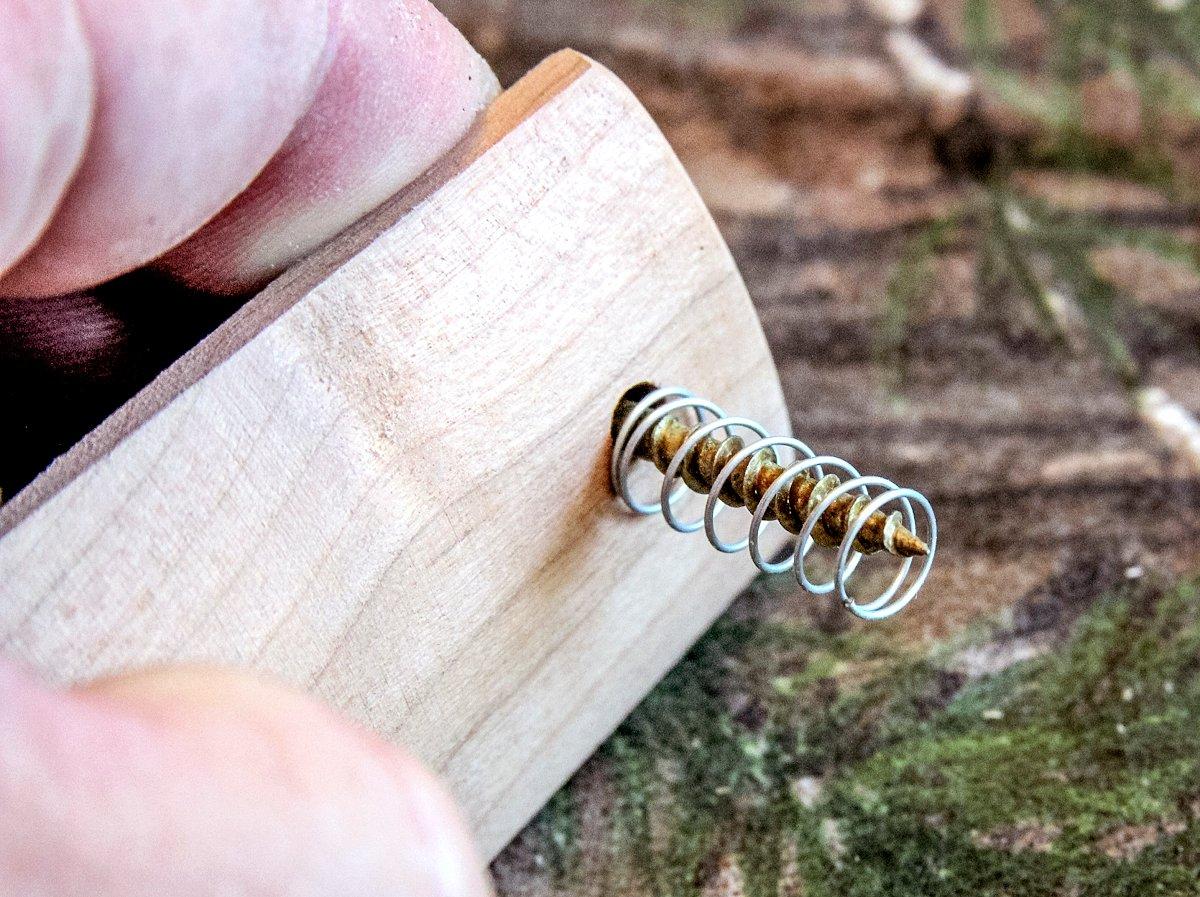
Assemble the lid by running the screw through the spring, then tightening it down into the box.
Travis Morgan, who has been building his Country Boy Calls of Kentucky custom box calls for years, recommends starting the lid of the call level with the highest point of the box side for the initial screw height. From there, run the call a few times and adjust the screw a quarter-tun up or down as needed to get the perfect sound.
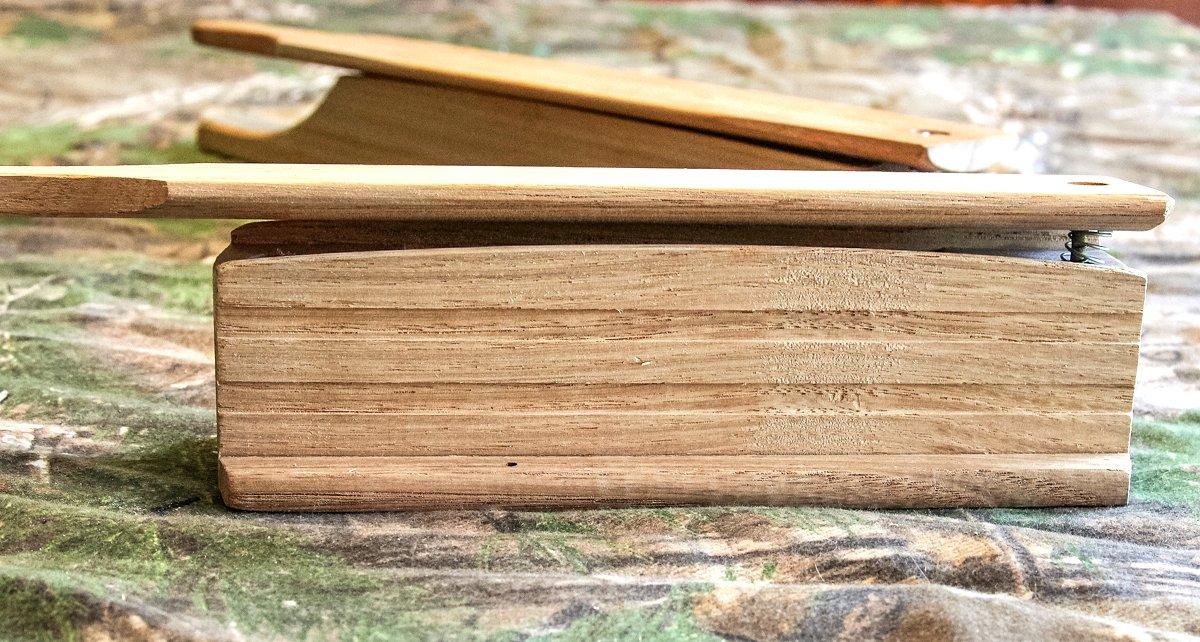
Adjust the lid up and down until you get the sound you like.
When your call sounds exactly like you want it to, you can finish the exterior surfaces to make your calls last for years, even in tough hunting conditions. When finishing the call, apply the oil to only the outer surfaces of the box and the top of the paddle. Avoid getting any finish on the playing surface, both the tops of the box sides and the bottom of the paddle, since this will negatively affect the sound of the call. A handy way to prevent errant finish from ending up on the playing surfaces of the call is to cover them with blue painter’s tape before applying the oil. Once the finish has dried, simply peel away the tape. If you do get oil on either the top of the box or the bottom of the paddle, simply sand it lightly to remove any unwanted finish.
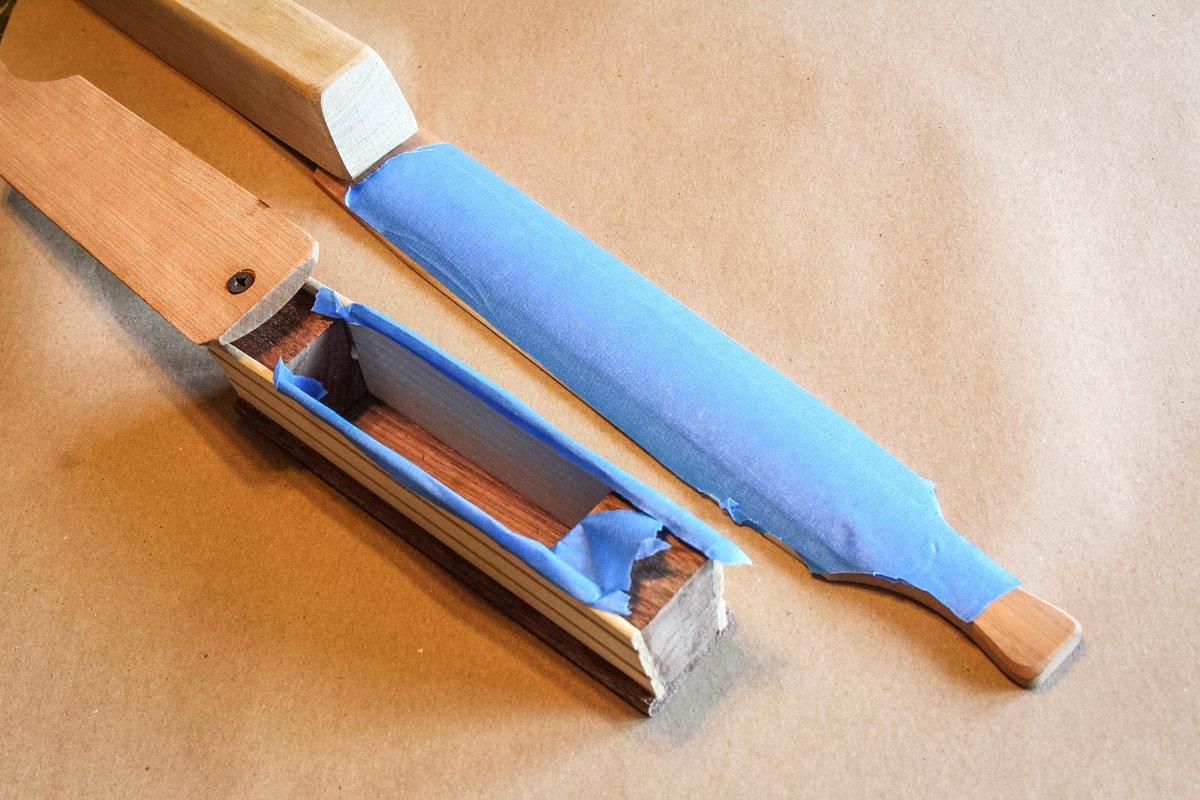
Apply painters tape to the underside of the lid and to the box edges to prevent excess finish from coating them and changing the call’s sound.
For a truly custom call, decorate the lid of your call by carving or painting a custom design on it before applying the finish. Initials, turkey tracks, turkey feathers, or hunt club names are popular choices, but let your imagination be your guide.
Looking for a step up in skill level but don’t have access to the wood shop tools necessary to build a call from scratch? Pick up a call kit from one of several sources including Flambeau, Shipley’s Outdoors or any of several suppliers on both Ebay and Etsy. We picked this kit up from Ebay for less than $30.
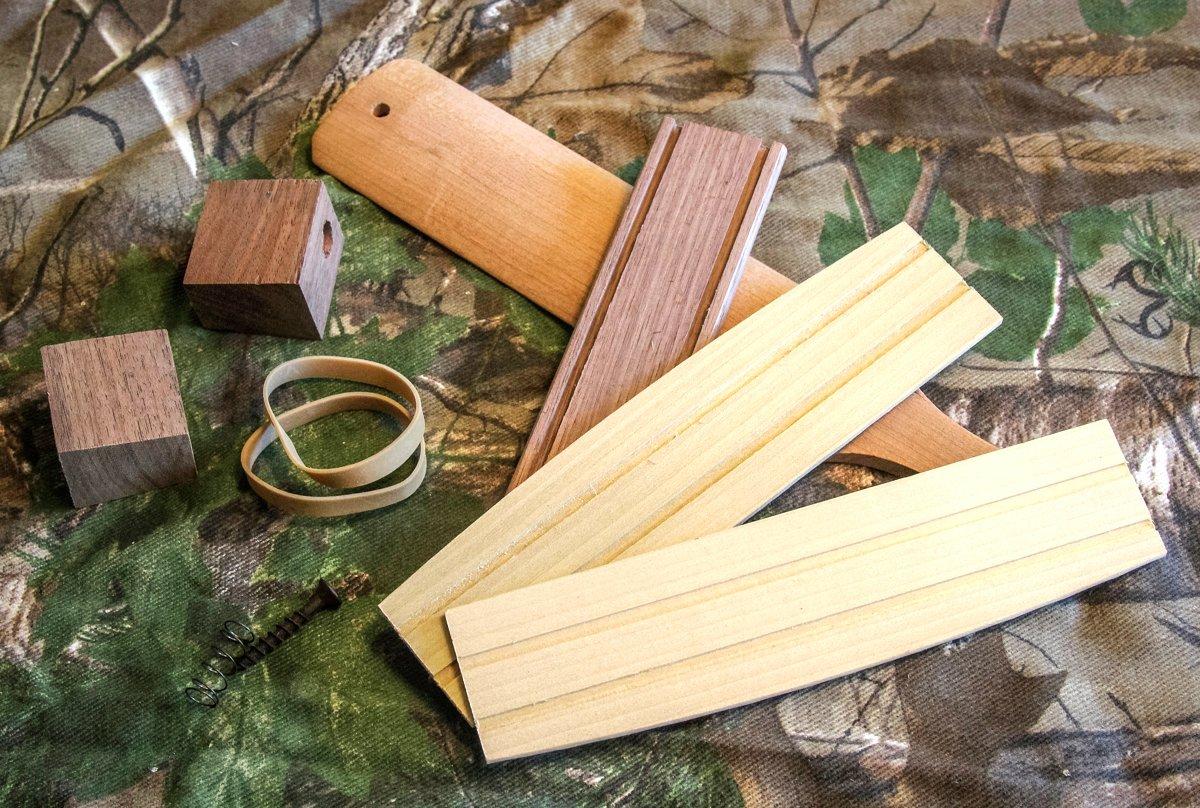
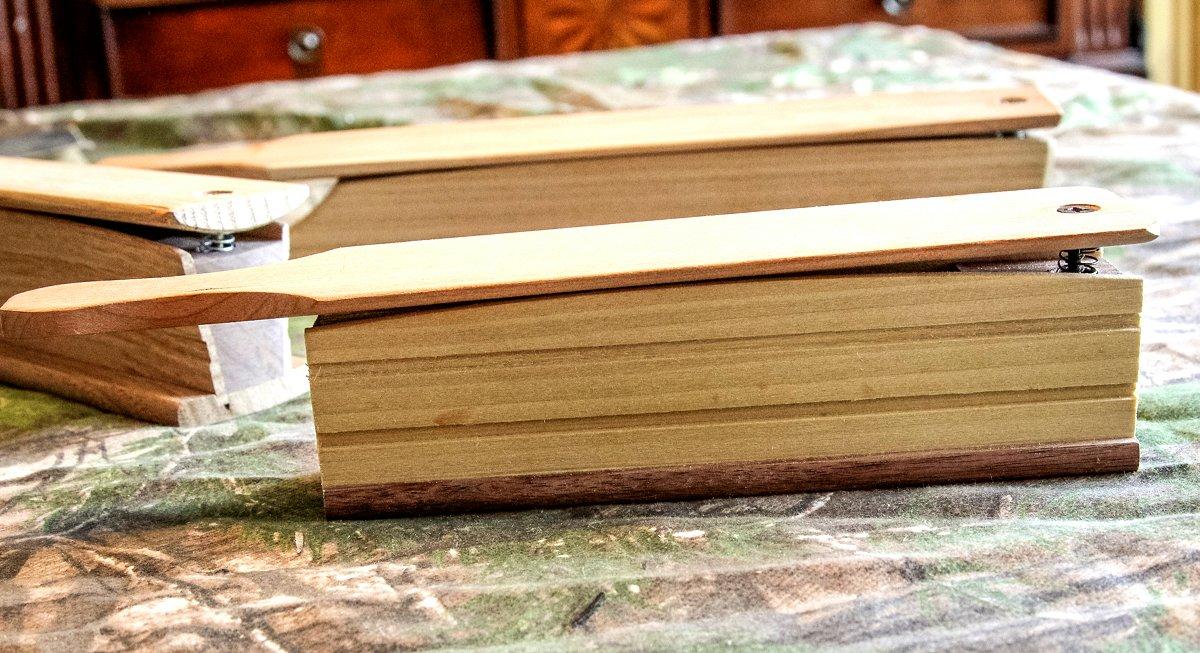
A step up from the single piece carved calls are full kits of pre-sawn blanks that you assemble and finish on your own.
The kit includes a grooved bottom board, two sides, two end blocks, a paddle, spring and screw. Everything is cut to size. Assemble by gluing the pieces together, then lightly sanding and finishing the outer surface. A few rubber bands help to hold the call parts in place as the glue dries. The call took about an hour for the kids to build and sounds great. I have no doubt one of them will work a bird with it this coming spring.
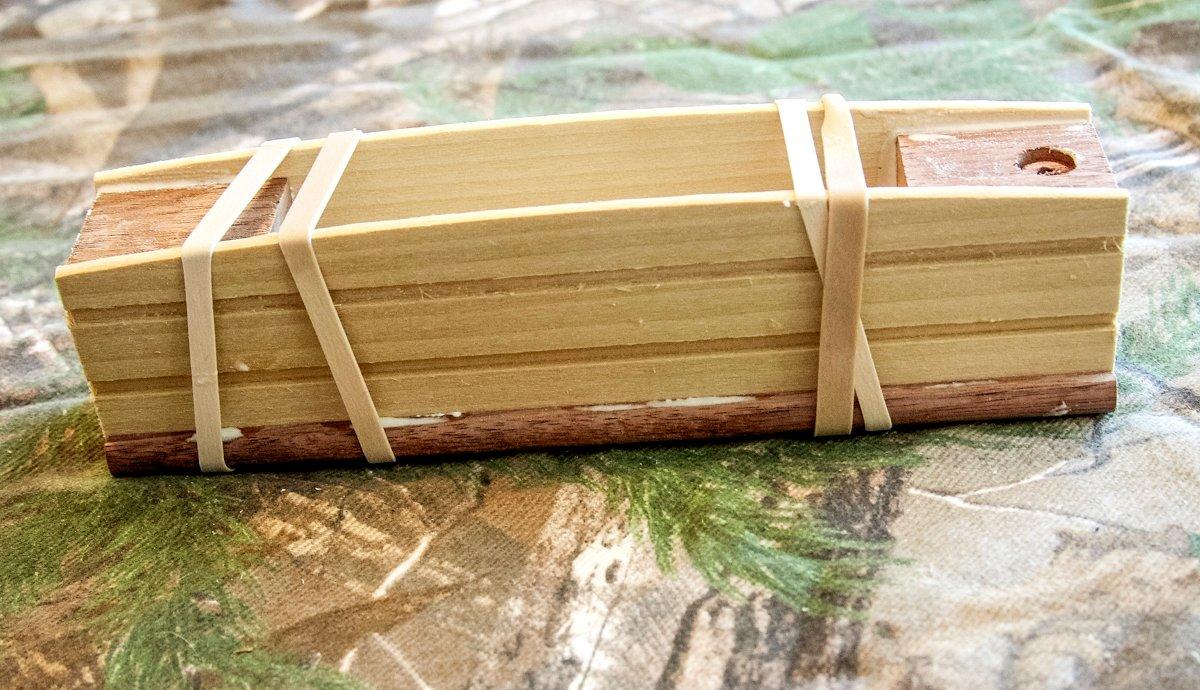
Rubber bands make perfect clamps to hold your call parts together as the glue sets up.
For the truly adventurous, building a call entirely from scratch is the ultimate challenge. While just about any wood can be used, Morgan recommends cedar as a great starter material. “If you can find a straight grained piece of cedar, its easy to work with and makes a really nice looking call, says Travis.
He uses a pattern he found online several years ago and has modified it some over time. “There are several patterns out there,” he says, “I think the one we started with originally came from Outdoor Life Magazine.”
Once you have located a pattern you like, Morgan recommends cutting the bottom and side board blanks to the correct thickness on a table saw. Make the blanks larger than needed for the pattern, then trace the outline for the bottom and sides onto the wood.
Don’t Miss: THE BEST 20-GAUGE TURKEY LOADS OF 2025
Morgan like to use a scroll saw to accurately cut the patterns out. He then sets his table saw at the correct angle and cuts to grooves in the bottom section for the sides to rest in. Once he has his sides in place, he can cut the front and back end blocks with the correct angles.
For the paddle, Morgan starts by tracing his pattern onto wood that is slightly thicker than his desired finished paddle. He then uses first a belt sander, then hand-sanding to finish the curved lower surface of the call. “Getting the correct curve can be tough. It takes a lot of trial and error to get it exactly right.”
Once he is satisfied with his call sections, he assembles the call with Elmer’s Wood Glue. Morgan says he has tried other brands over the years, but keeps coming back to Elmer’s. “It gives me a solid hold, dries clear, and can be sanded to finish,” Morgan says of the brand. “Some others I’ve tried either didn’t hold well or dried with a white finish that had to be completely sanded away before finishing the call,” he said.
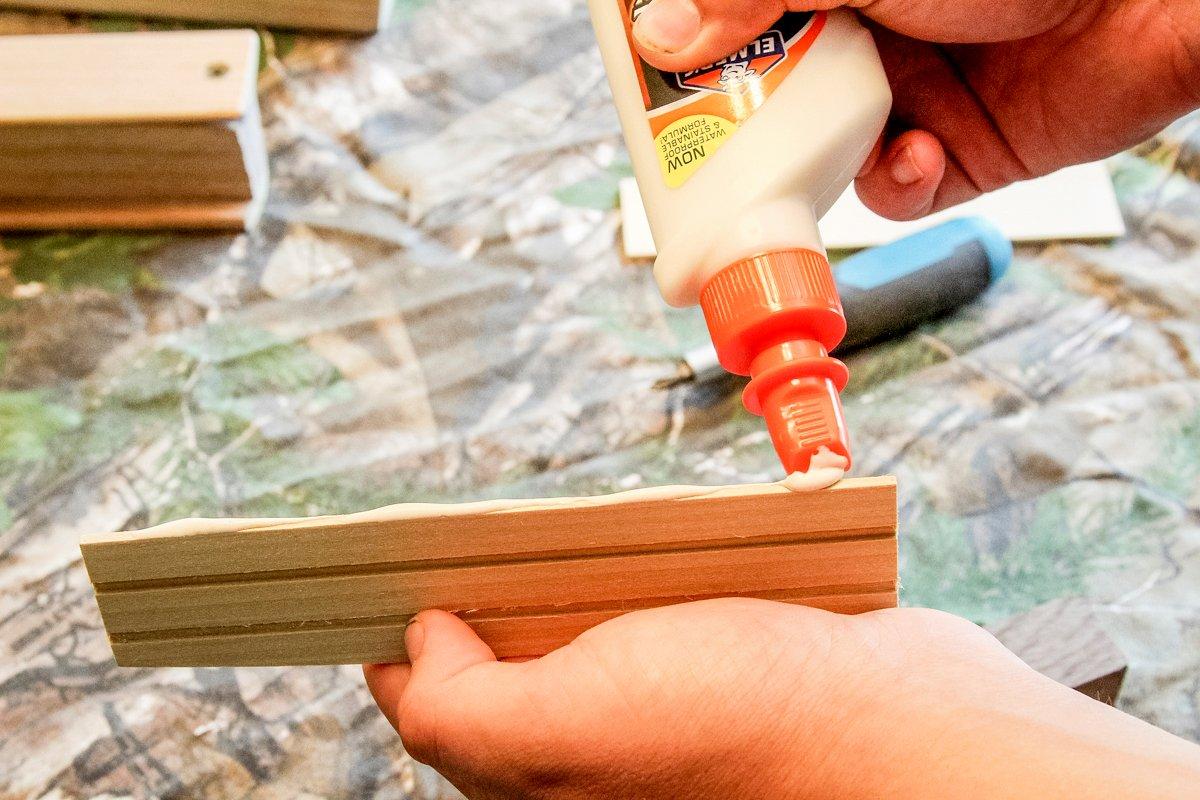
Long time box call maker Travis Morgan has tried several adhesives and keeps coming back to Elmer’s Wood Glue.
Morgan finishes his calls with several hand-rubbed coats of tung oil, allowing each coat to fully dry before lightly sanding the call with steel wool and applying the next. “The first few coats really soak into the wood, so you have to keep adding to it for a nice finish."
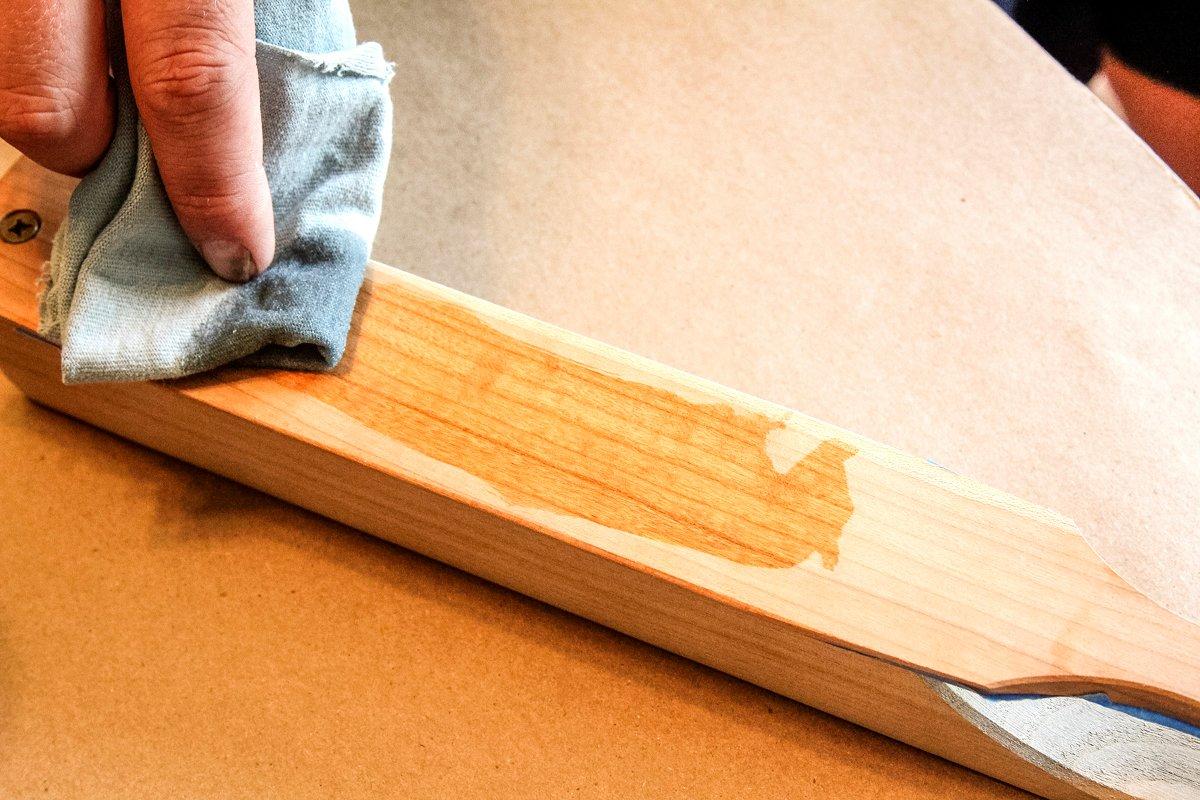
Morgan recommends several coats of hand-rubbed finish with a light sanding between coats.
Once you have a pattern you like and have built a few calls from an easy-to-work-with wood like cedar, then you can branch out to other hardwoods, or even laminated blanks of multiple species glued together in custom patterns.
Morgan prefers hardwoods with a tight grain pattern for the best sound. One of his current favorite combinations is a cherry box with a chestnut paddle. “That combination just sounds like a hen."

For final tuning, turn the lid screw a quarter turn at a time, checking for the proper tone after each adjustment.
For final tuning on any box call, start by chalking it well with box call chalk, available in most sporting goods outlets or anywhere box calls are sold, and tuning the screw up and down for different sounds. If you absolutely can’t get the sound you are searching for by adjusting the paddle height, then try sanding the inside of the box sides lightly near the top where the paddle meets the side sections. Sand lightly and try the call often, you can ruin a call by getting the box sides to thin.
Don’t Miss: 4 TACTICS FOR HUNTING LARGE EARLY SPRING TURKEY FLOCKS