How to Freeze and Store Fish for Maximum Flavor
Posted 2024-02-14 by
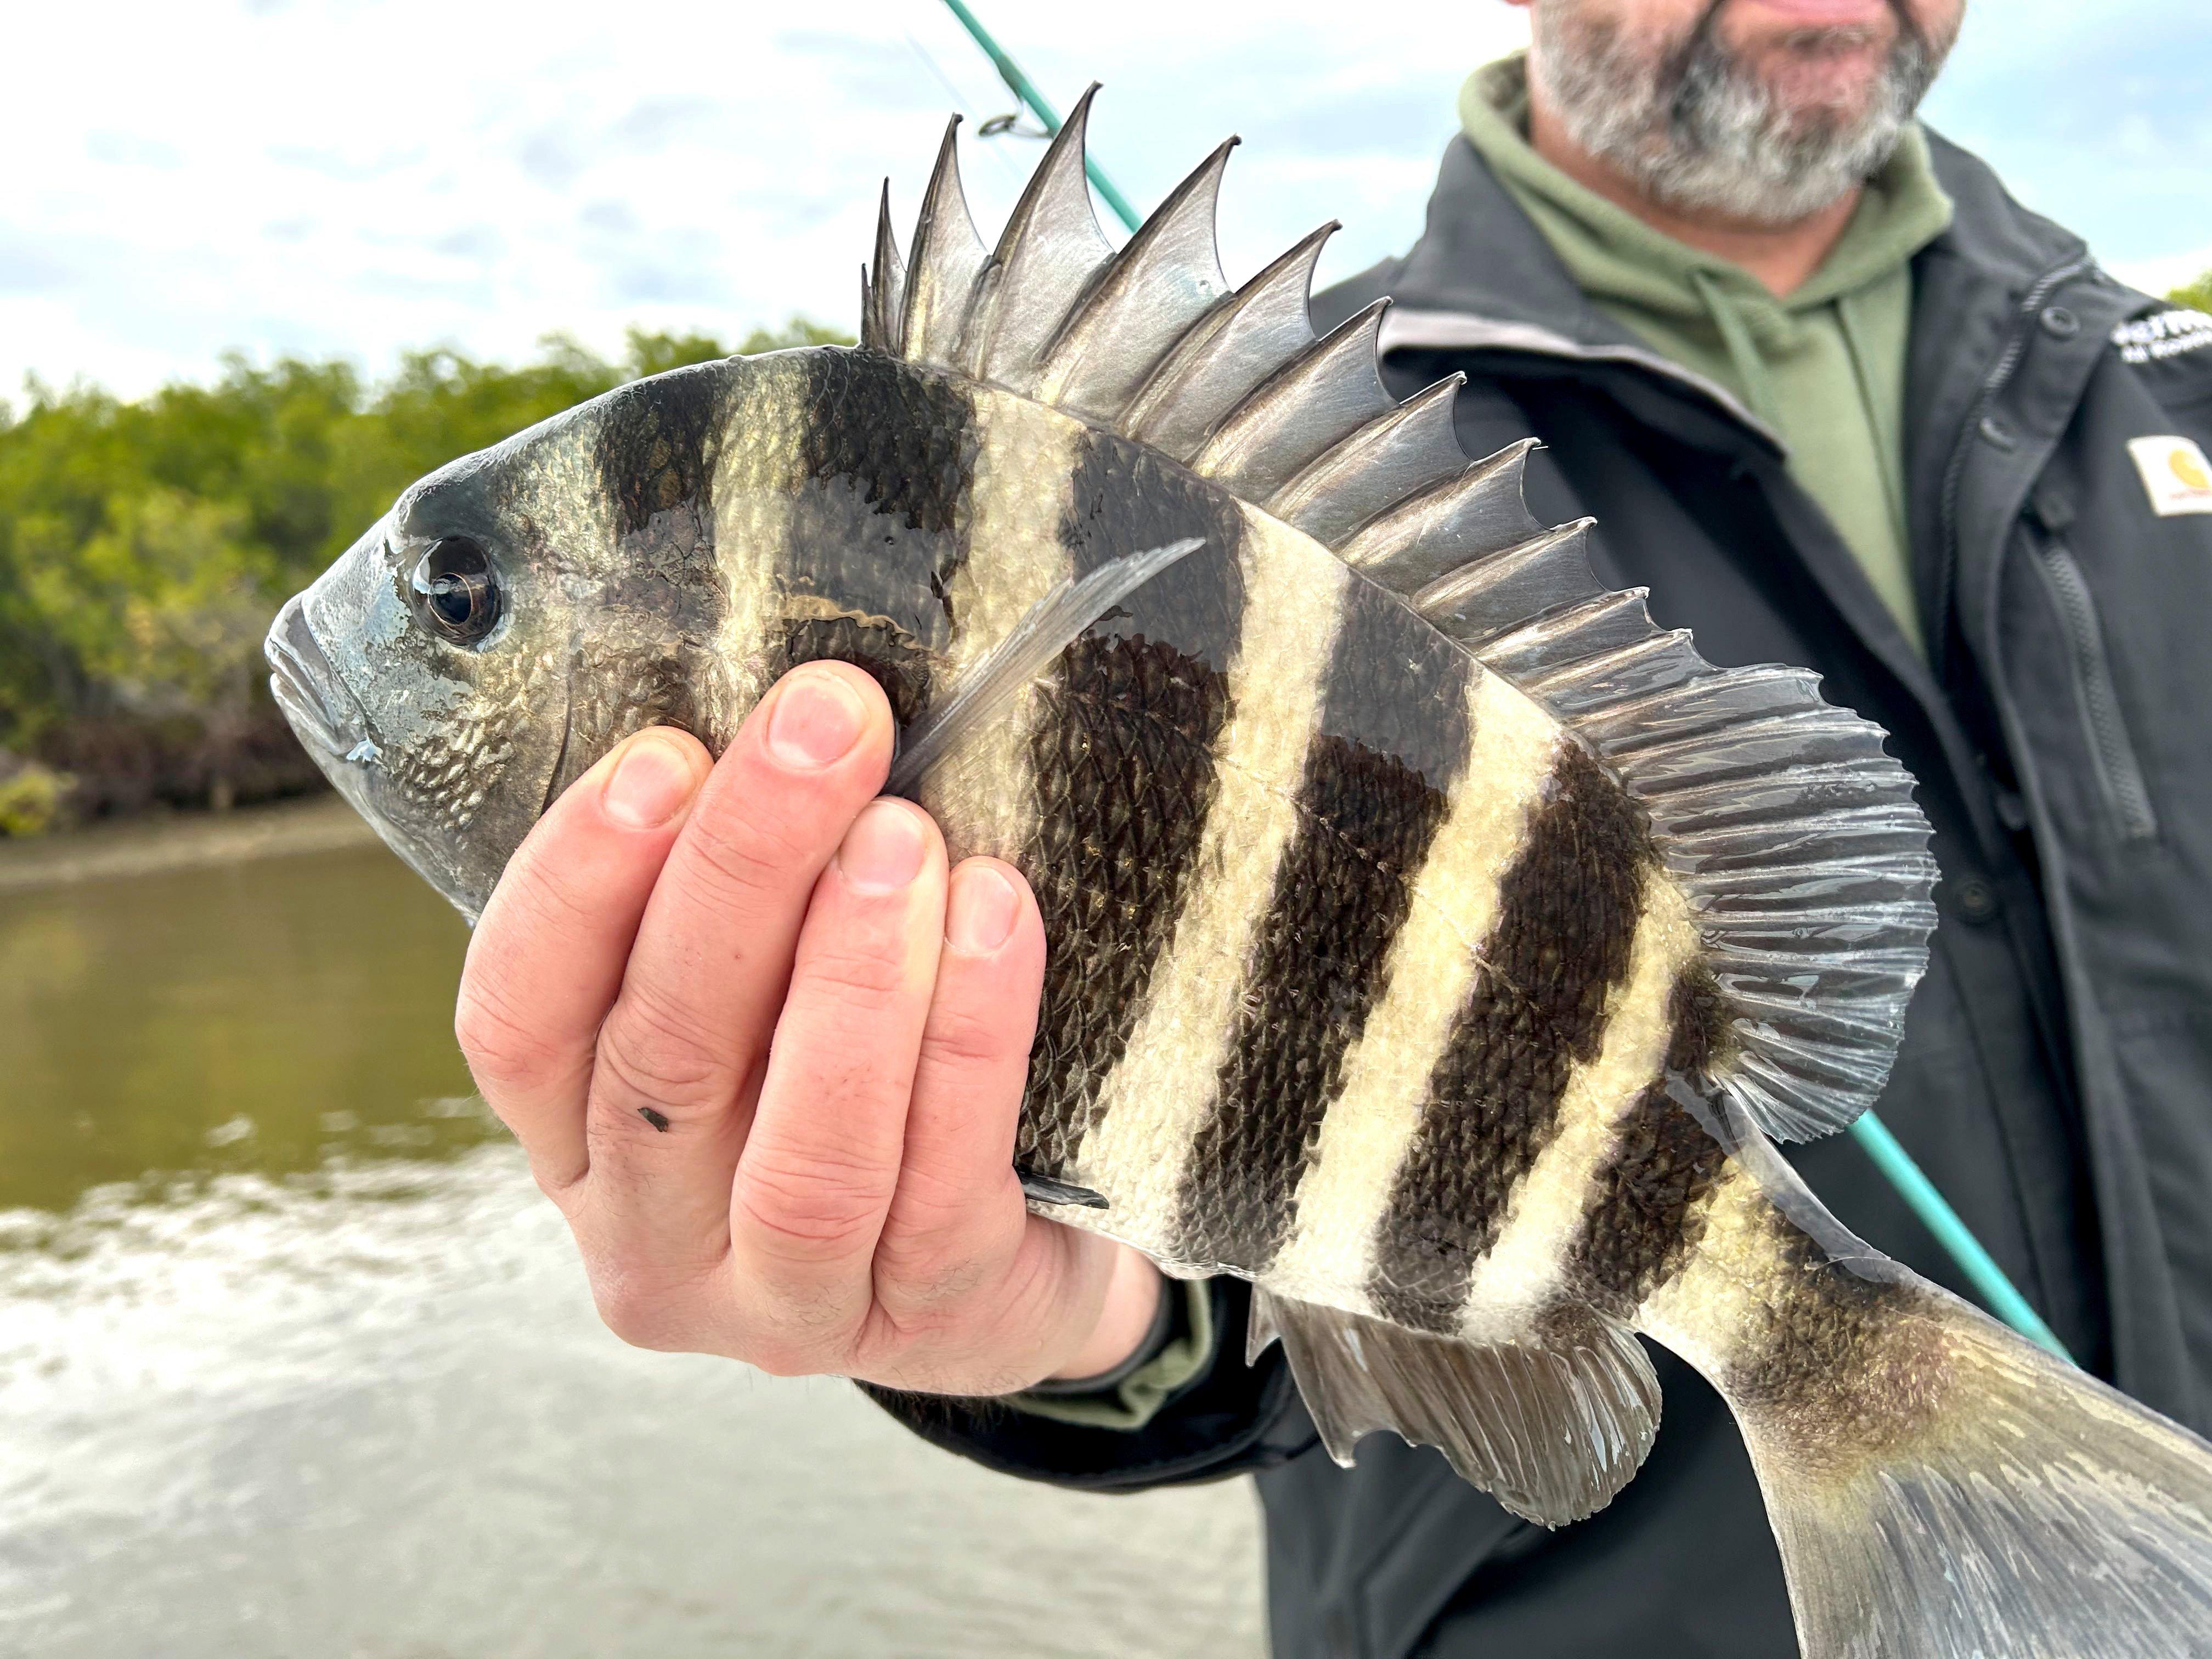
With proper care, you can keep your catch fresh and delicious for extended periods of time
A fish dinner is only as good as you treat it. Preparation and care of your hard-earned catch is vitally important. Consider this: Chefs in top seafood restaurants now care for fish more meticulously than their best cuts of beef. High-end restauranteurs are careful to ice their fresh fish vertically in their cooling areas, to ensure the weight of the ice doesn’t condense the muscle tissue or damage the flesh. It makes that big of a difference.
As anglers, whether we fish saltwater or freshwater, there are a number of steps we can take to increase the palatability of our catch.
Taking care of your catch, both on the water and at home, ensures maximum flavor and longevity in the freezer. Image by Millennium Promotions, Inc.
Step 1: Care on the Water
The first step is the easiest. The faster you can kill and cool your fish after catching them, the better they will taste. This is the place where many anglers fishing for good meals fail. Keeping your fish in an aerated livewell all day simply works against the concept. With any fish you catch and plan to eat, it’s important to think of that fish as a food product immediately upon landing it, the same as you would a steak or pound of shrimp. Take care to quickly cool that food product below 40 degrees. Don’t allow the fish to flop around, or float around in a well all day. Get it on ice.
Dispatching of the fish is left up to the consumer. While most of us simply toss our catch in a cooler full of ice, many experts are finding that quickly dispatching the fish adds to the flavor. A Japanese method of dispatching fish known as Iki Jime is gaining popularity across the globe as being humane and enhancing the flavor of fresh fish. Iki Jime is a method of inserting a needle-like knife directly into the brain of the fish, which kills the fish instantly and lessens the chances of lactic acid build-up in the flesh, which is caused by a fish thrashing around as it dies. In addition, Iki Jime ensures most of the blood of a fish retracts back into the gut tissue, enhancing the taste of the flesh.
Bleeding fish is also a common practice for species like tuna, but one that has grown in popularity for trout and walleye anglers as well. Bleeding a fish provides the same benefit as Iki Jime — getting blood from the flesh elsewhere — to create a cleaner tissue.
The best way to bleed a fish varies by species, but slicing the tissue between the gills does a good job for most. Big fish can be held over the gunnel while they bleed out. Smaller panfish can go into a livewell that’s pumping fresh water. Either way, move the fish to a cooler of ice immediately after it’s dispatched.
Speaking of coolers, don’t be stingy with a handful of ice or frozen ice packs. Utilize a large amount of ice, and cover all of your fish completely. It’s one of the most underrated steps of ensuring top flavor. Saltwater anglers often go the extra step of utilizing “slush ice,” mixing cubes with a bit of seawater, to bring the temp down even lower and entombing their catch.
To sum up: bleed your fish if you want, but cool them all immediately.
Step 2: Care at Home
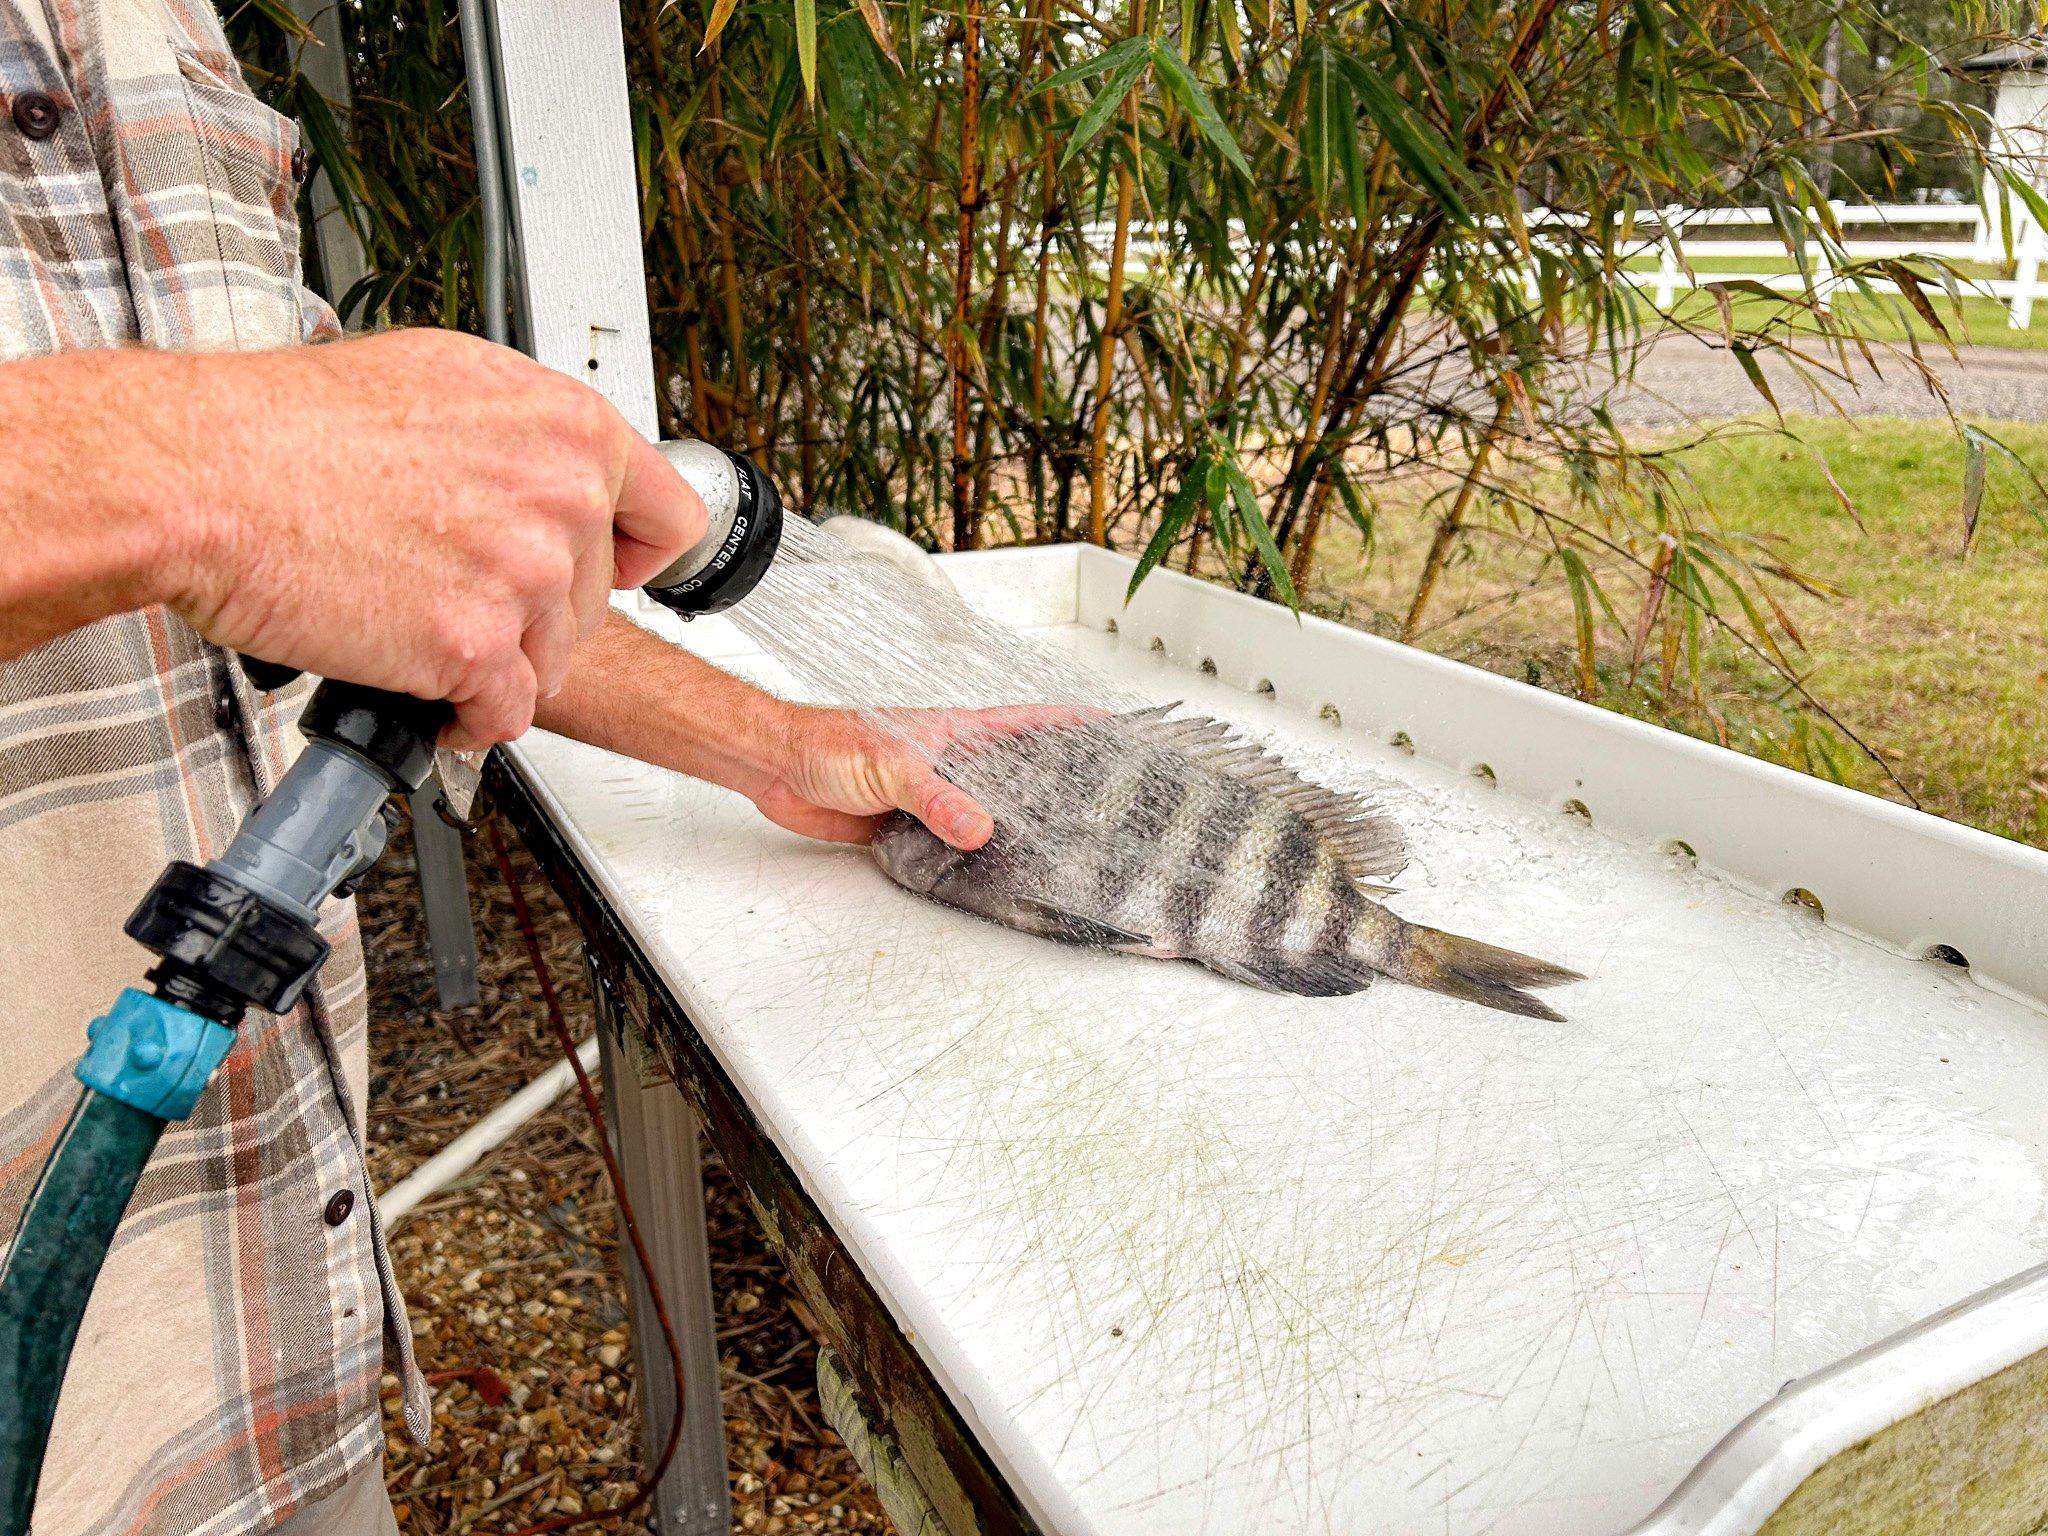
Thoroughly rinse the both the fish and the cleaning area before starting the cleaning process to remove any slime and keep the finished fillets pristine. Image by Millennium Promotions, Inc.
After you finish your day on the water, keep your catch on ice until it’s ready to clean. Some fish benefit from a full day of icing prior to cleaning; crappies, for example, are much easier to clean the next day, rather than the same day they are caught. Lane snapper benefit as well, as do catfish from warm water, or bluefish anytime. Any soft-fleshed fish can benefit from some time on ice. Just remember to keep the fish completely covered in ice. Remove the plug from your cooler (be sure it’s outside!) to reduce water from pooling on your catch.
***Don’t Miss: *HOW TO FIND BASS ON A NEW LAKE
Step 3: Prep the Cleaning Station
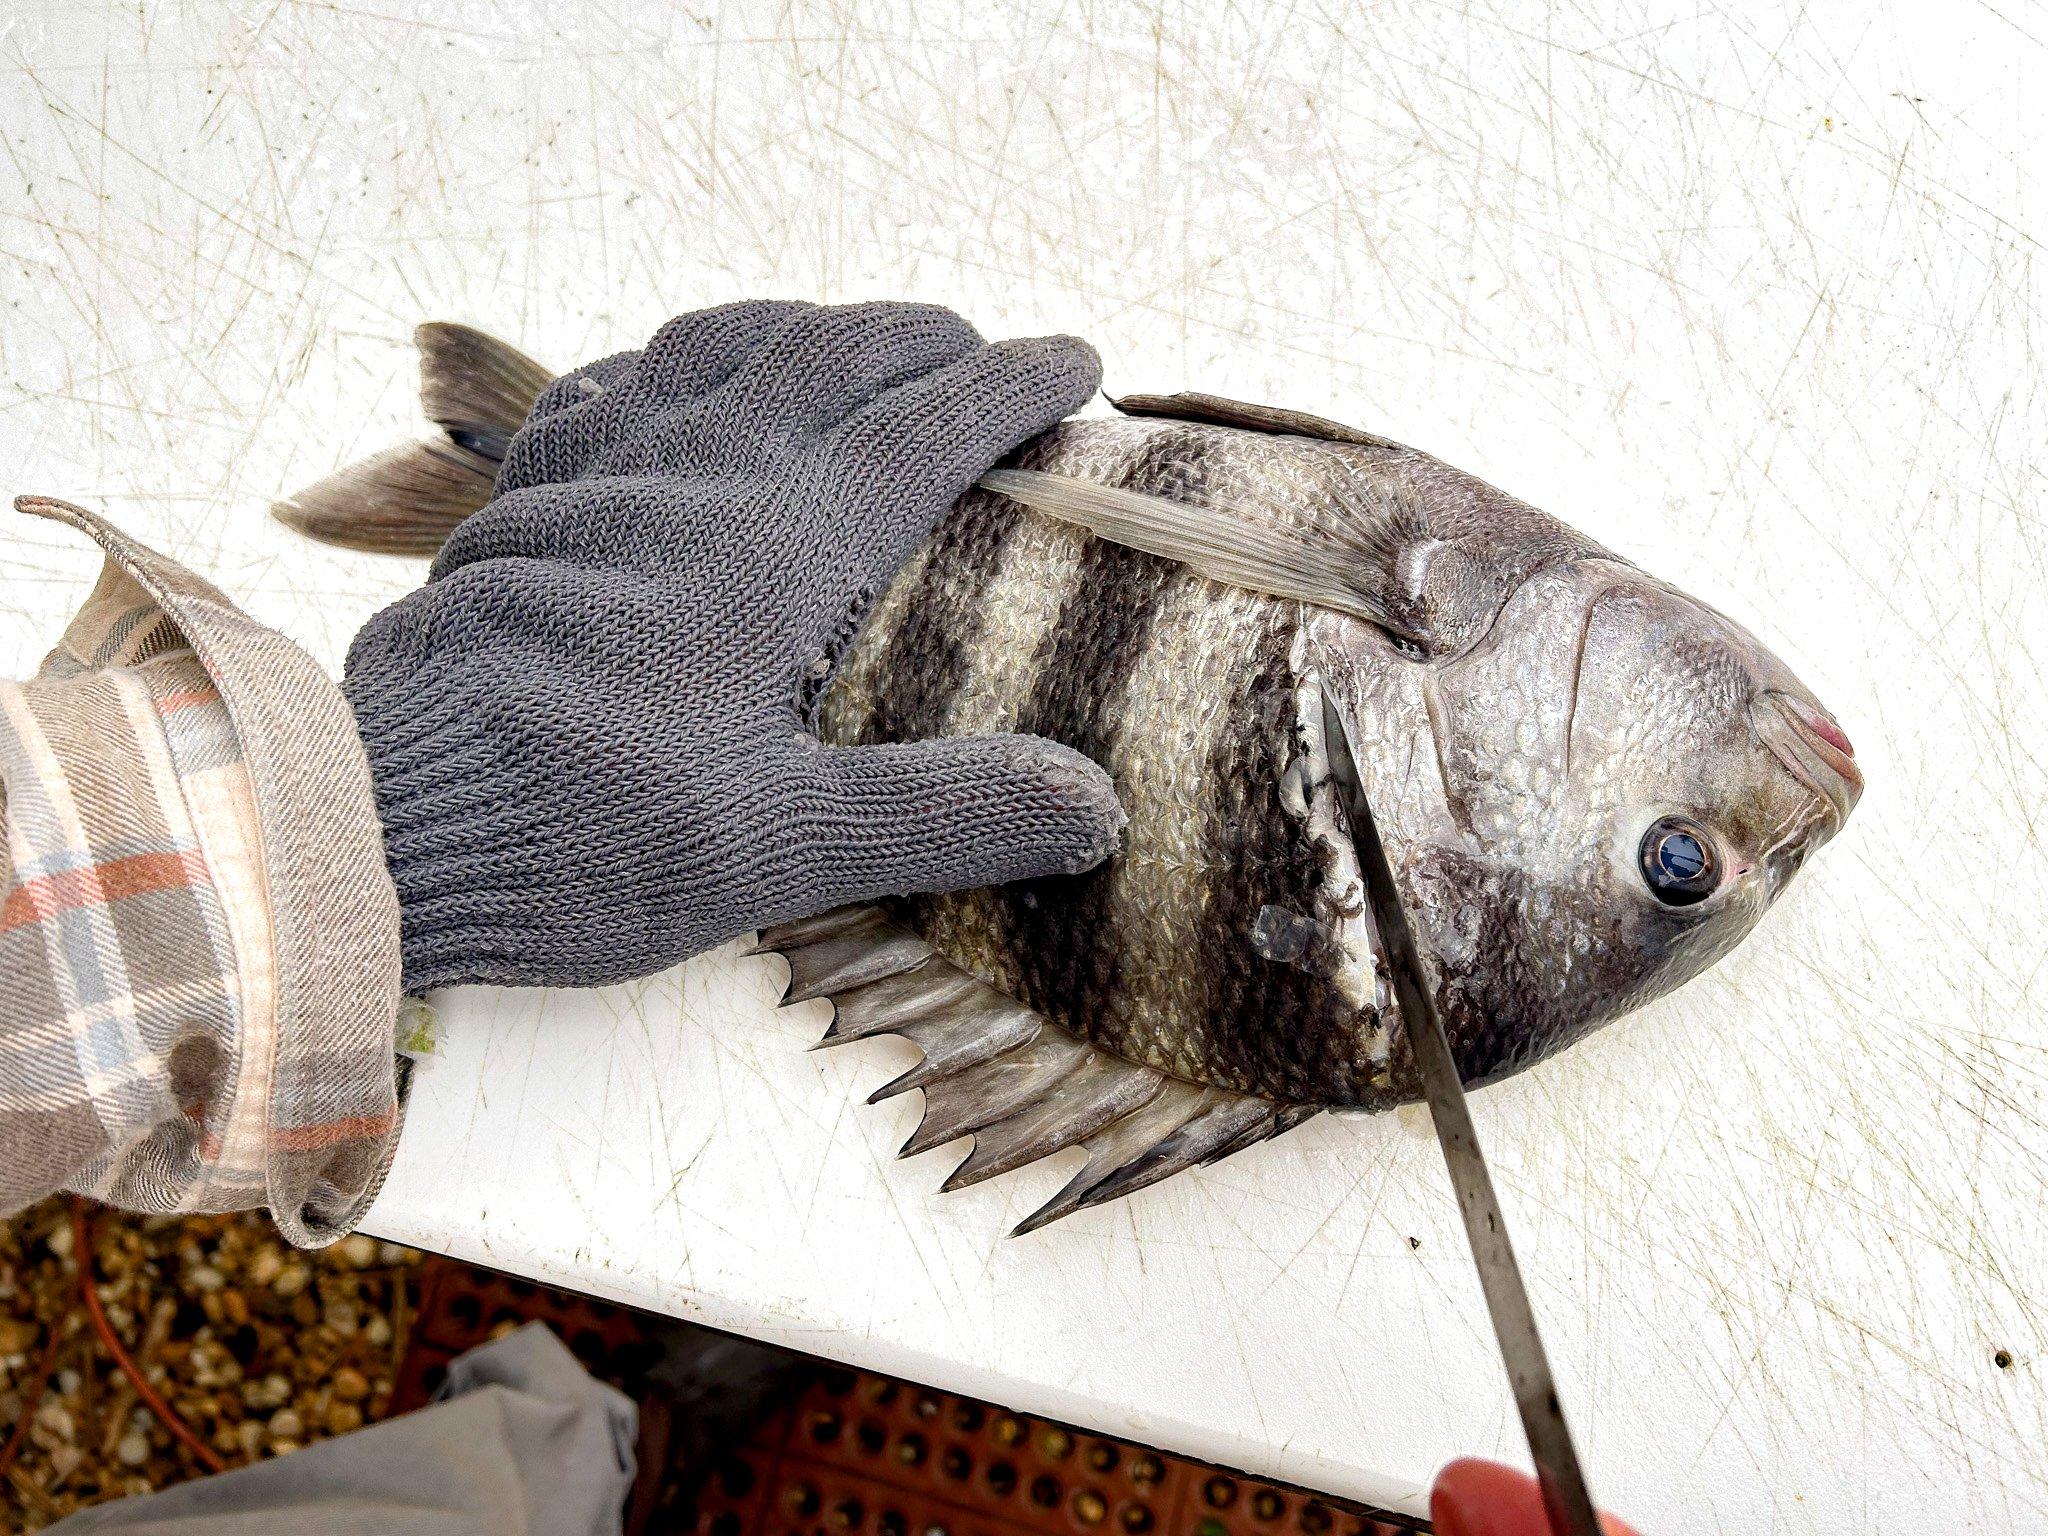
Wear a cut-proof glove while cleaning fish to prevent nicks, cuts, and infections. Image by Millennium Promotions, Inc.
Sometimes I watch in disbelief as charter captains unload a fish box full of keepers at the cleaning station, only to have those fish sit in the heat for hours while they labor through the pile. Why care for your catch onboard, only to allow it to get warm a few hours later?
While cleaning fish, my crew keeps them iced, before and after. A fish or two comes out of the cooler, is cleaned, then the fillets are immediately placed back on ice.
The first step in cleaning is to rinse each fish thoroughly. This removes any excess slime, preventing it from contacting the meat, and making the fish easier to handle.
I’ve cleaned tens of thousands of fish in my lifetime. Long-ago, I adopted the principle of always wearing a cut-proof knife glove. I did this after watching a captain wince in pain from a majorly infected palm wound he suffered while cleaning salmon. Since the captain couldn’t afford to stay off the water, that wound got infected several times before a surgery was required.
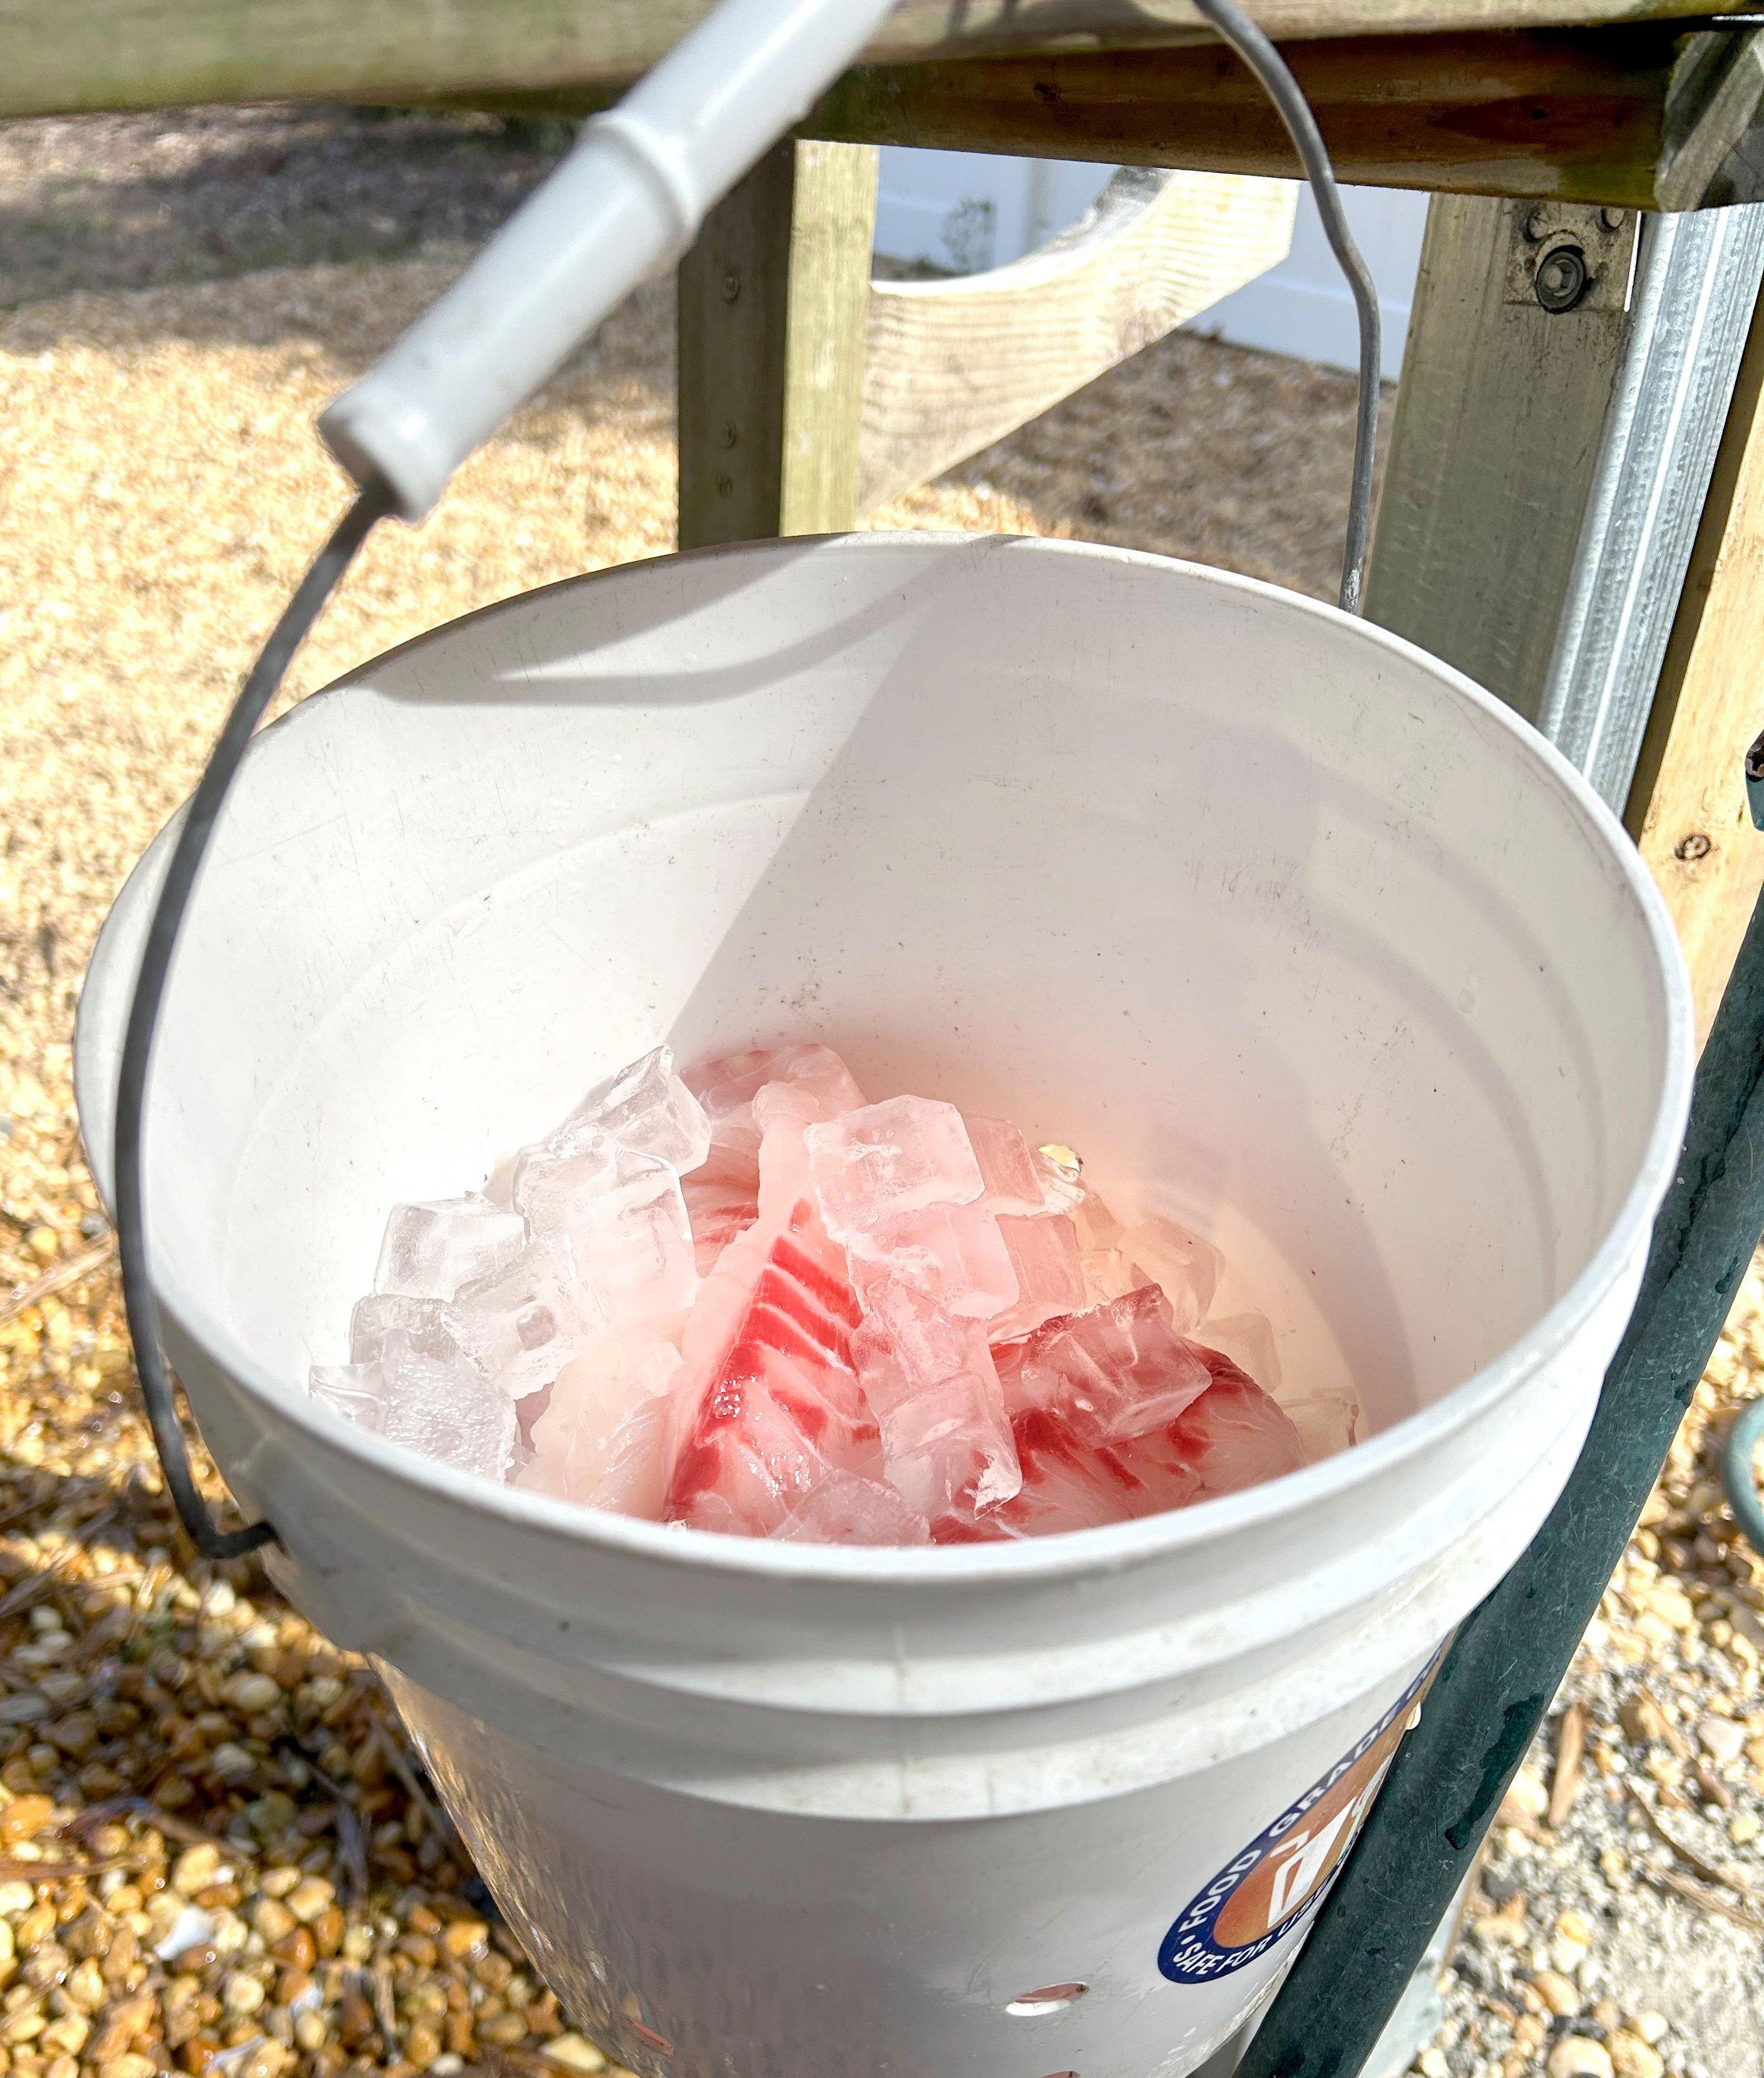
The author keeps a bucket of ice with drain holes hanging near his fish-cleaning station. This ensures fillets always stay cold. Image by Millennium Promotions, Inc.
Besides safety, a fish-handling glove really aids in the ability to securely hold a cold, slimy creature, making it ideal for use at the cleaning table. The gloves clean up easily and don’t really hold any smell.
Most anglers know the basics of filleting, but here’s a trick if you clean tough-skinned fish: Do all you can to cut from the inside, out. By that I mean insert your knife, then rotate its blade up, as if gutting a deer. This reduces blade dulling tremendously, particularly on tough fish like sheepshead and triggerfish.
Skinning is easy, should you choose. For species where “skin-on” is the choice, it’s almost always best to first scale the fish. Boning out most fillets simply requires a “V” shaped cut where the rib bones remain.
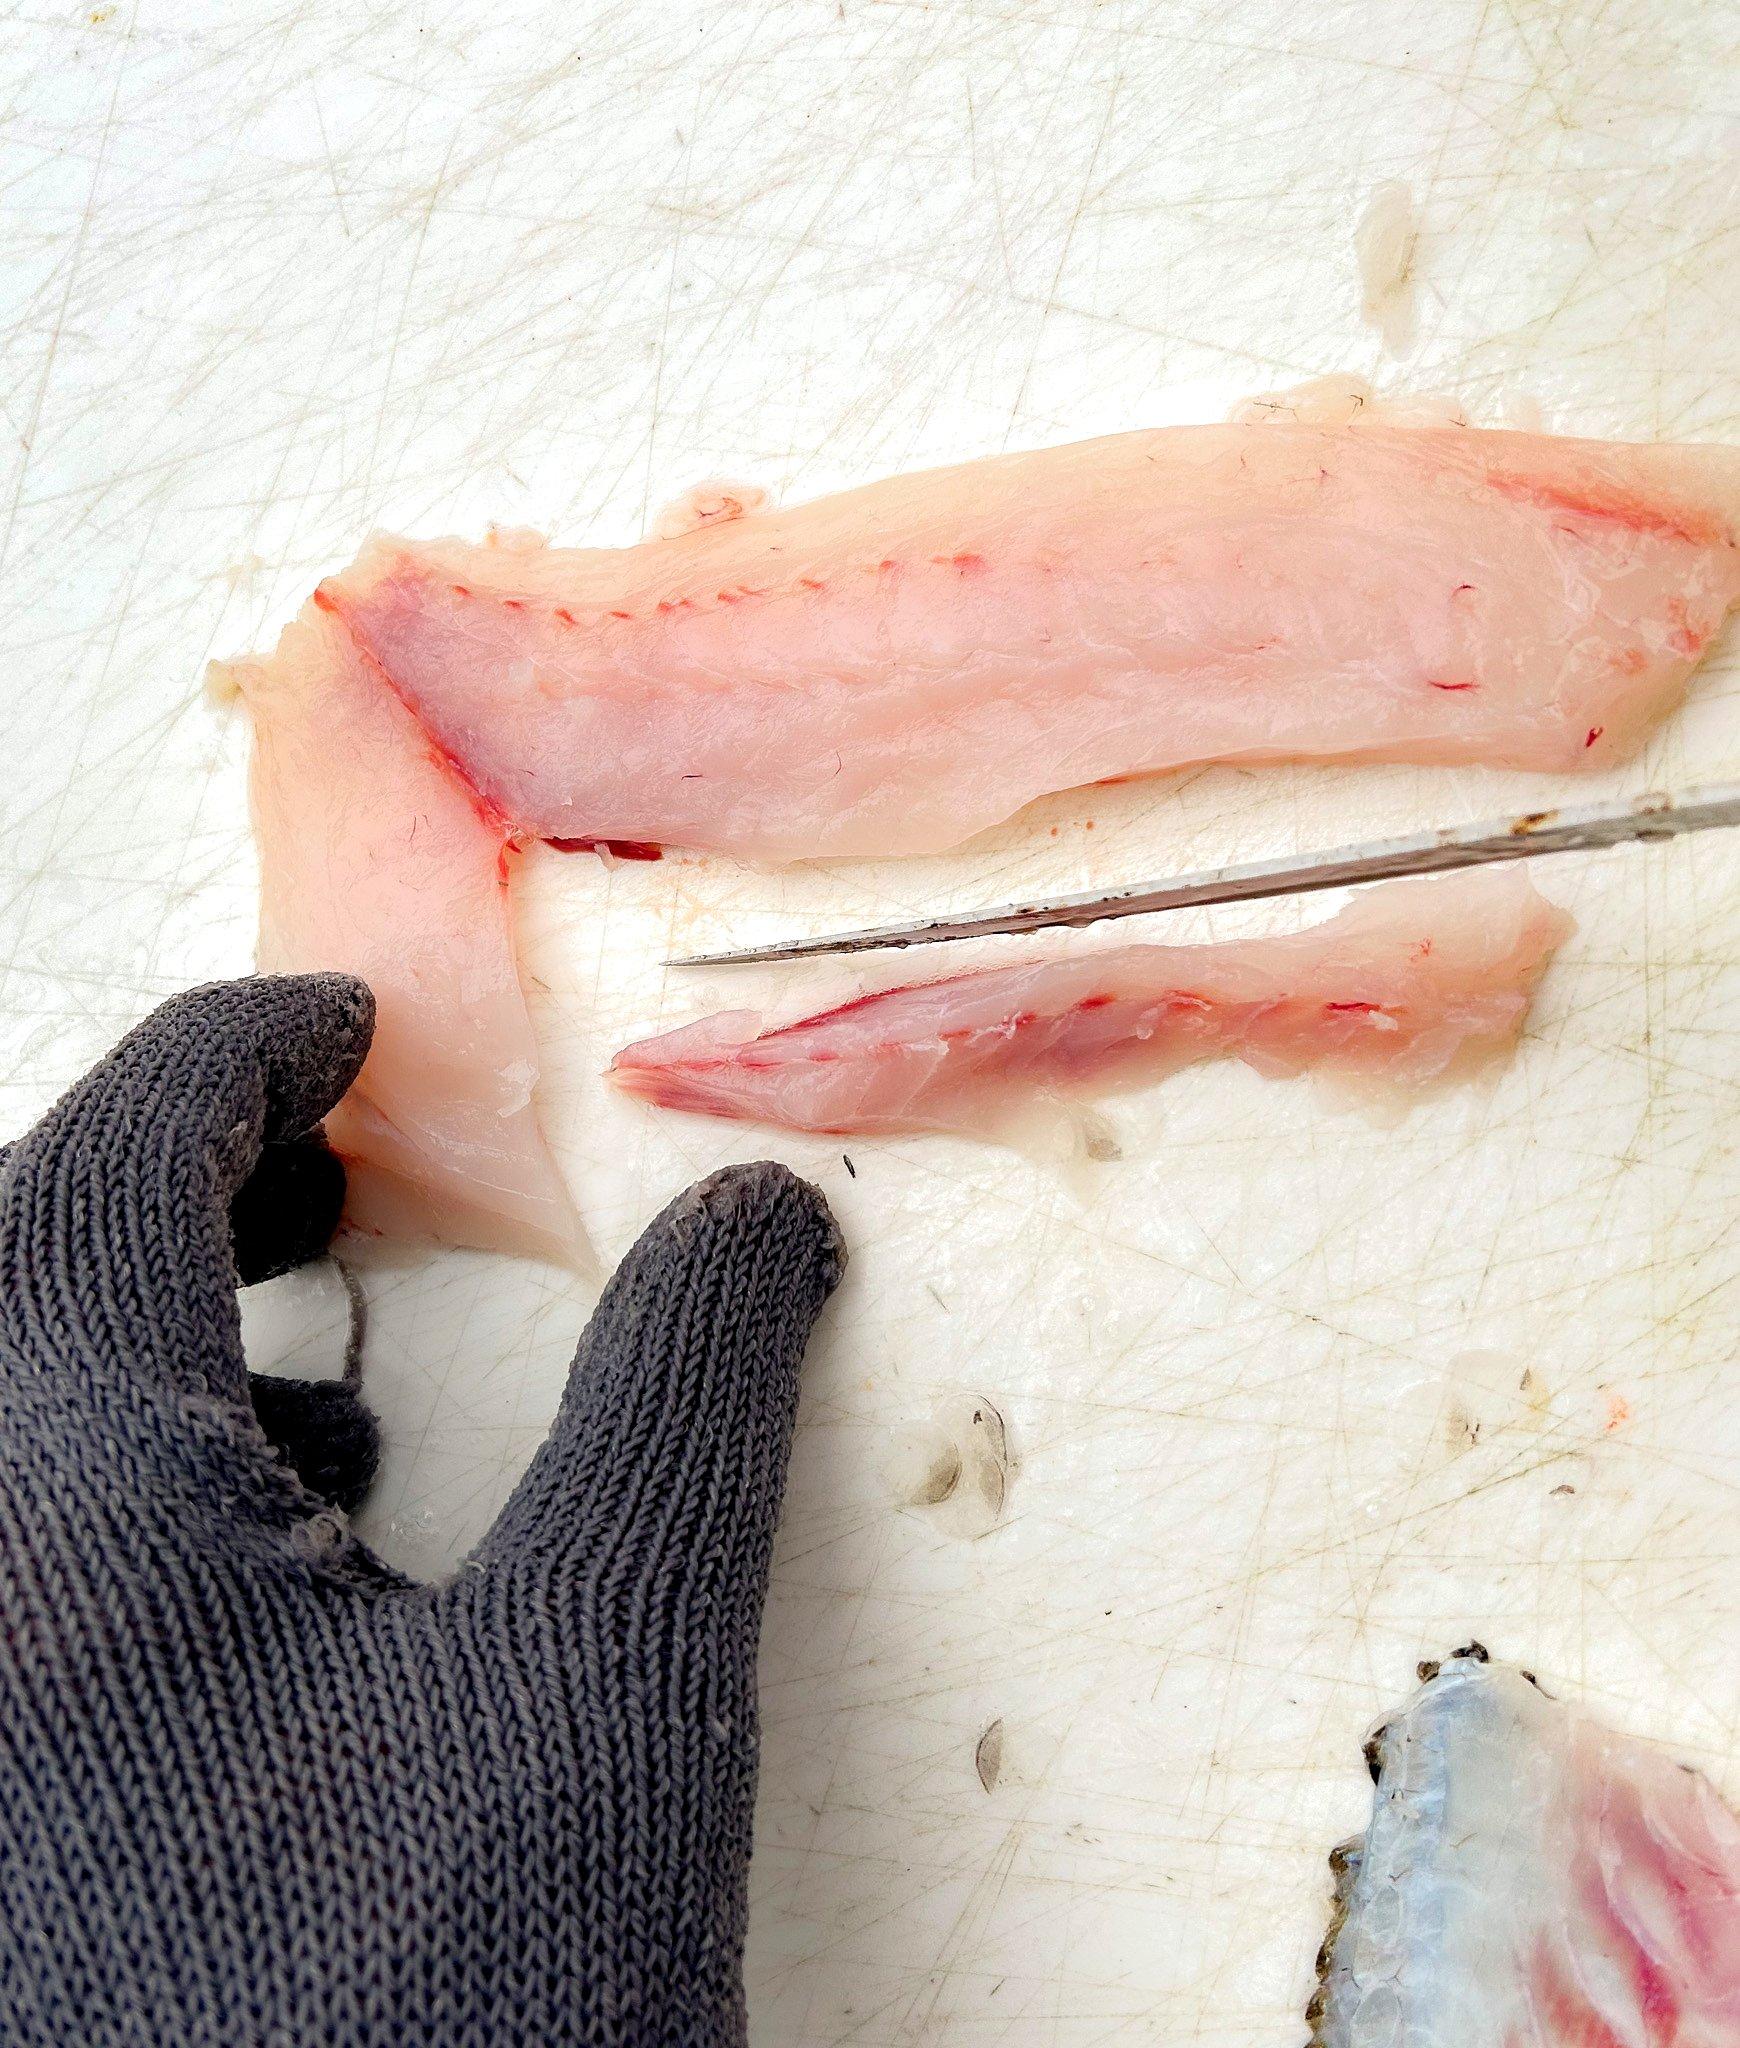
Remove the rib bones from the fillet by making a V-shaped cut above and below. Image by Millennium Promotions, Inc.
After skinning and boning, be sure to cut out any of the red meat that remains in the fillet. This, again, is the blood source, and can cause an unpleasant “fishy” taste in certain species. Finally, with all steps complete, rinse and re-ice the meat.
A simple trick for chilling fillets is to utilize a fillet bucket with holes. Toss in a few cleaned fillets, add a little ice, and repeat. The entire bucket can be rinsed together, and the ice acts as a mild scrubbing agent on the filets. A two-gallon bucket hangs from my filet table at all times and works perfectly for this process.
Step 4: Cooking Considerations
While most fish can now move right to the cooking stage, a few will benefit from a rest. Like quality steak and game, certain fish are best when aged. Tuna aficionados know the value of aging prime cuts, and some sushi-grade tuna is aged for 20 days or more. This produces a more robust flavor as moisture in the meat is reduced.
I’ve found certain fish benefit from a process of aging, especially those with a soft, wet texture. Using snapper as an example, the fish is best cleaned, held cold and uncovered for 2-3 days. I accomplish this by keeping it on top of a layer of ice in a cooler (again, with the drain plug removed), in a refrigerator or in a Ziploc bag, covered in paper towels that are changed out daily. The key is to allow the moisture of the fish to essentially evaporate, creating a denser, more flavorful product. This also allows for easier cooking.
***Don’t Miss: *THE 5 BEST LIVE-BAIT RIGS MADE FOR WALLEYE FISHING
Step 5: Storage
If you’re not planning to cook your fish soon after catching, it’s best to freeze the fillets. Some fish freeze better than others. Firm, white-fleshed fish (walleye, perch, crappie, halibut, striped bass) do extremely well in the freezer. Fish with higher oil contents (grouper, cobia, mackerel) don’t hold up as well, and should be utilized within the first few months. Also, those oilier fishes are simply much more flavorful fresh. Regardless, the concept of successful freezing is simple: no contact of the food product to air.
No matter the method you use for packaging, always label the fish clearly with the date and species. Image by Millennium Promotions, Inc.
I’m old-school, and still freeze most of my fish in a container, submerged in saltwater. Old timers remember utilizing half-gallon milk cartons for this purpose. I buy screw-lid, quart-sized containers. I’ve got plenty of freezer space, and I enjoy having the fish in a relatively stout container, a I often toss a few in the cooler when I travel, and they stay frozen for days.
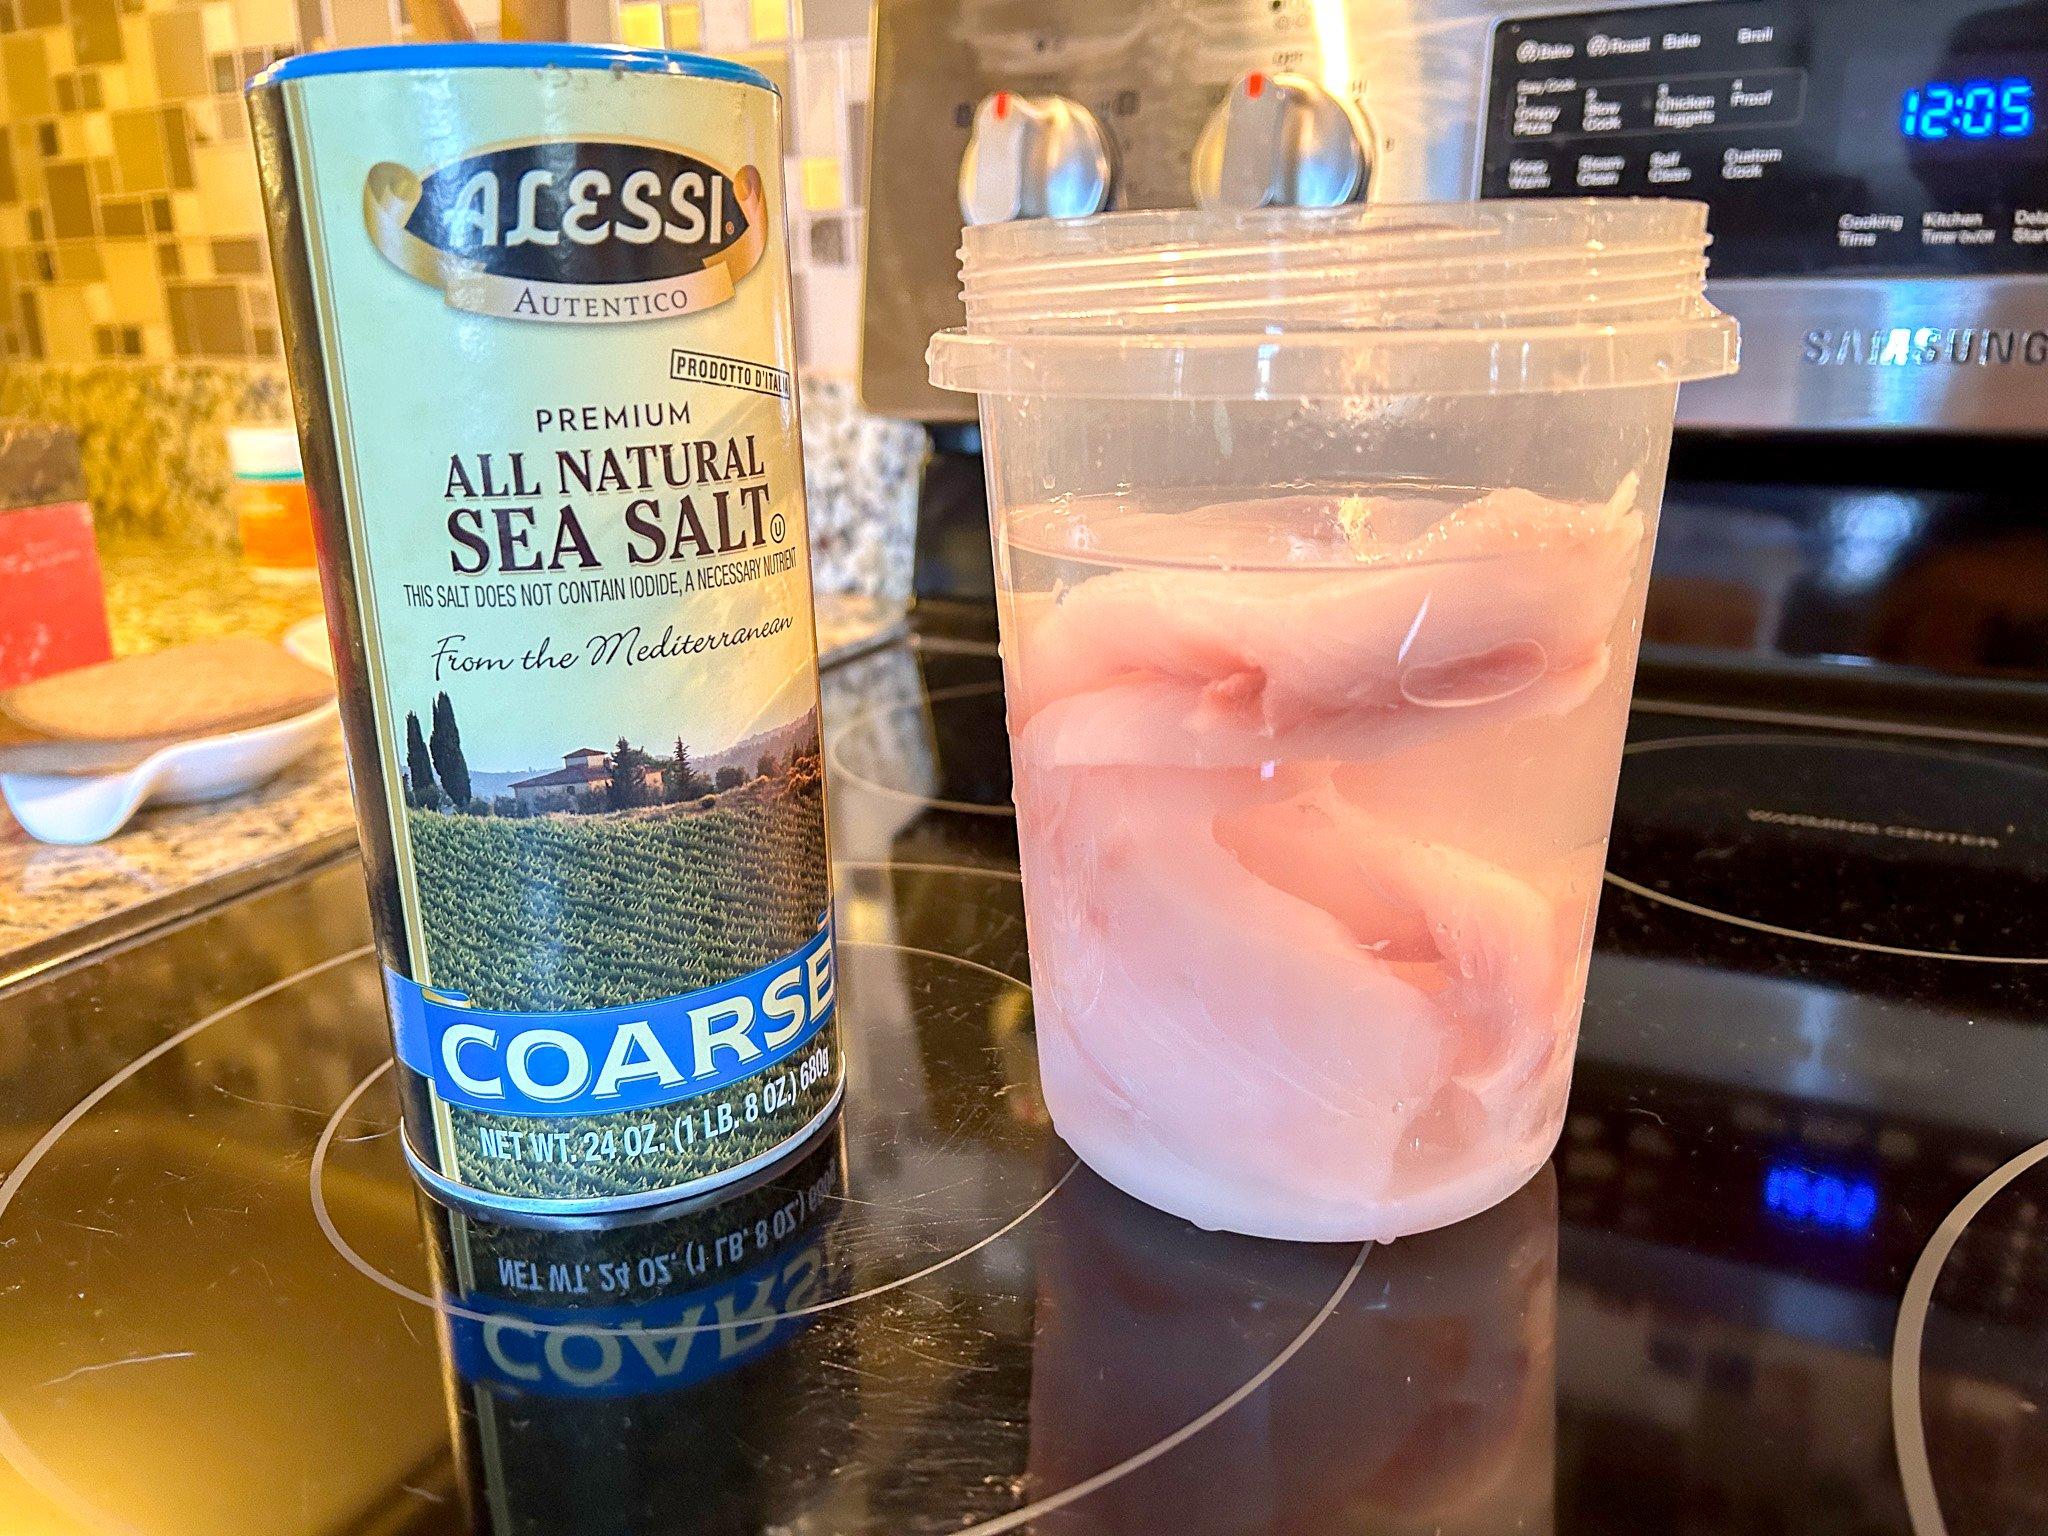
Freezing fish in a saltwater bath inside stout plastic containers will keep it fresh and flavorful for extended periods and makes transporting easy. Image by Millennium Promotions, Inc.
Many avid anglers use vacuum sealers, and modern models work extremely well. These greatly reduce your freezer footprint, allowing fillets to be stacked together and take up almost no room. In either case, you’ll benefit from freezing smaller portions, and only thawing what you cause for a meal or two. I label mine by portion size.
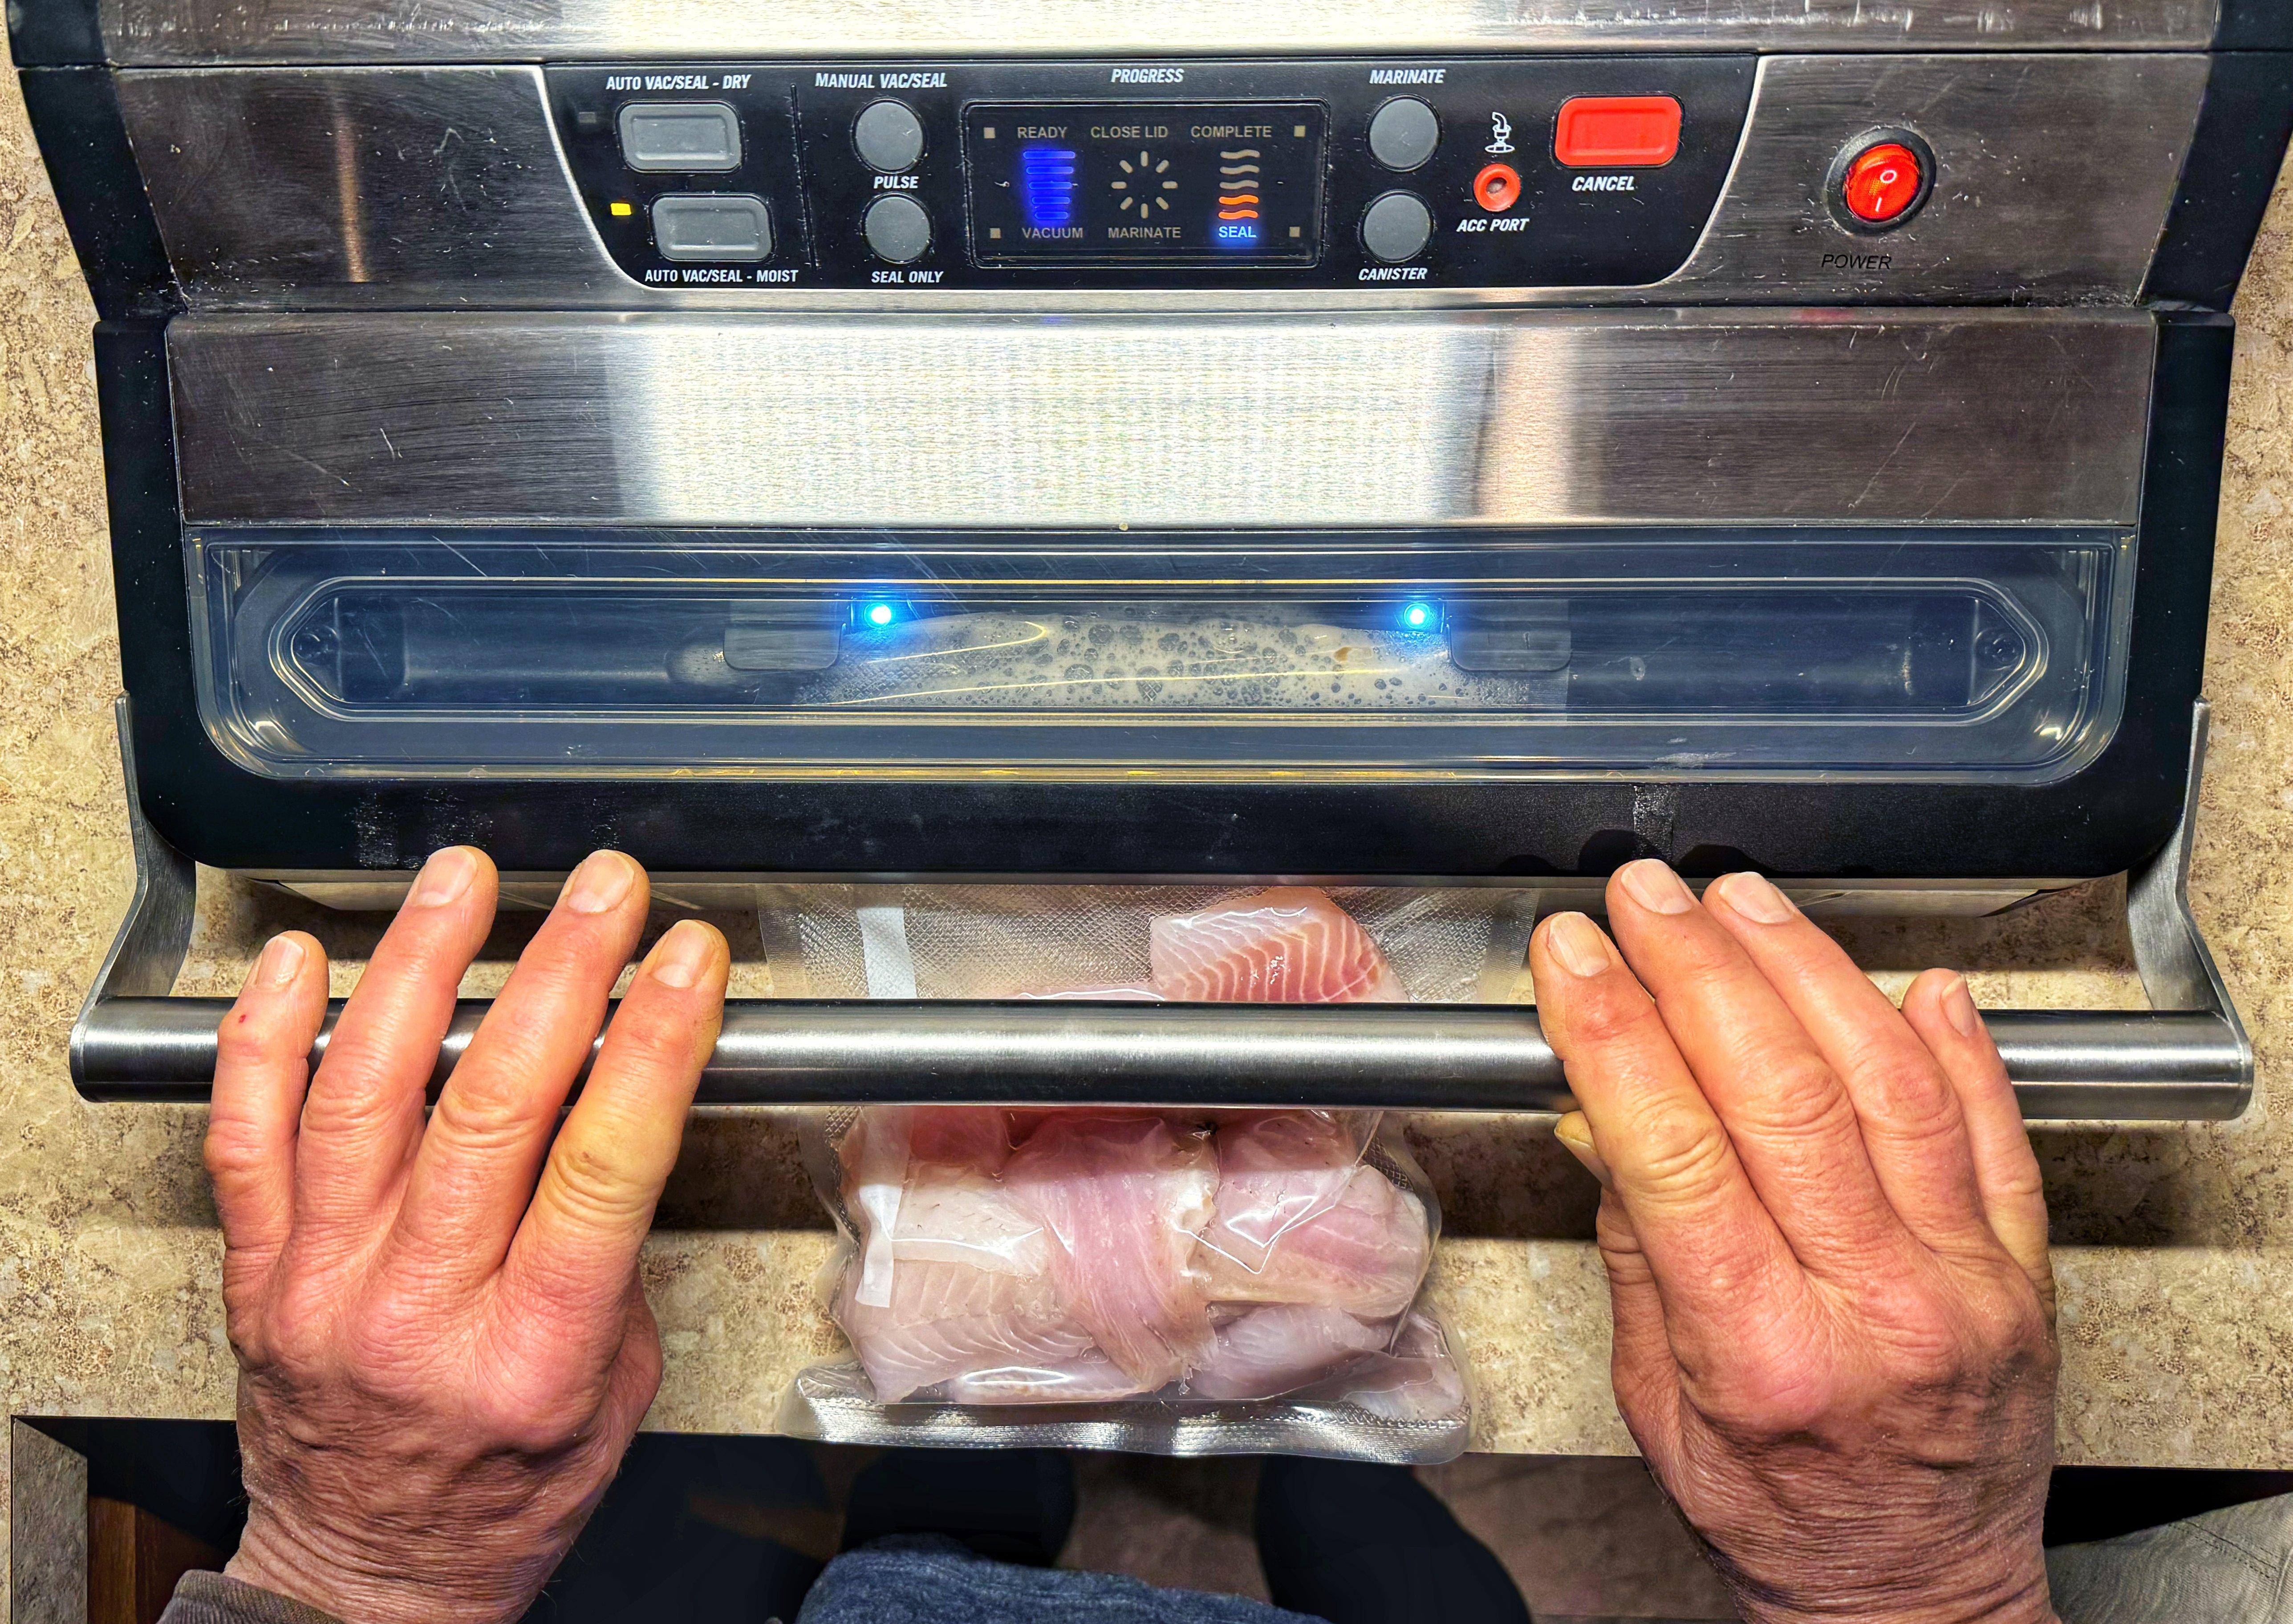
Vacuum sealing fish before freezing keeps the meat fresh and reduces the space it takes up in the freezer. Image by Bill Konway.
If using Ziploc bags, fill a sink with water, and submerge the bag after filling it with fish to ensure all the air escapes. It’s a neat trick for getting the air out of just about anything.
With a successful fishing trip in the books, a fresh meal, and a bit saved for the freezer, we can all appreciate our time on the water. I’ve always loved catching, cleaning and eating fish. Saltwater species immediately come to mind as favorites on the table. Flounder, grouper, and mahi-mahi are top choices for restaurants and lucky anglers alike. But freshwater fish comprise the bulk of fish dinners at home. Crappies and catfish reign supreme across the South, while walleye and perch take top honors across the Great Lakes region. Bluegills are popular everywhere and oh, fresh salmon.
Maybe one of my favorite things about eating fish is that I’ve never quite settled on which kind I enjoy the most.