How to Make Homemade Soap From Deer Fat
Posted 2024-01-31 by
Don’t let the fat from your deer go to waste when you can use it to make some of the best soap you’ve ever used
We don’t cook with with deer fat. Instead, we trim it away before we package our hard-earned venison and send it to the freezer. But have you ever looked at a thick layer of bright white fat on the outside of a late-season deer in a good acorn year and thought to yourself that there should be a way to use something so beautiful?
If you have ever wished you could use the fat from your deer, this is for you.
There is. While it isn’t great for eating, that fat (or the fat from elk, moose, bear, or wild pig) makes some of the best soap you’ve ever taken to the shower. The process might seem daunting at first, but it’s really pretty simple. Do I think there will come a day when we are forced to make our own soap or stay dirty? Probably not, but it’s a neat skill to have and a cool way to use up even more of your deer. Plus, it makes really good soap that is excellent for your skin. It is hypoallergenic, foams nicely, and lasts longer than mass-produced bar soaps.
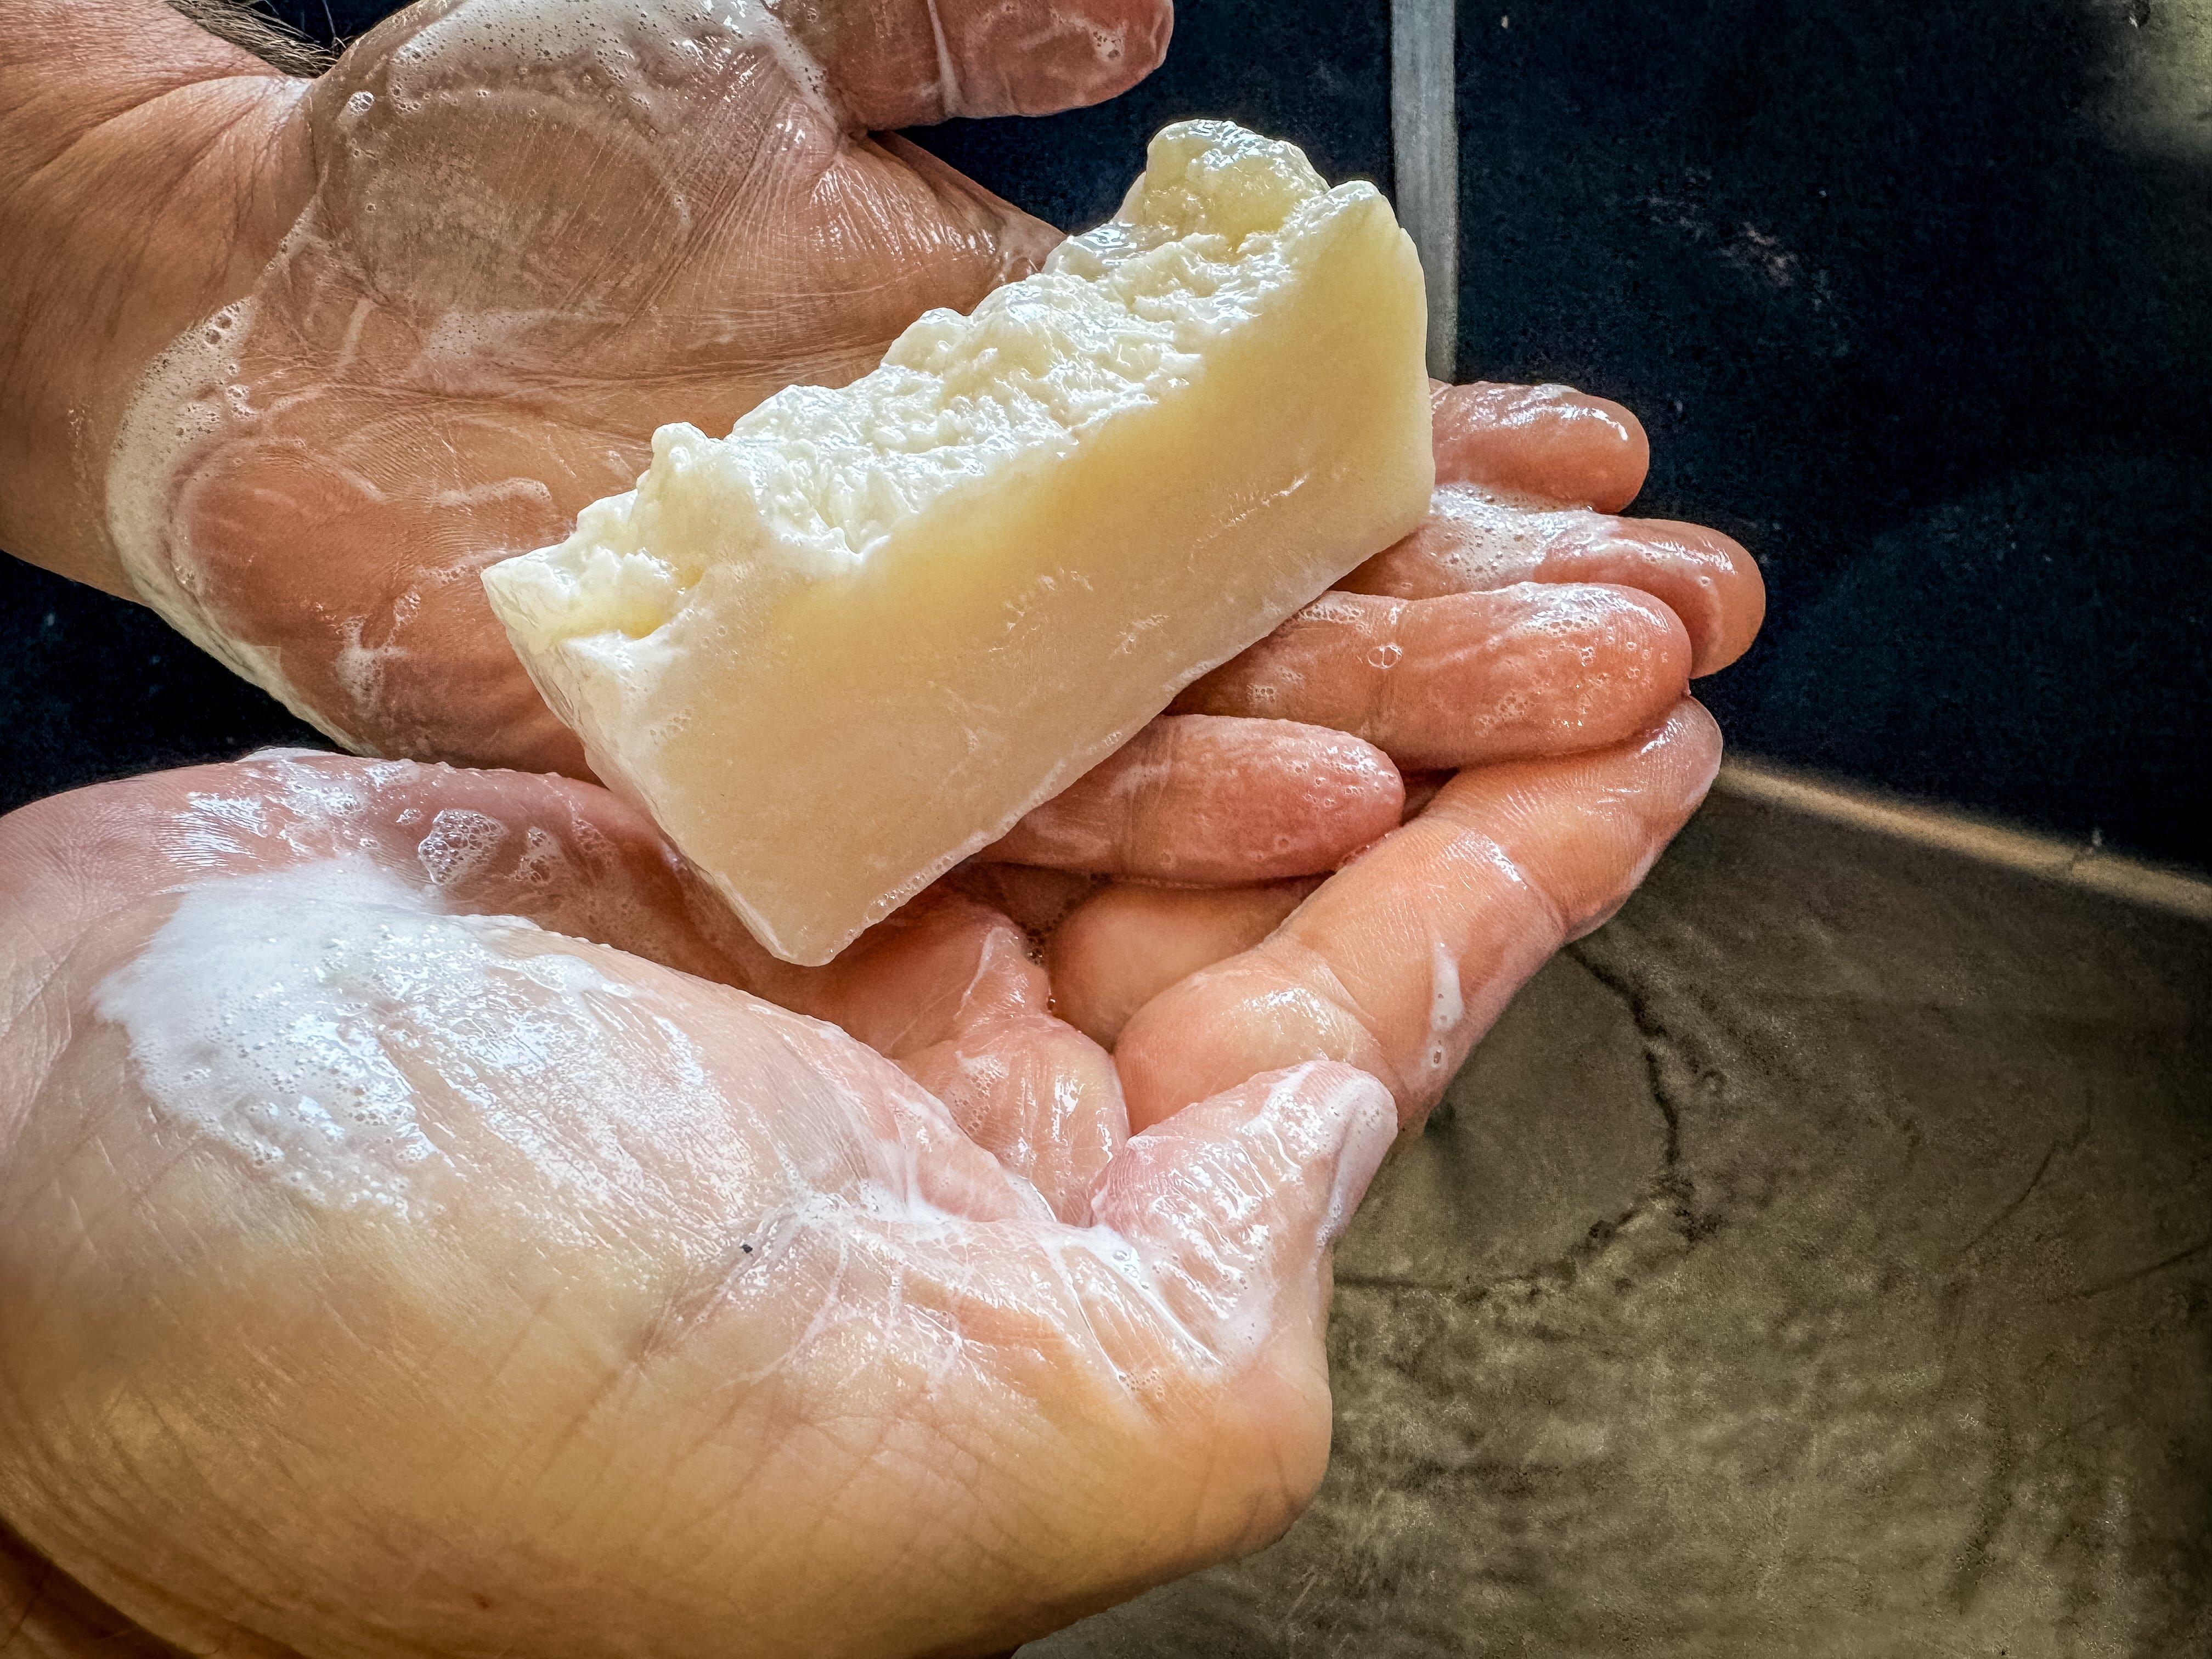
Homemade soap cleans well and is great for your skin.
You will need a few supplies. Some of it you probably already have at home; the rest can be ordered online or purchased at most supermarkets.
• 10-15 pounds deer fat
• Soap-grade lye
• Digital scale
• Distilled water
• Cheesecloth
• Mesh strainer
• Glass or stainless-steel bowl
• Jars for storage if you aren’t using the fat right away
• Options: honey, essential oils, herbs
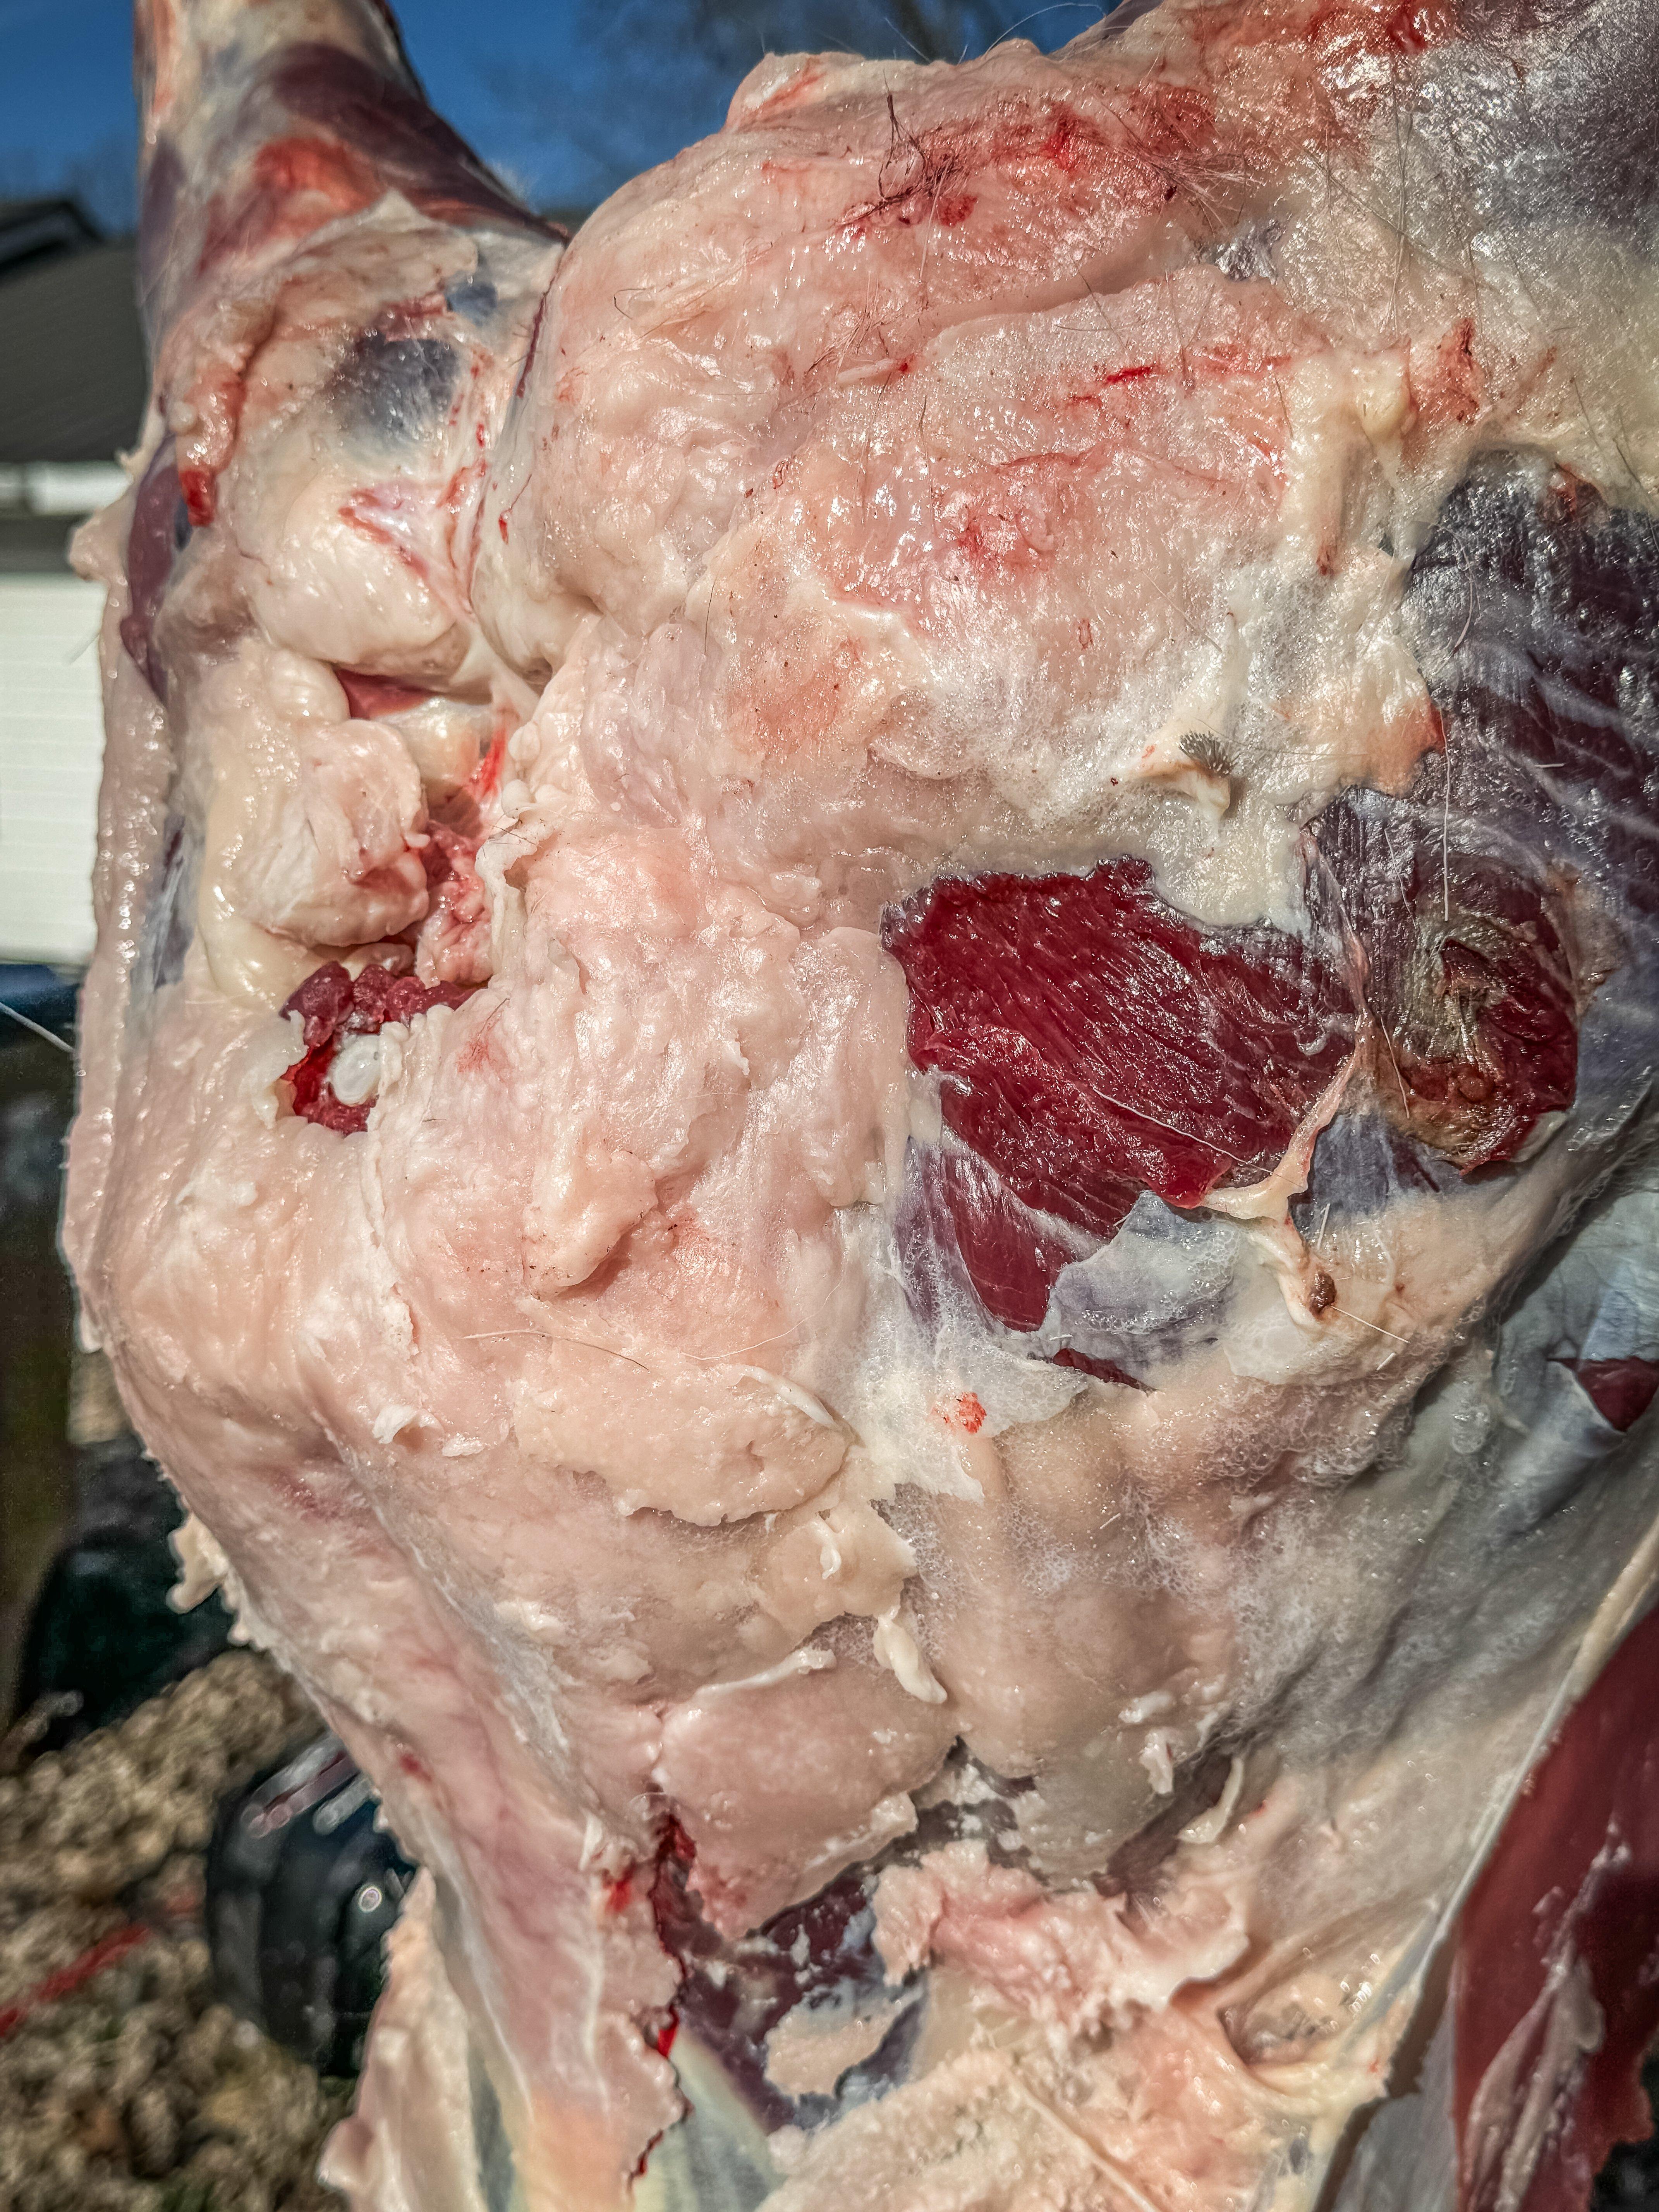
Start by harvesting the fat. Just trim it off the back and pull the hard fat from around the organs. Harvest the fat as soon as you skin your deer, and get it bagged and in the fridge or freezer until needed. Trim as much meat away as possible, leaving only the fat. Deer fat is rich in omega-3 acids and tends to turn rancid quickly when exposed to air. Getting the fat bagged tightly and cooled slows that process. That is one of the reasons I like to trim my venison before freezing.
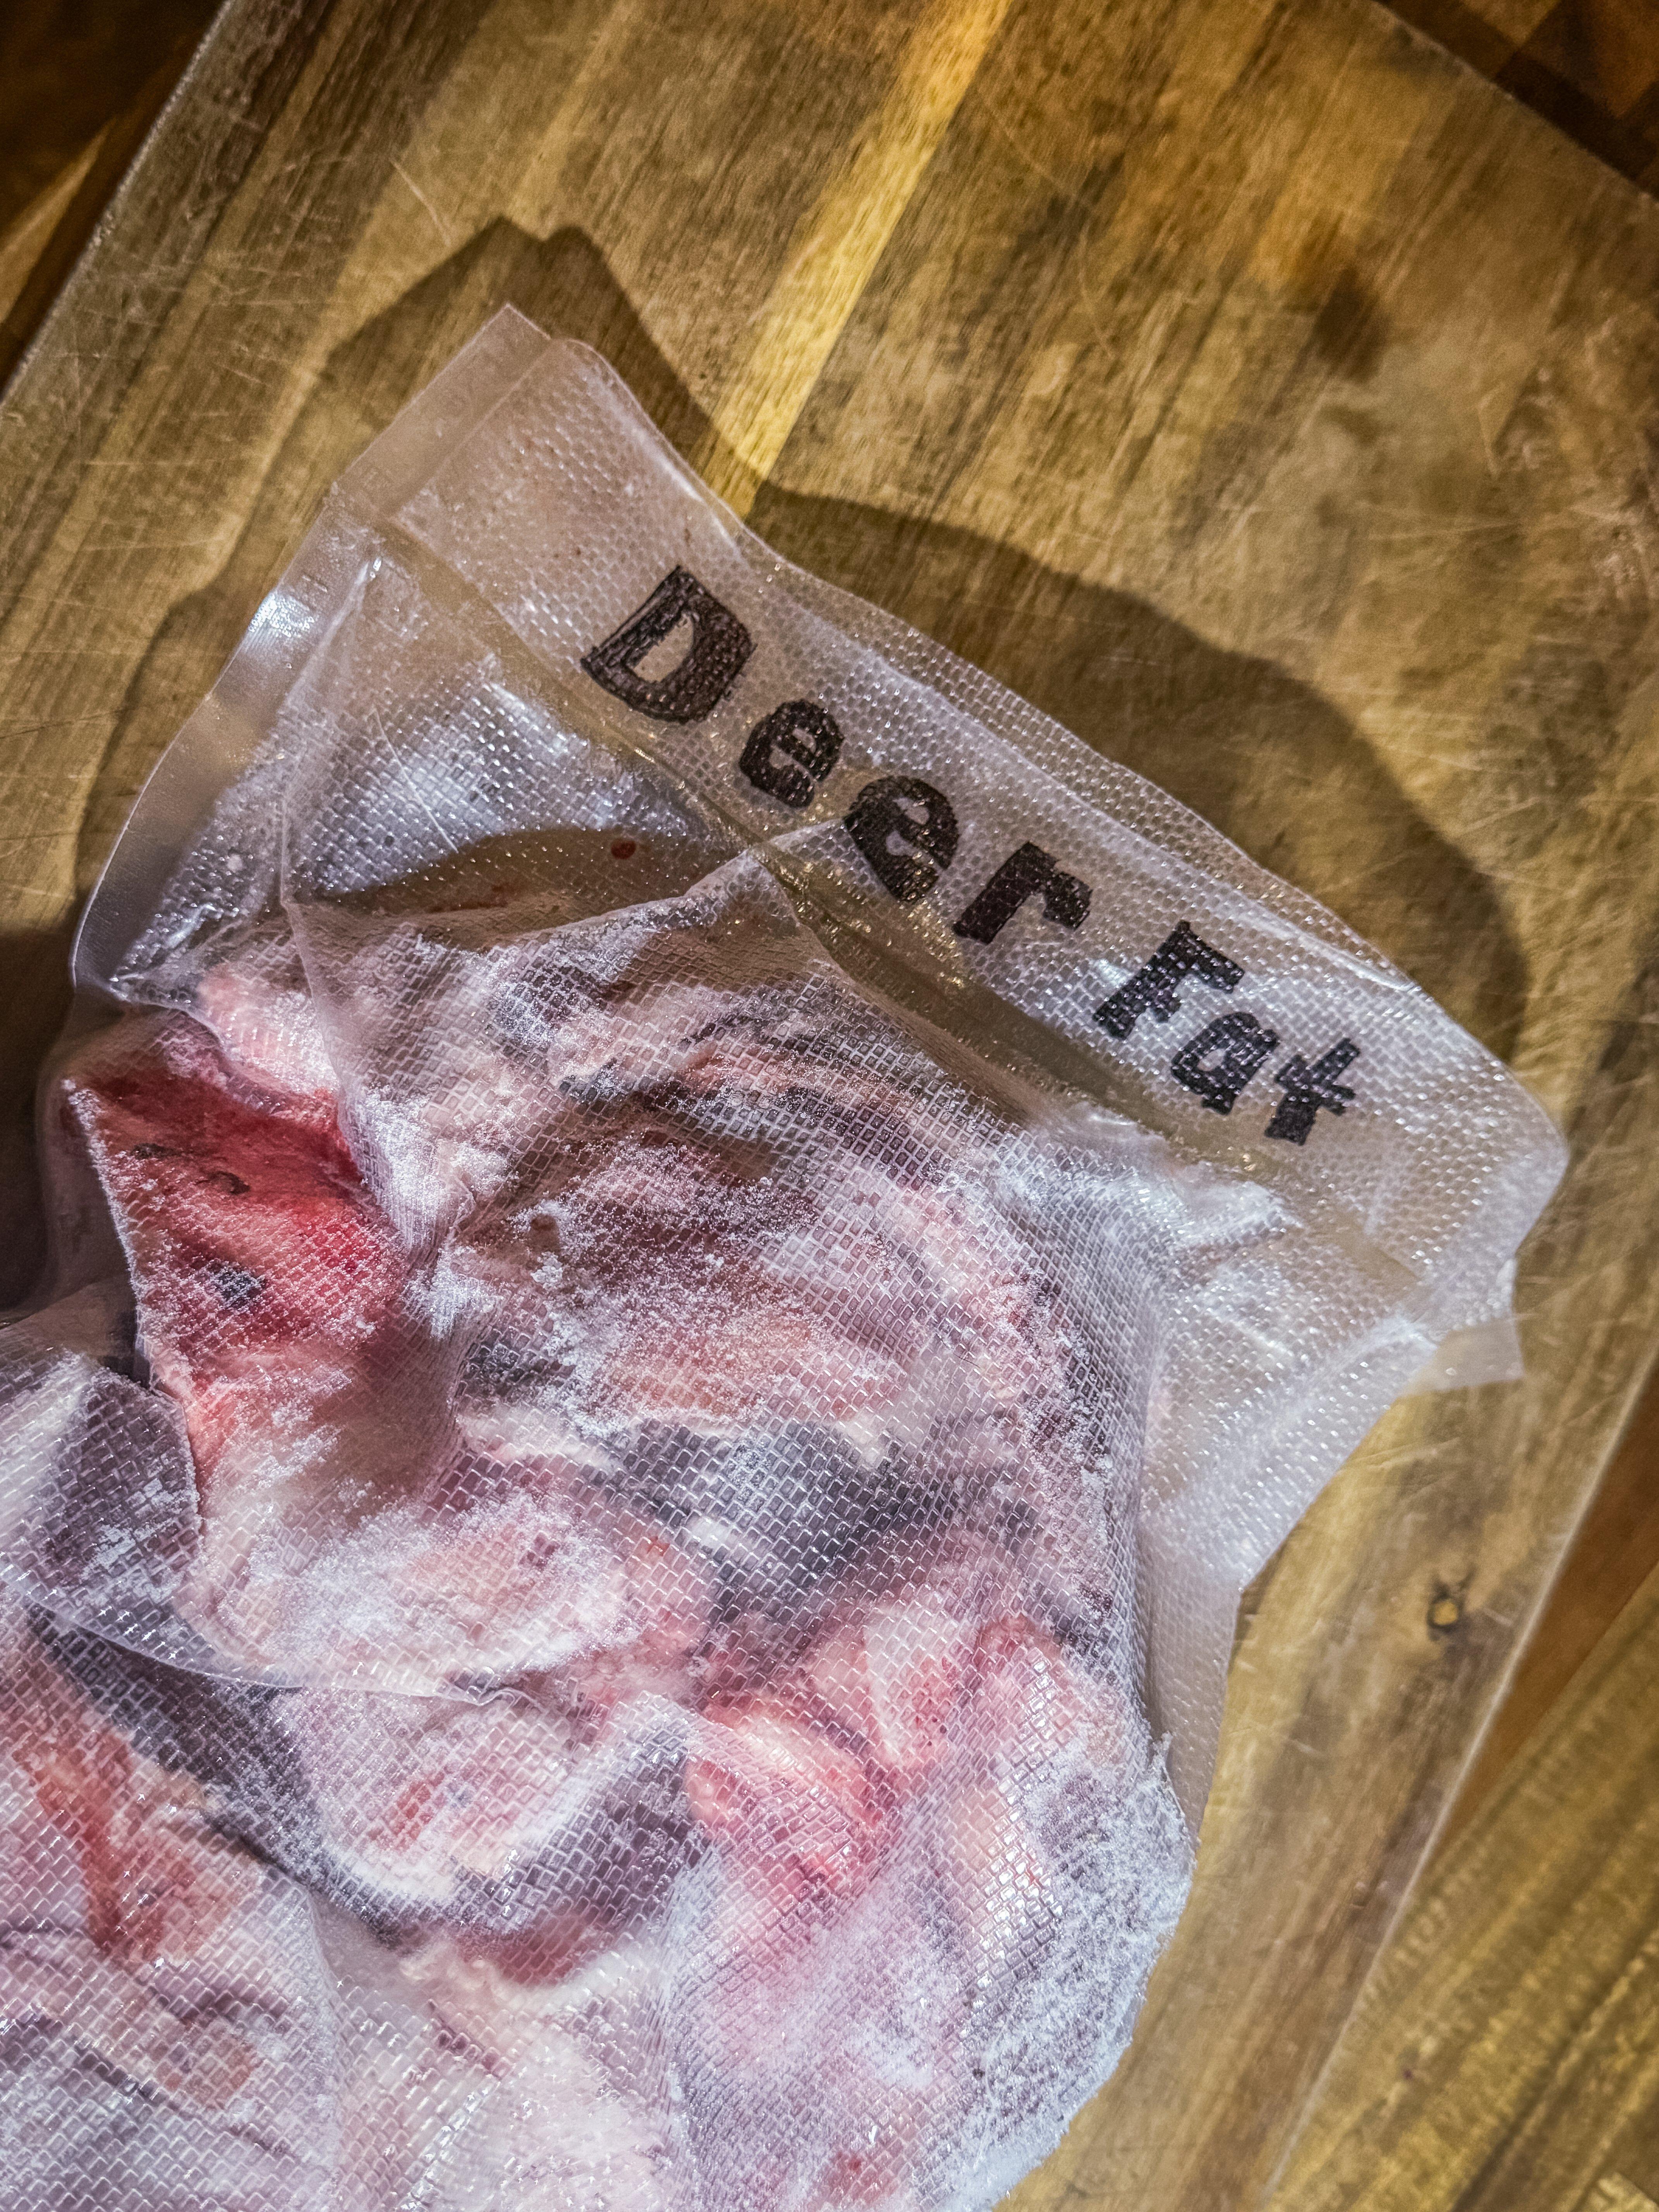
Vacuum seal and freeze the fat until you have enough to make soap.
Depending on the deer and the food availability where you hunt, it might take the fat from three or four deer to get enough for a batch of soap. Just keep freezing it after each skinning session until you have enough.
Once you have the fat and are ready to make soap, you will need to render it into tallow. You can do that in a large stockpot on the stovetop, but I prefer a slow cooker for this task. It takes the guesswork out of it and prevents scorching that might occur if your pot gets too hot.
Start by chopping the cold fat with a sharp knife or by running it through a meat grinder with a large plate attached. The smaller the pieces, the faster the fat renders. You can do larger chunks, but add some time to the rendering process.
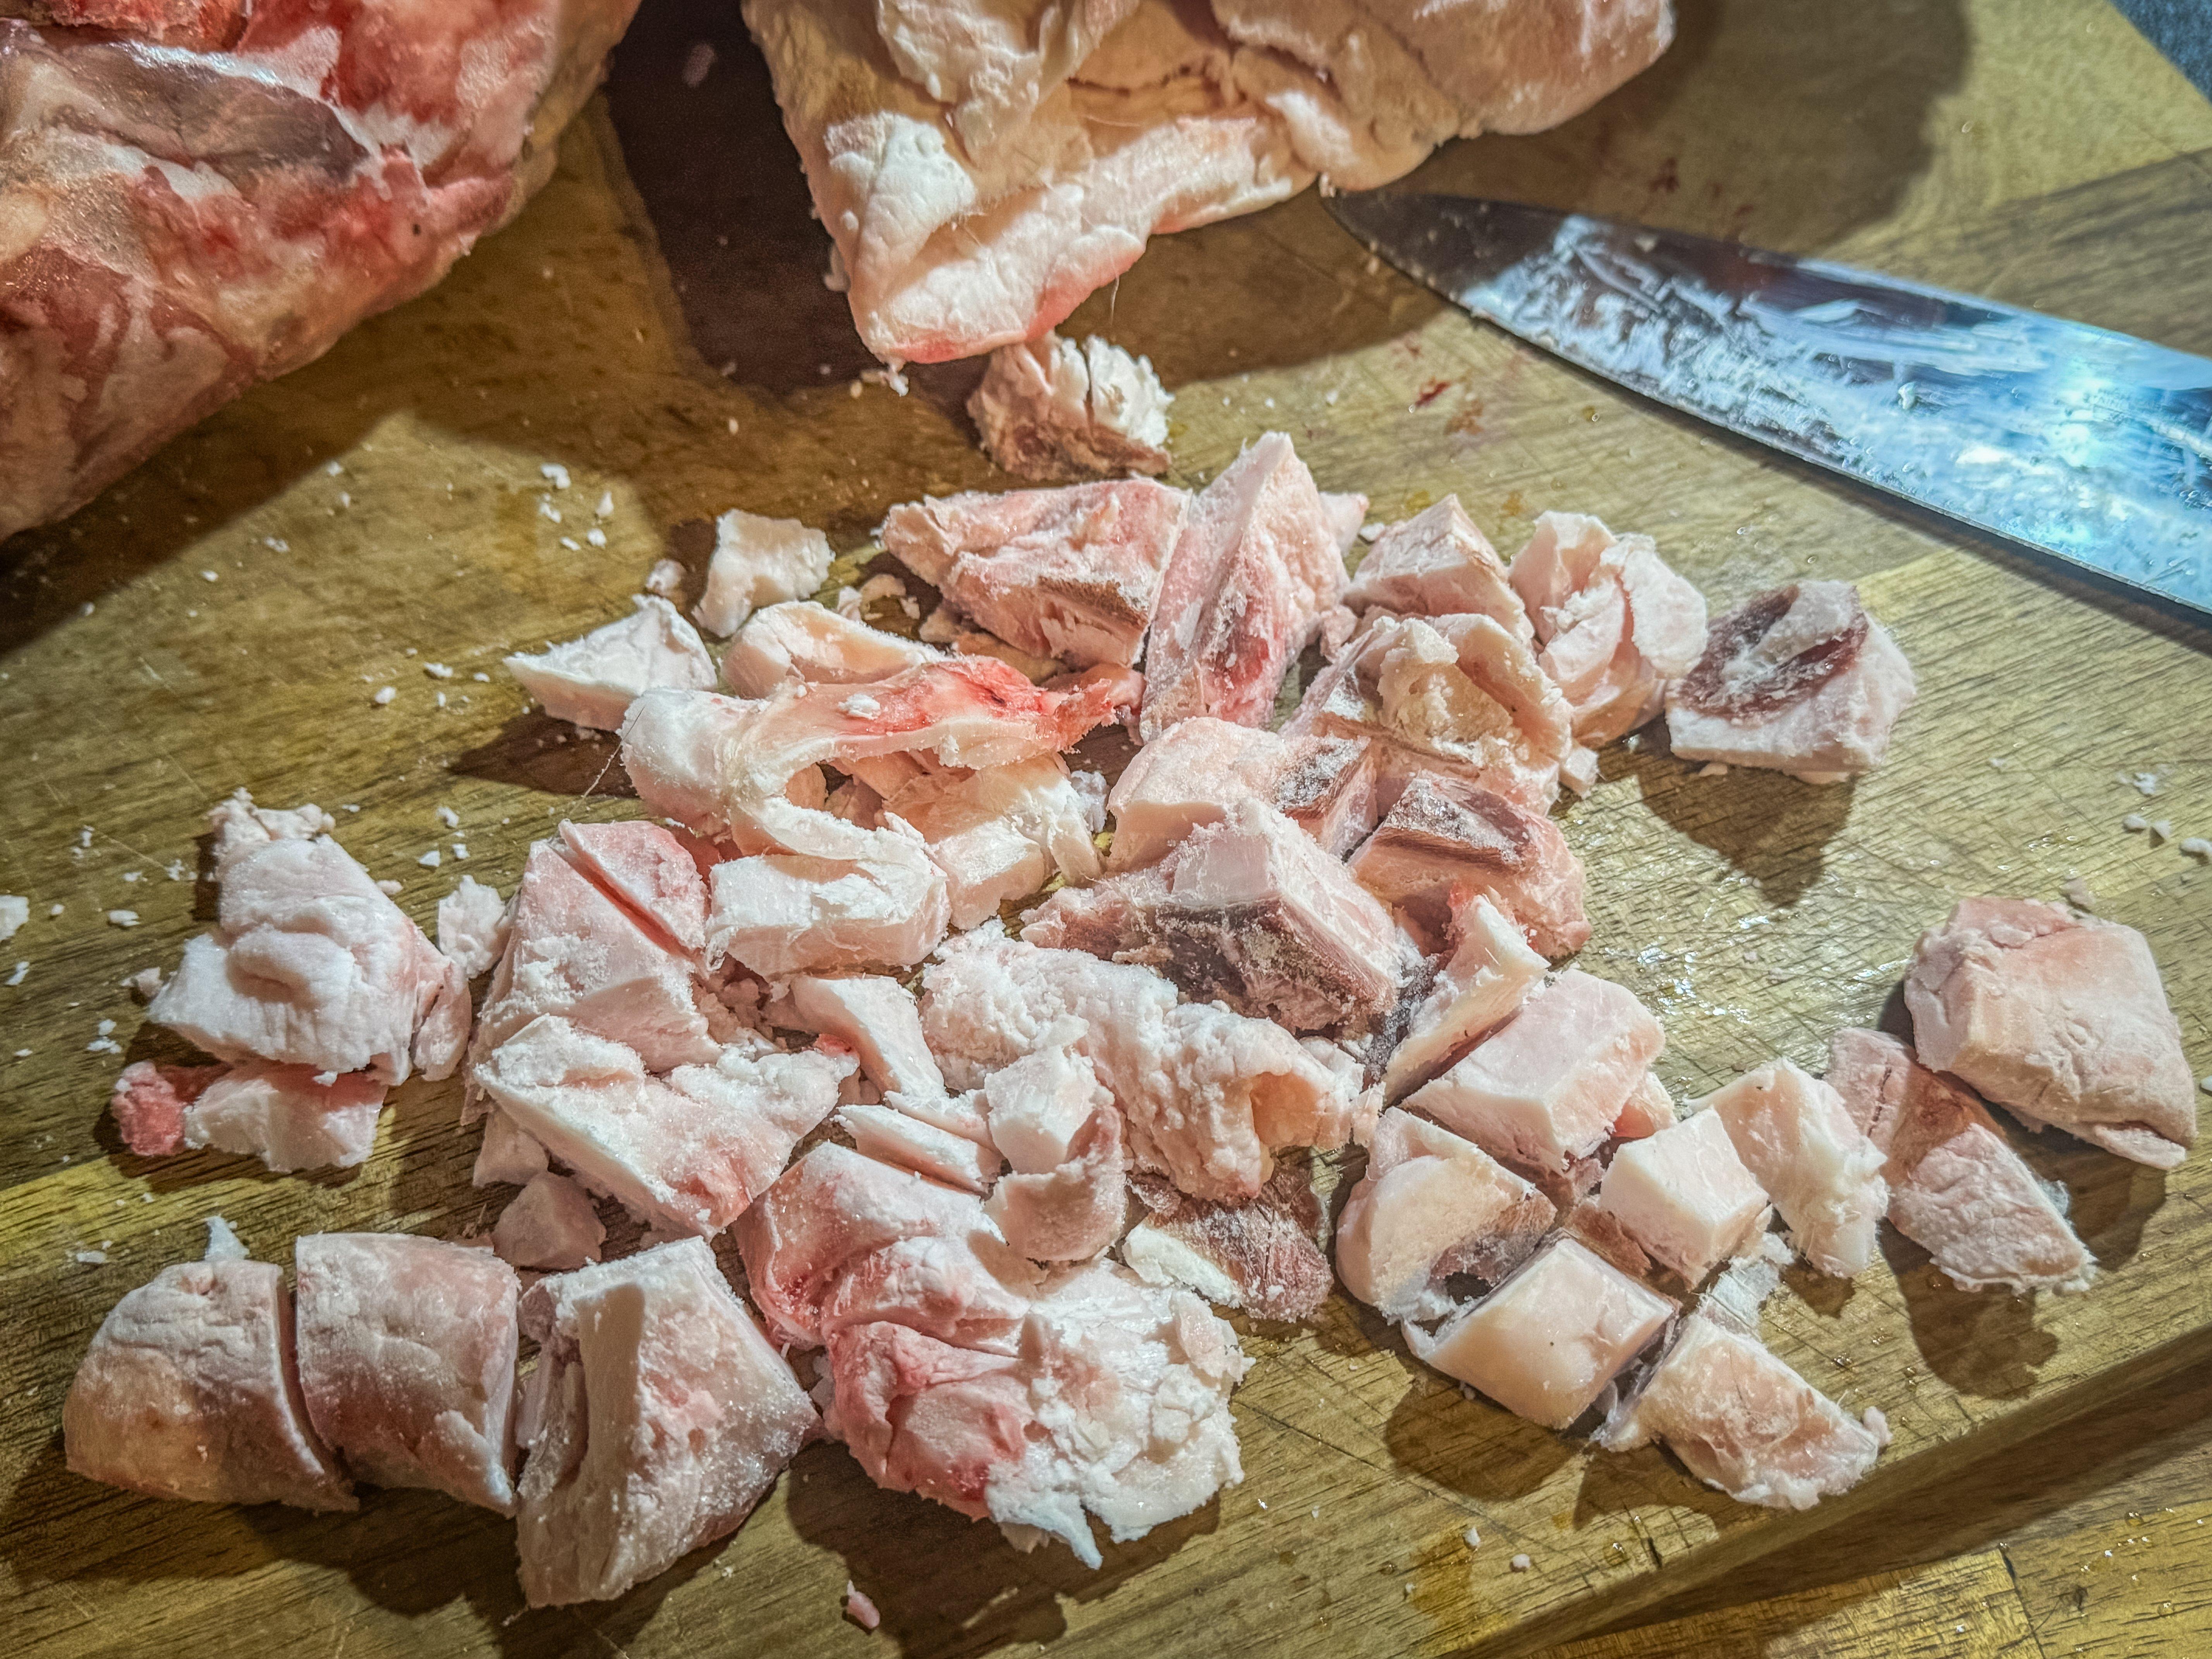
Chop the fat into small pieces and trim away as much meat as possible.
Add 2 cups of water and the chopped or ground fat to the slow cooker on low and let it heat for 2 hours. Stir and continue heating with the lid on. Heat for 10-12 hours total, stirring every 2 hours.
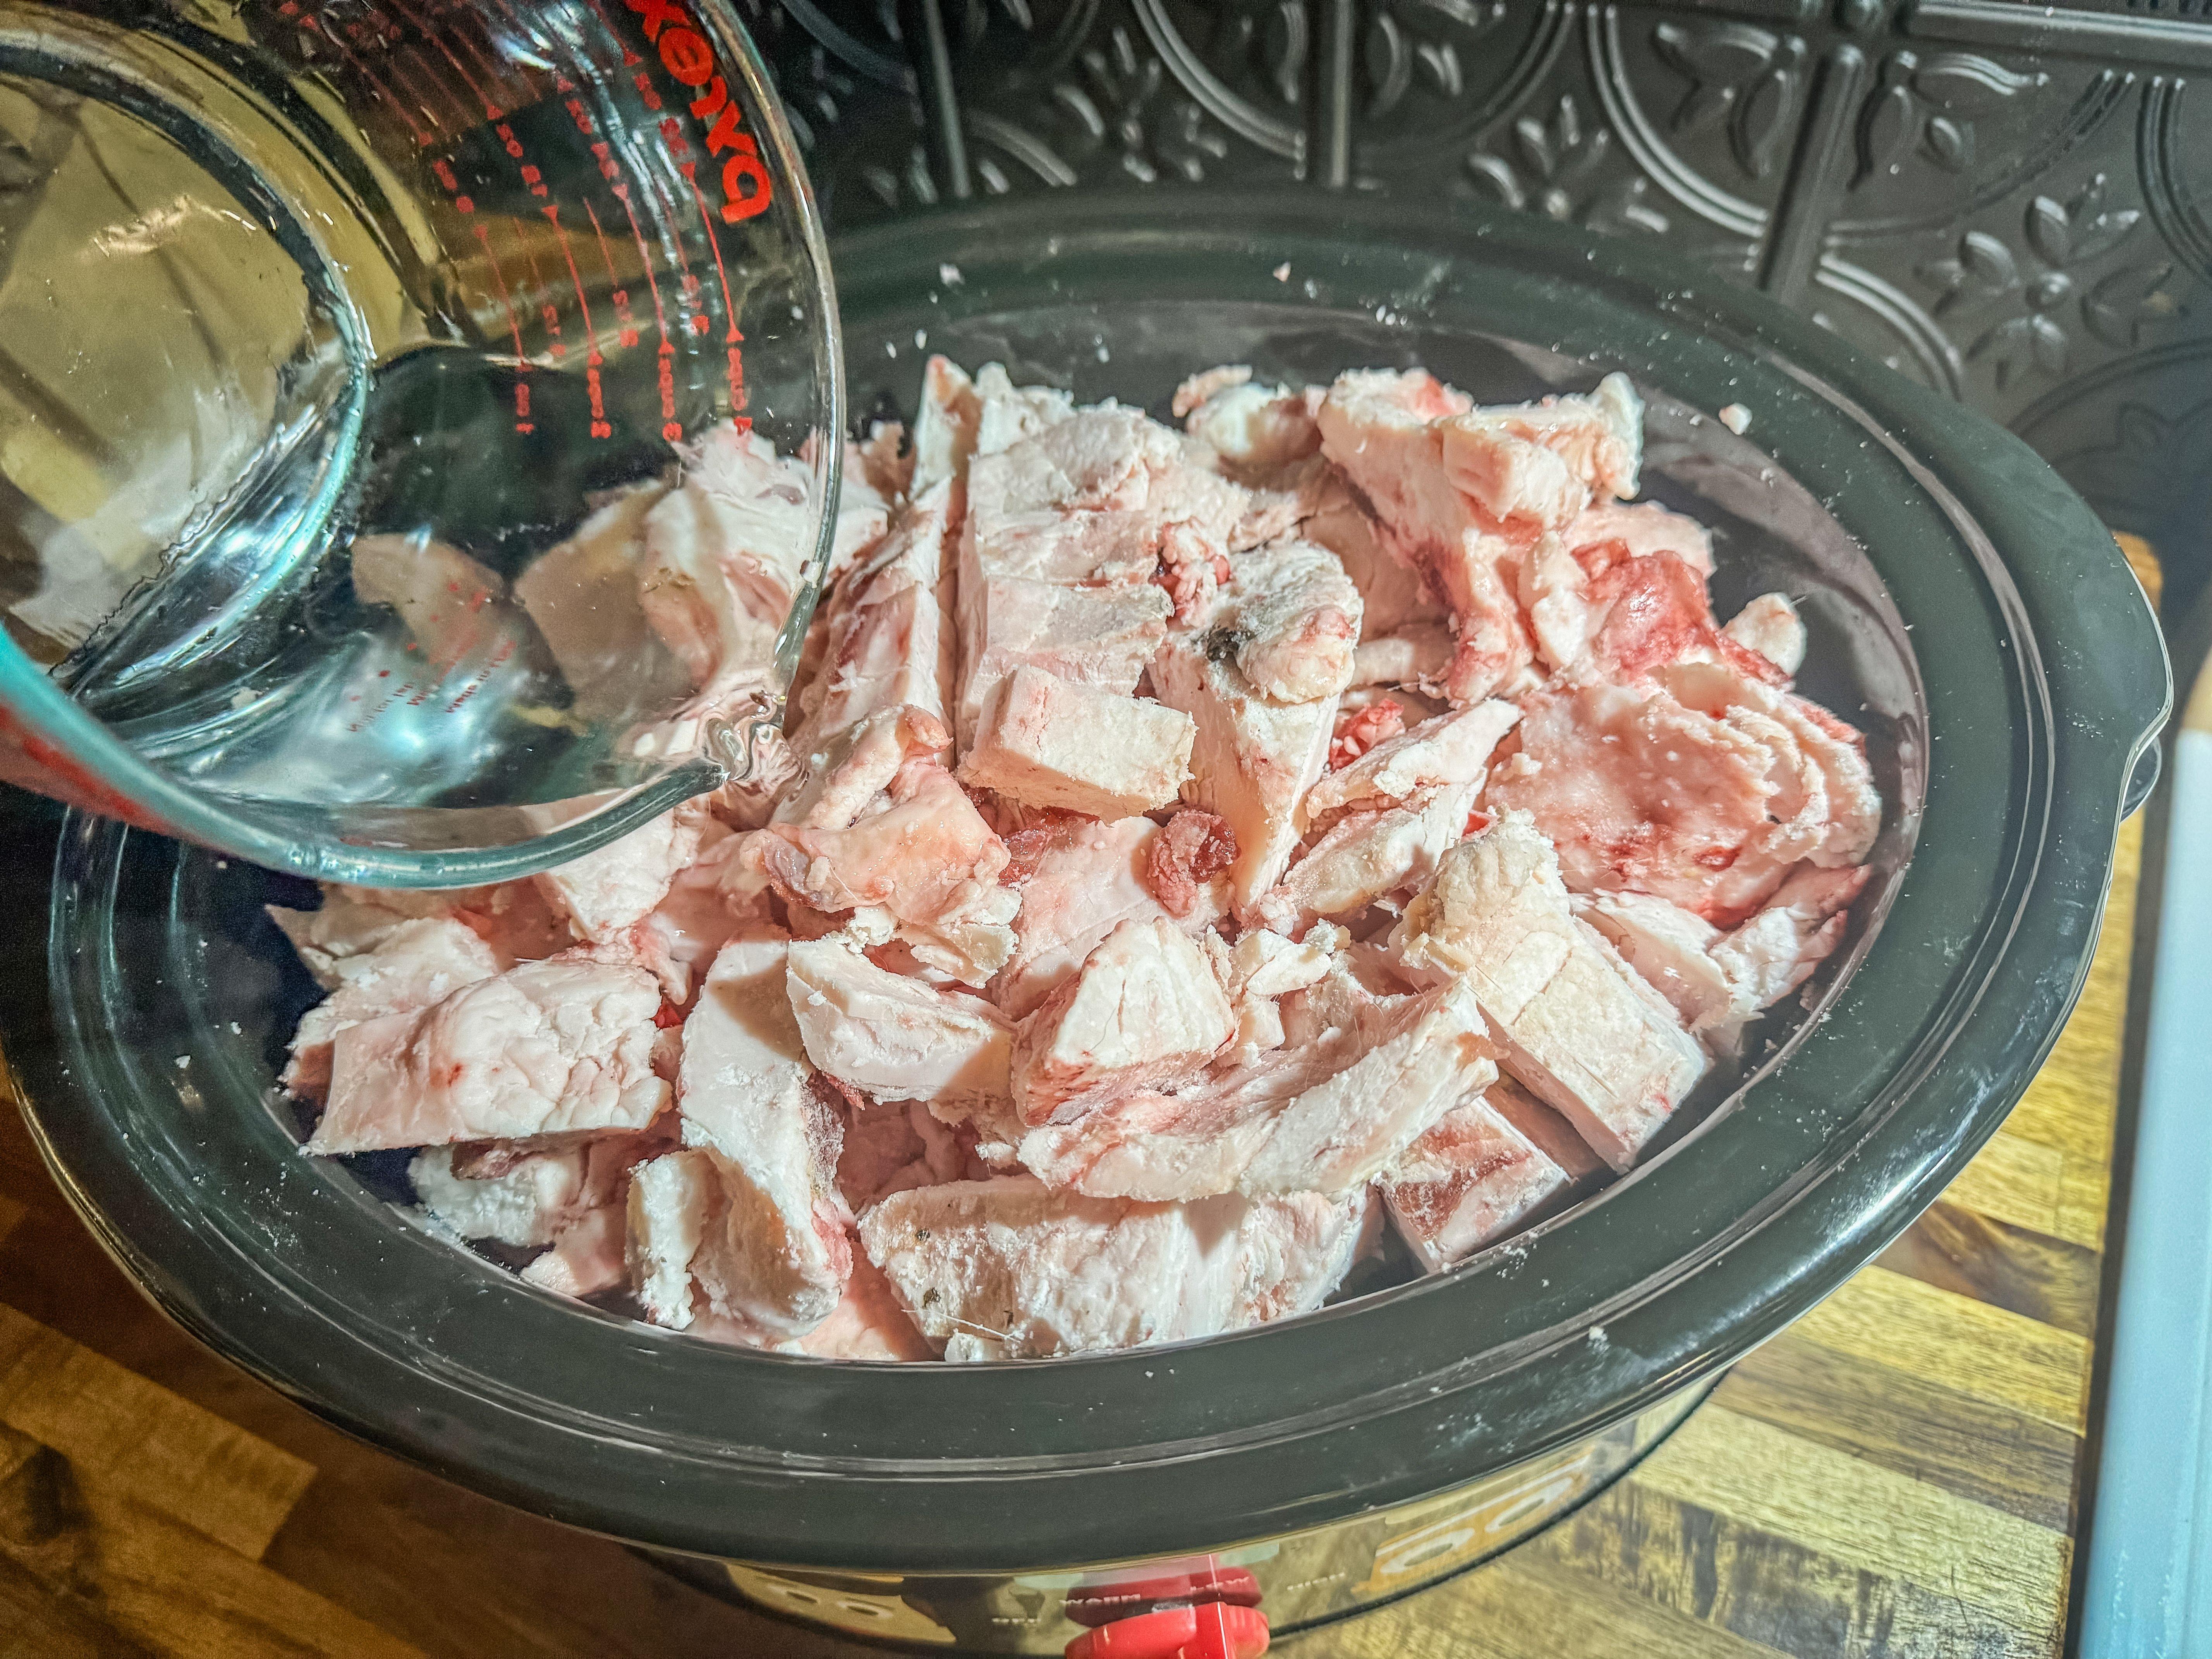
Add fat and water to slow cooker.
Once the fat has turned to clear liquid, use a slotted spoon to remove any large bits of meat, remaining fat, or other debris.
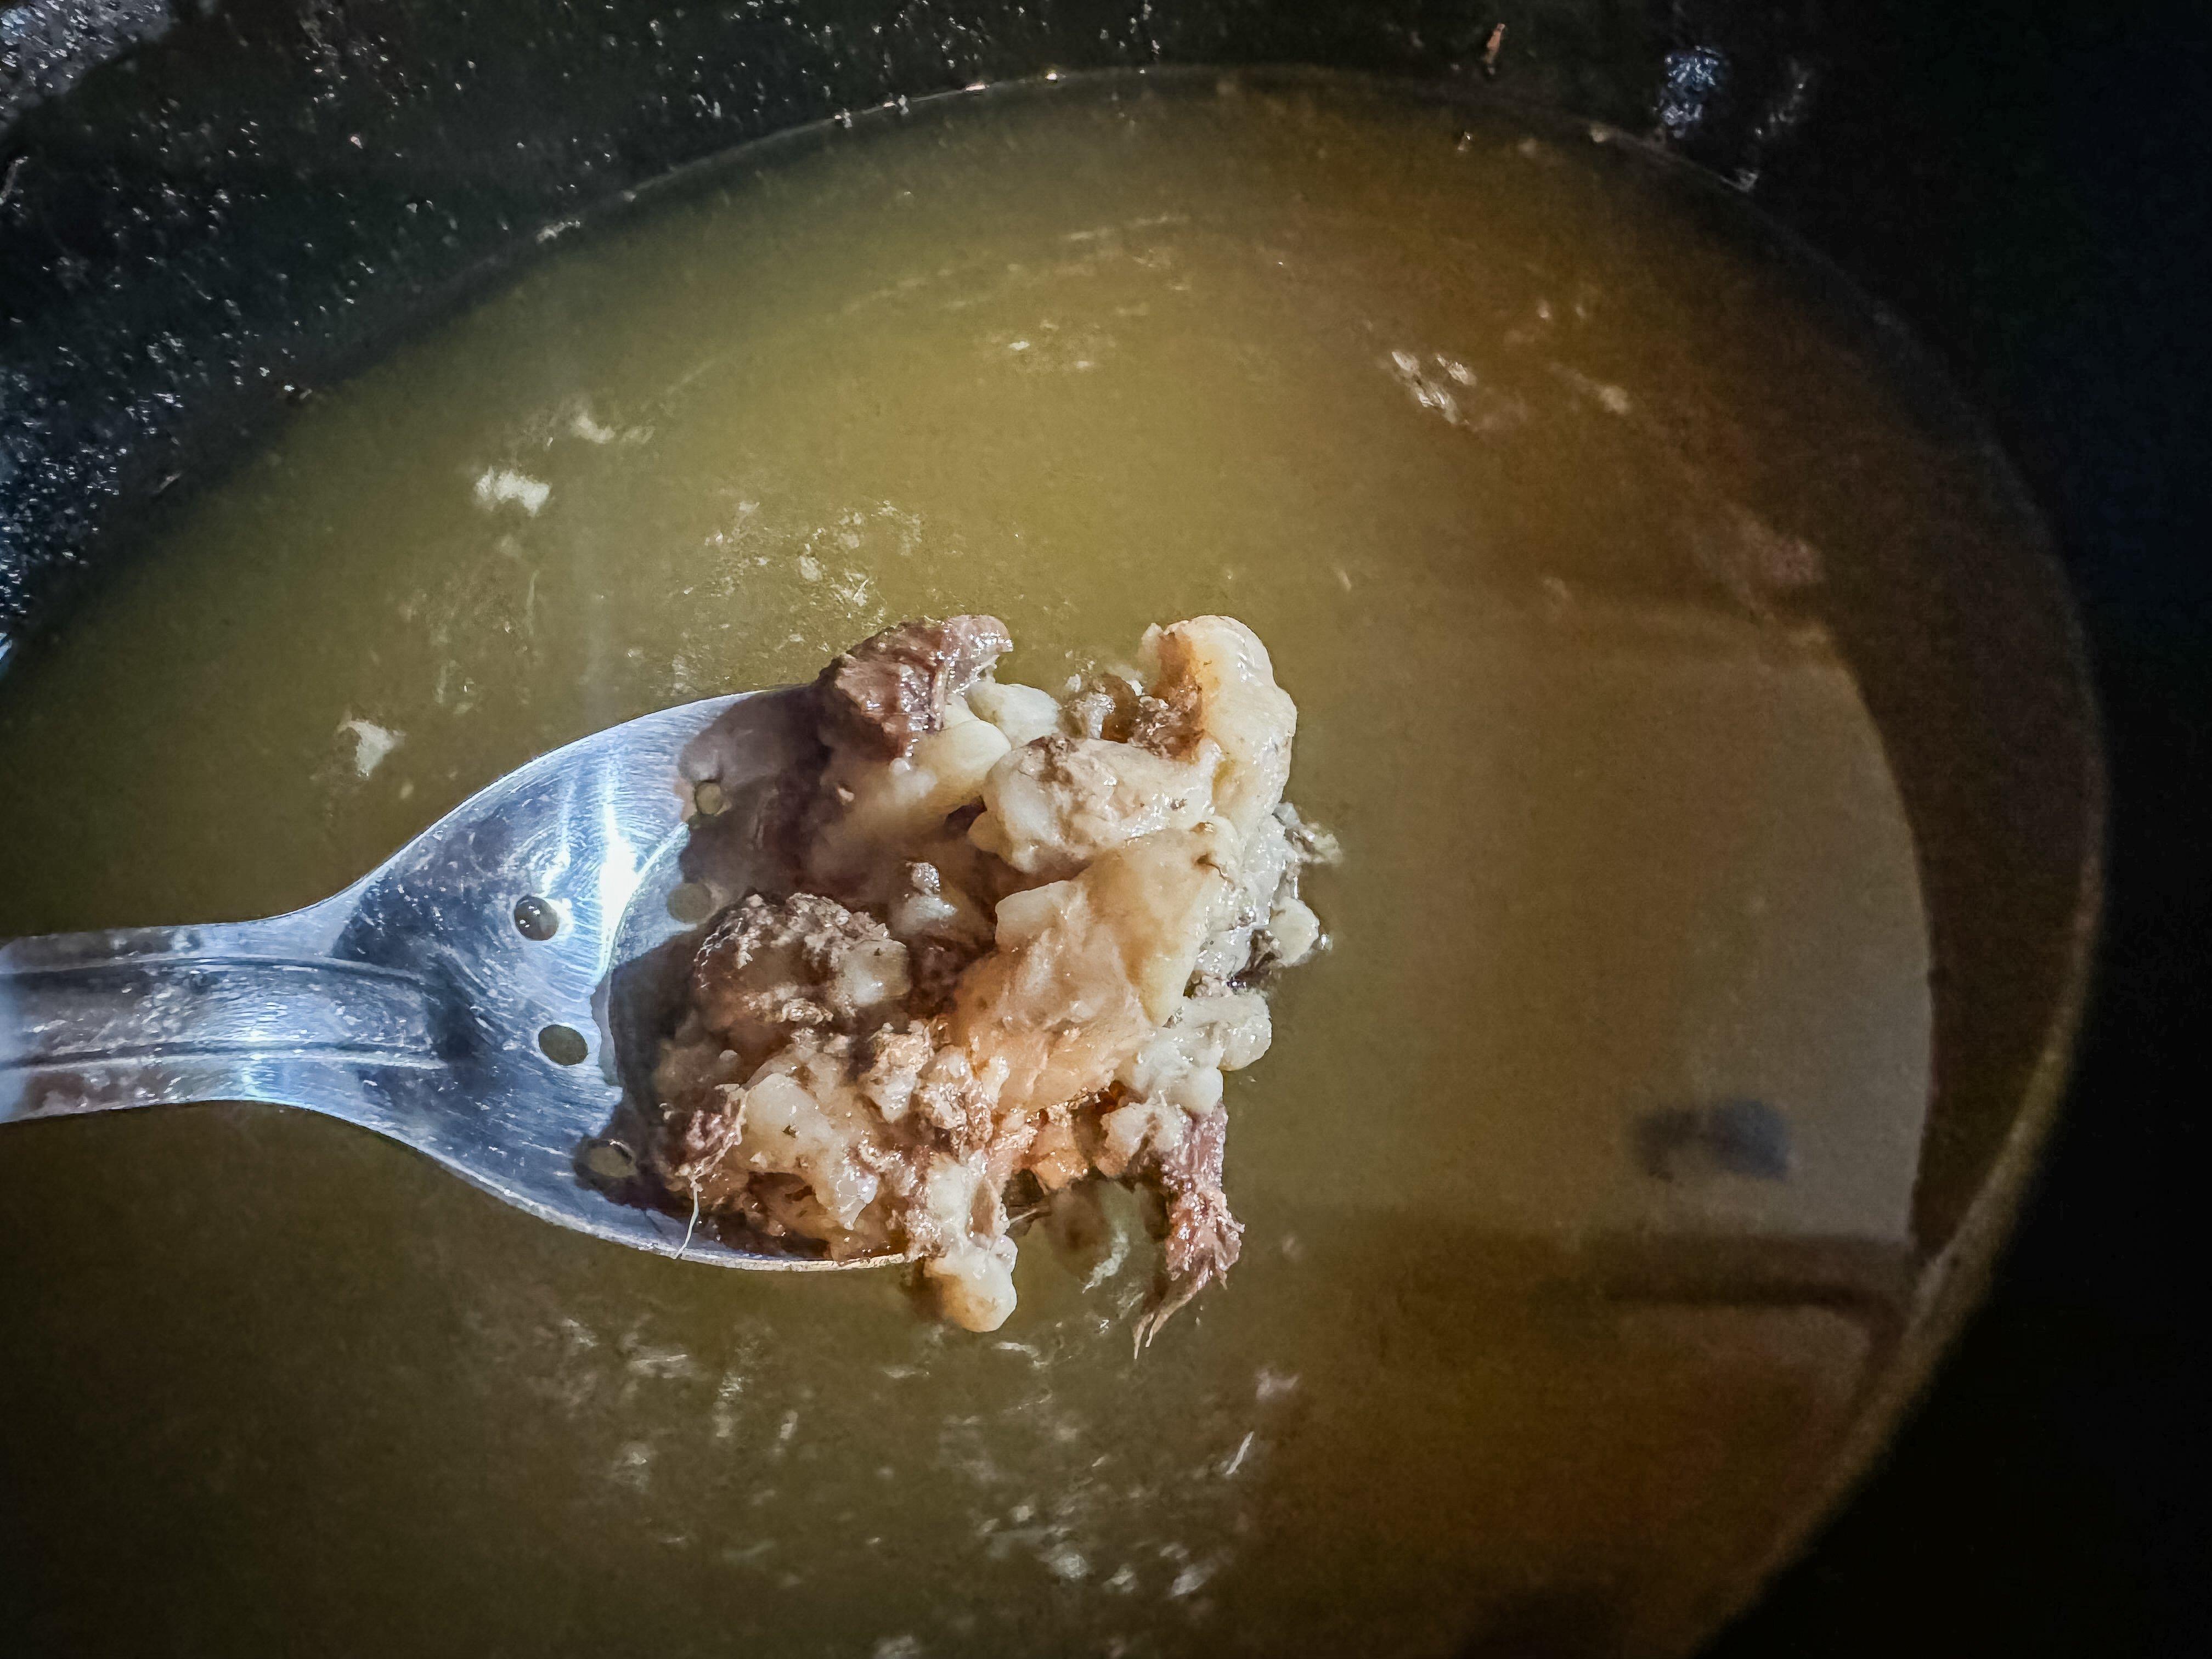
As the fat melts, use a slotted spoon to remove solids.
Turn off the heat and place the slow cooker, covered, in the refrigerator or another cool area. Allow the fat to solidify.
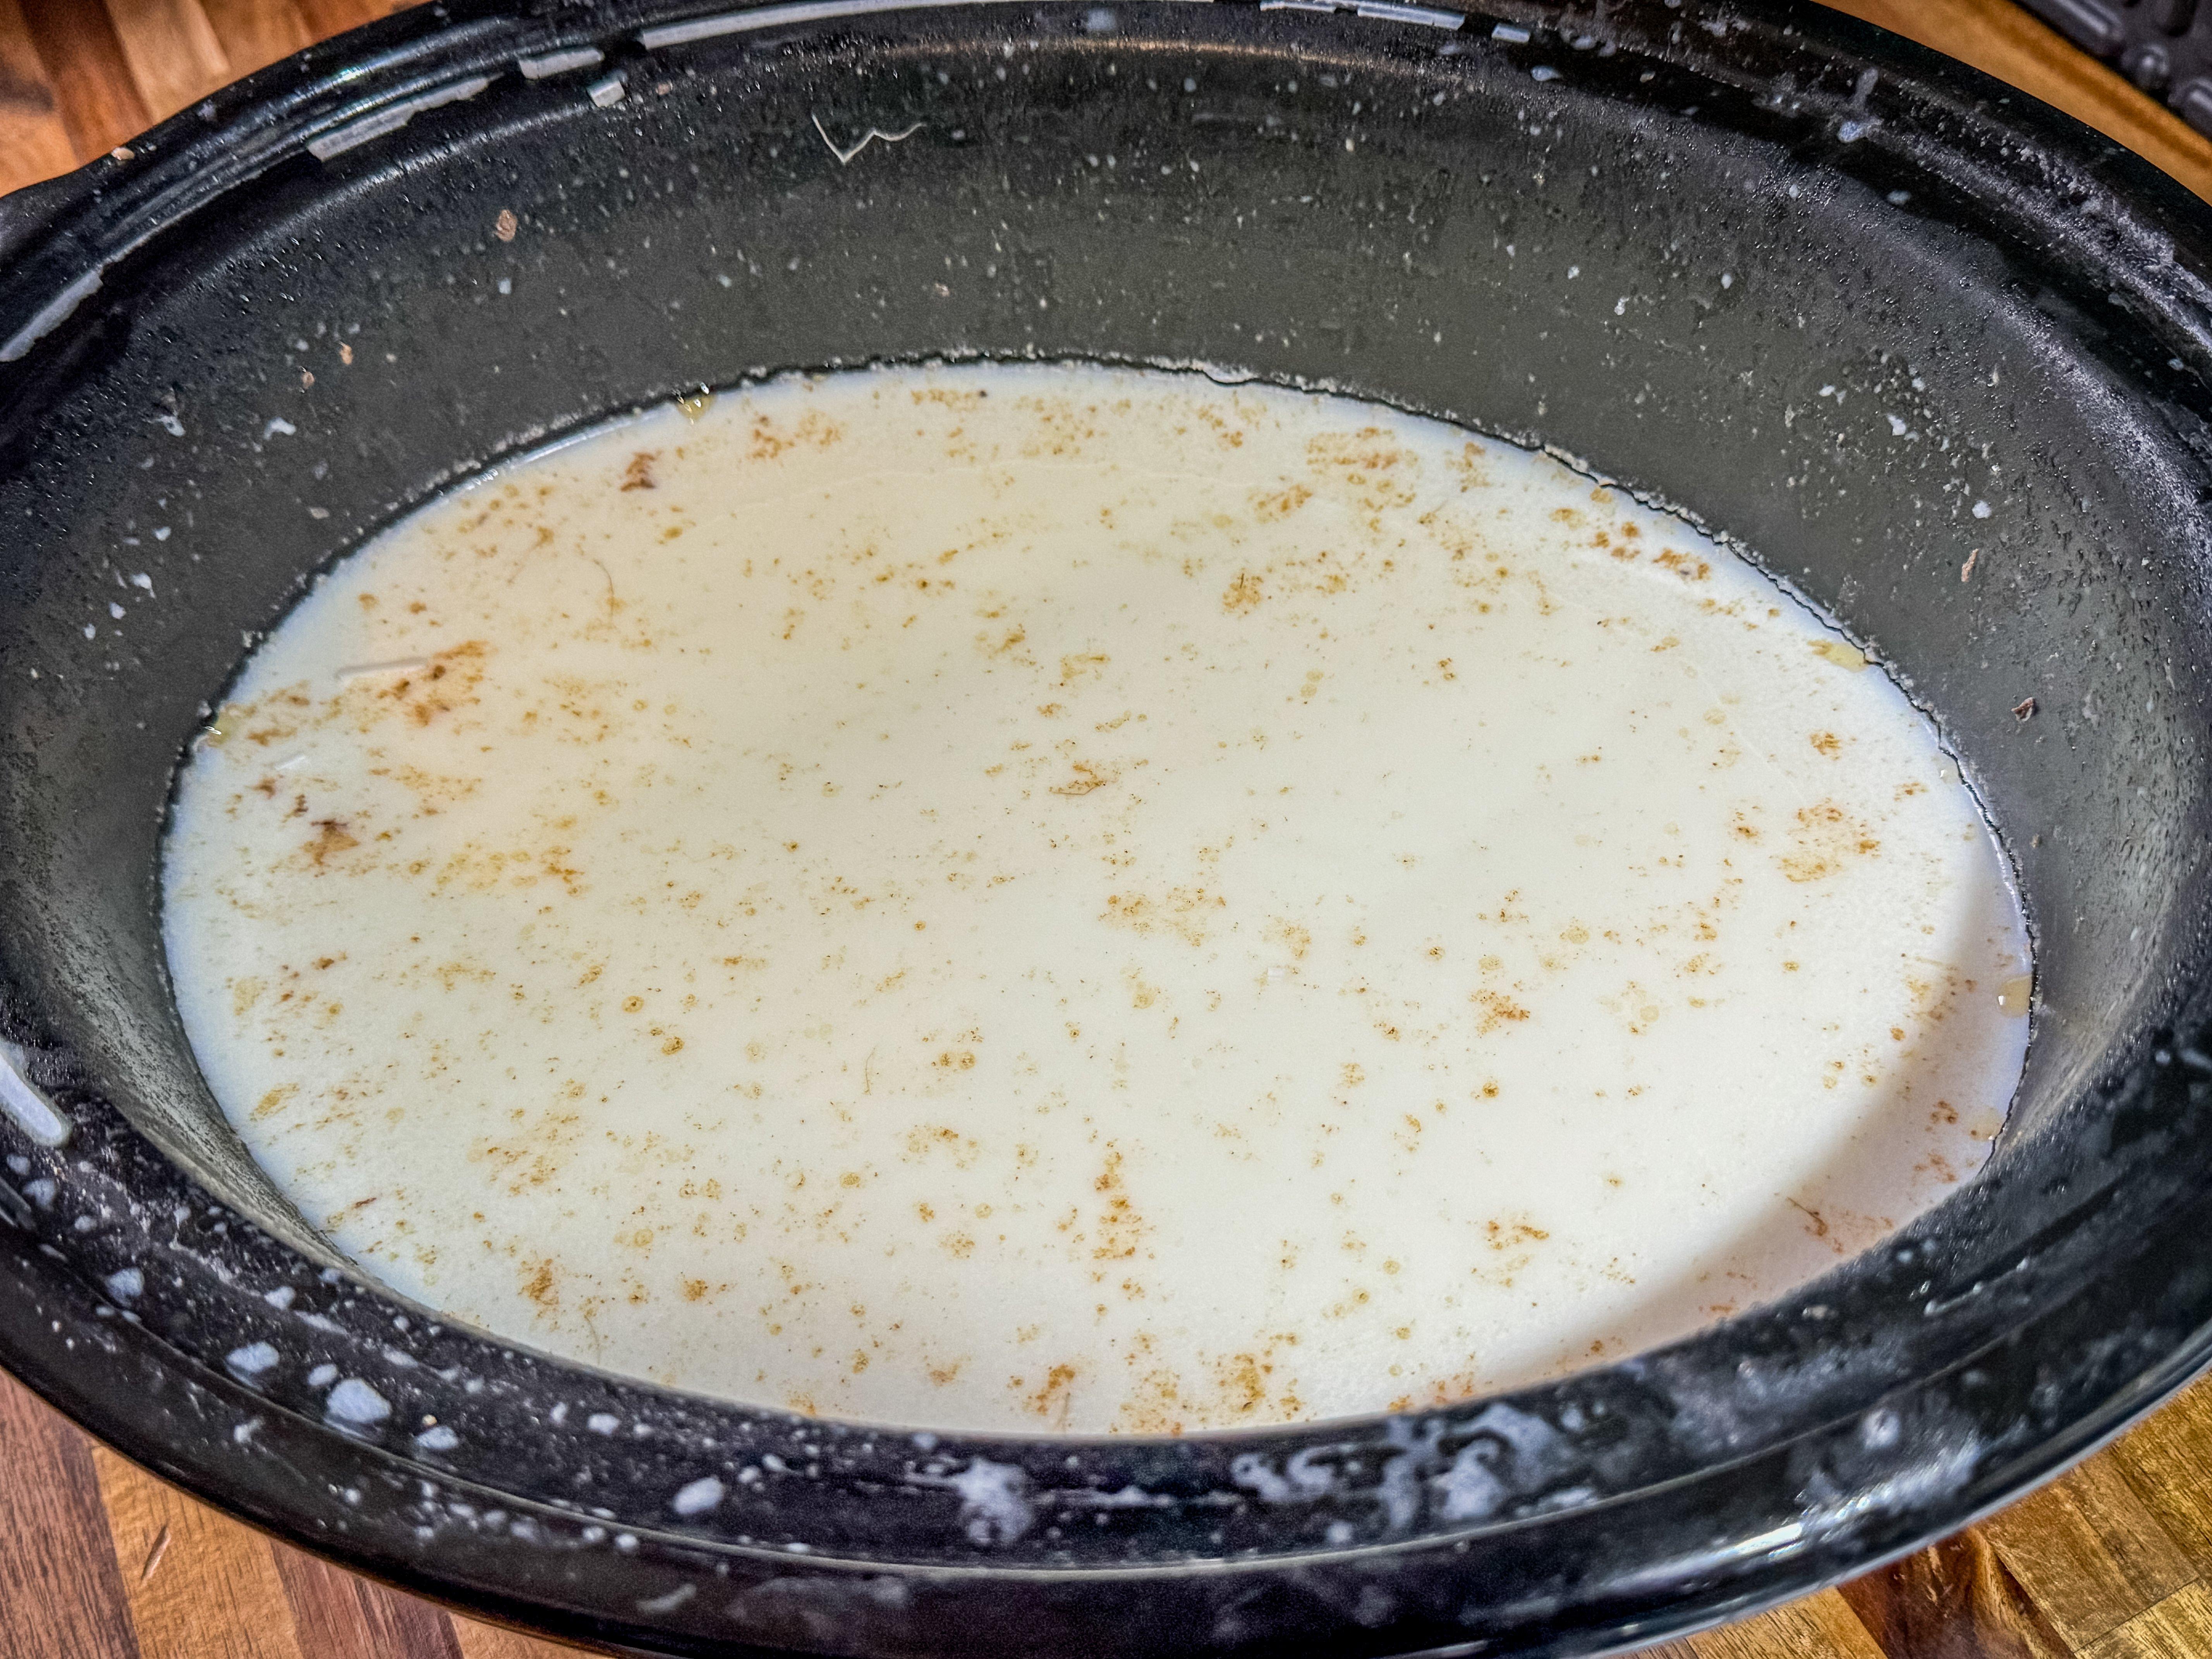
Move the fat to a cool spot and allow it to solidify.
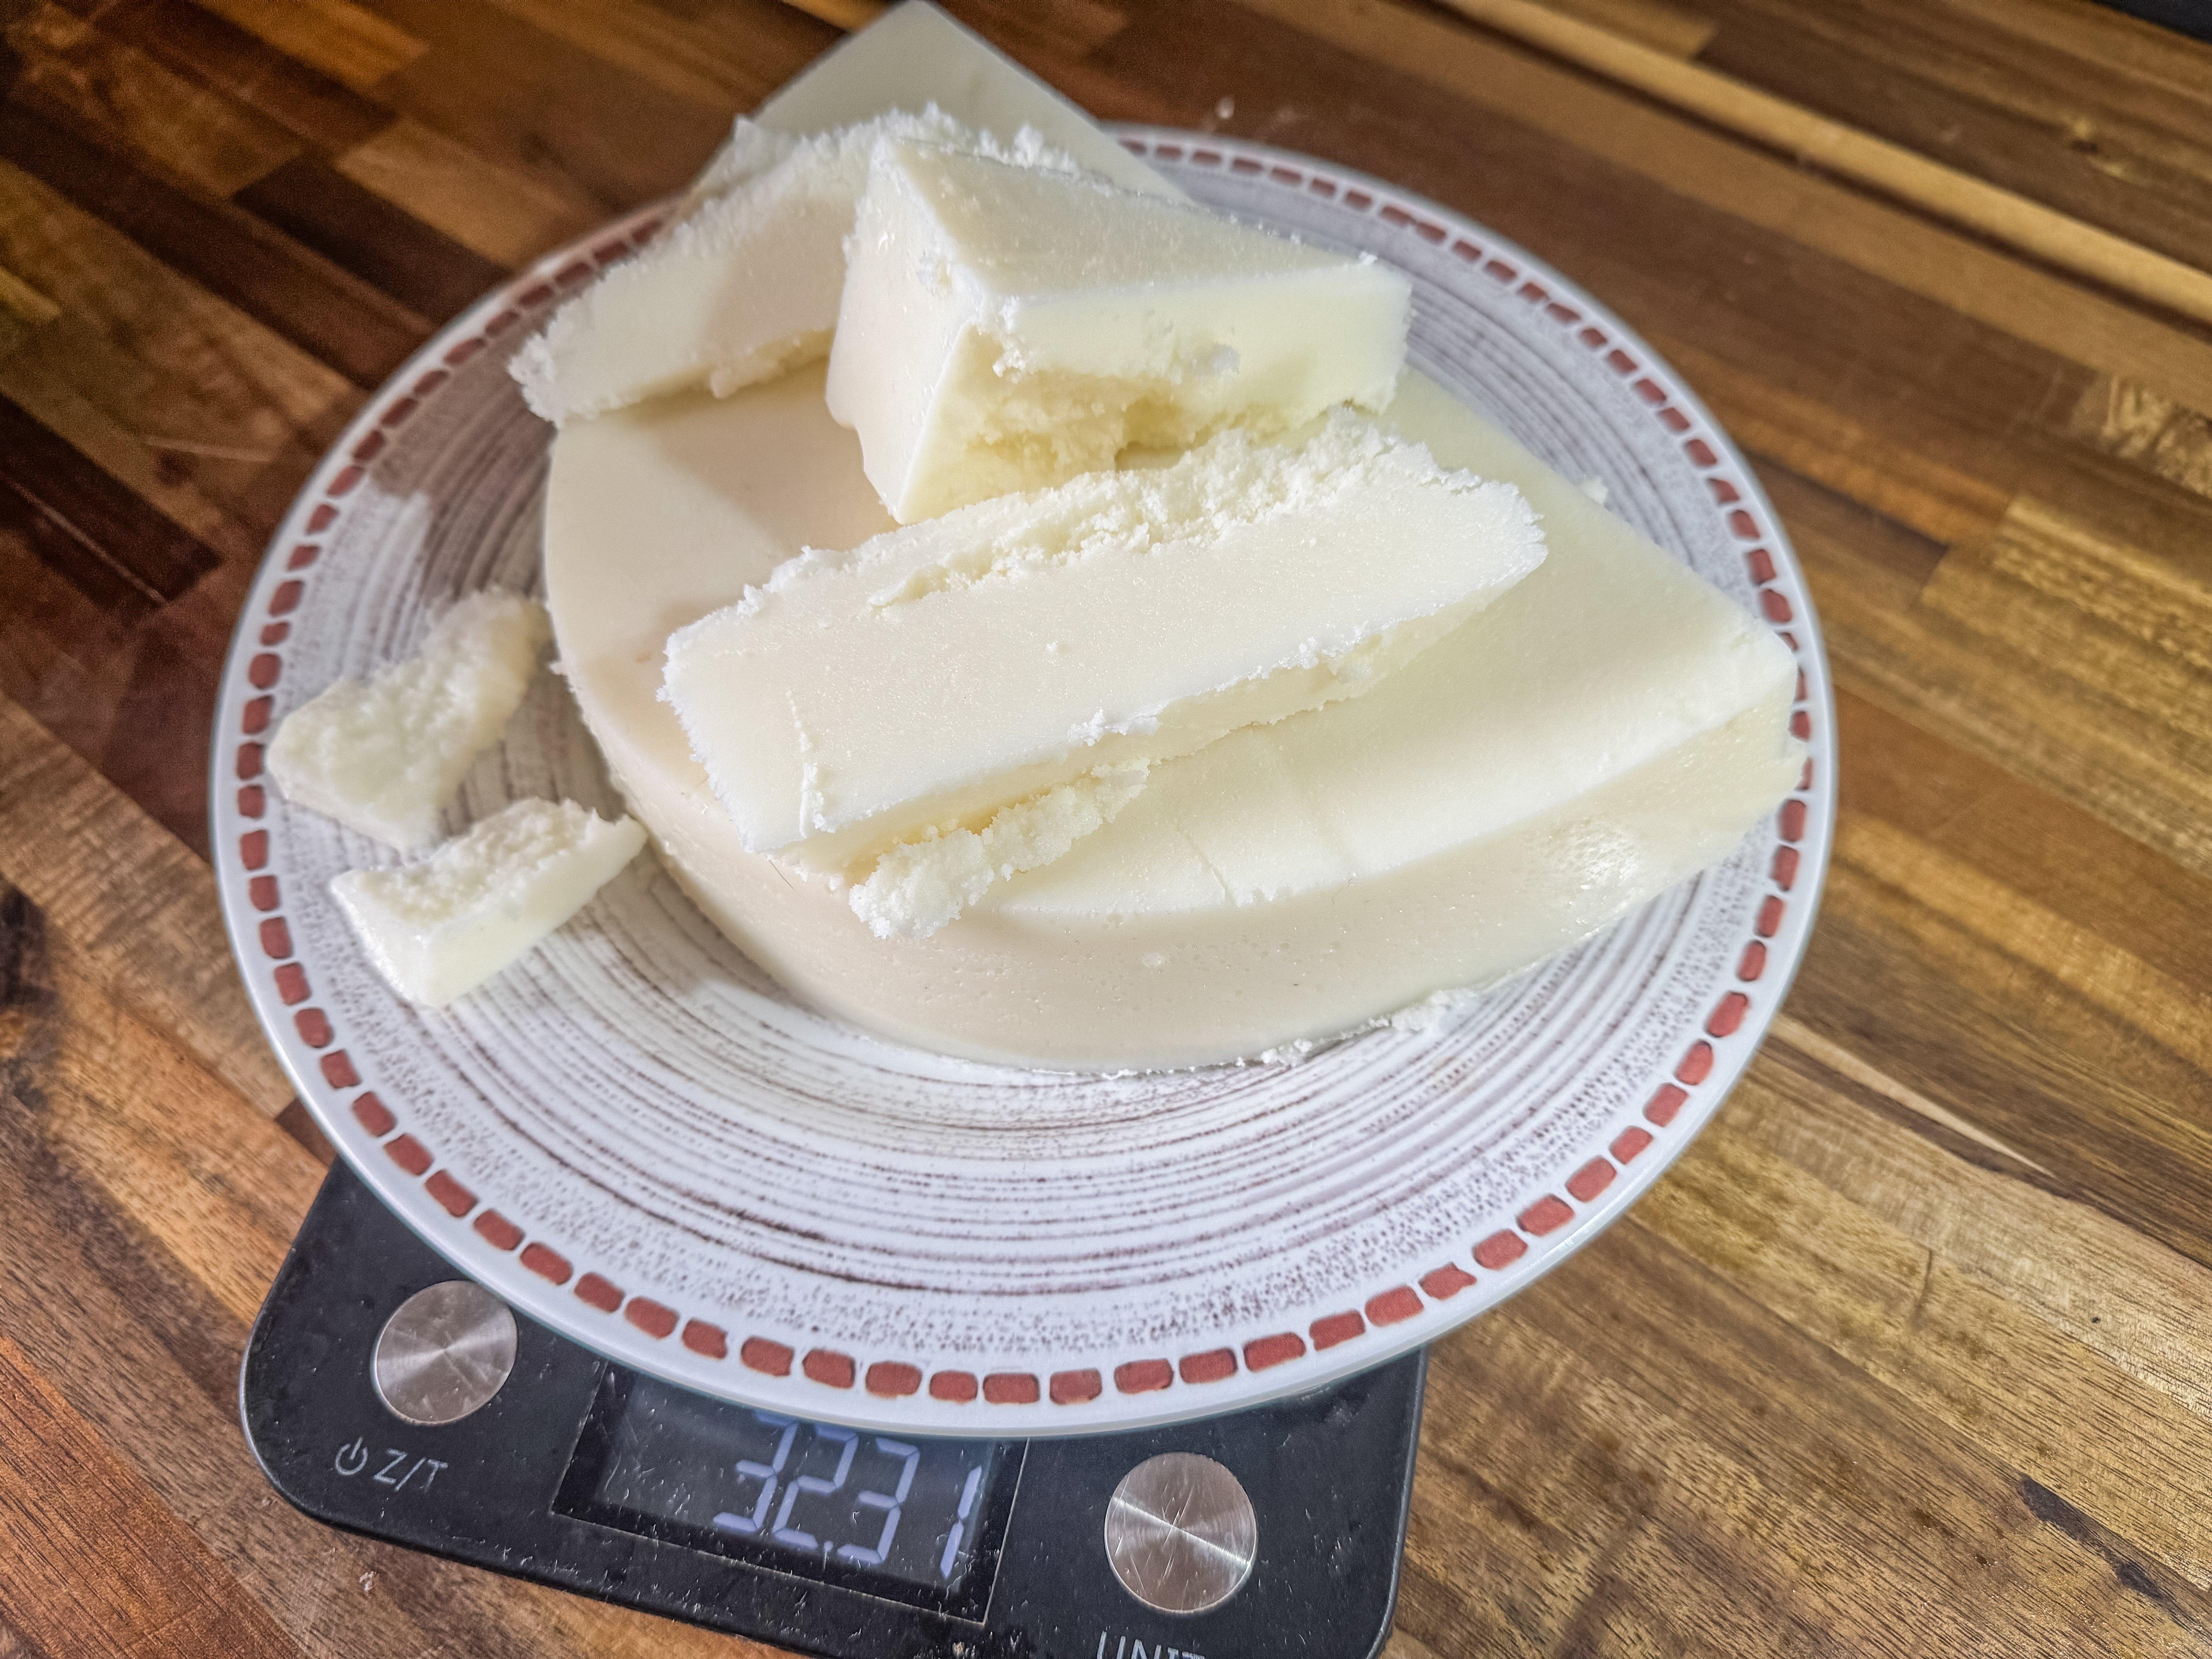
The fat should rise to the top of the water, allowing most of the impurities to settle to the bottom. Gently remove the solidified fat from the slow cooker and turn it over. Most of the impurities that remain will be located on the bottom (now top) of the fat.
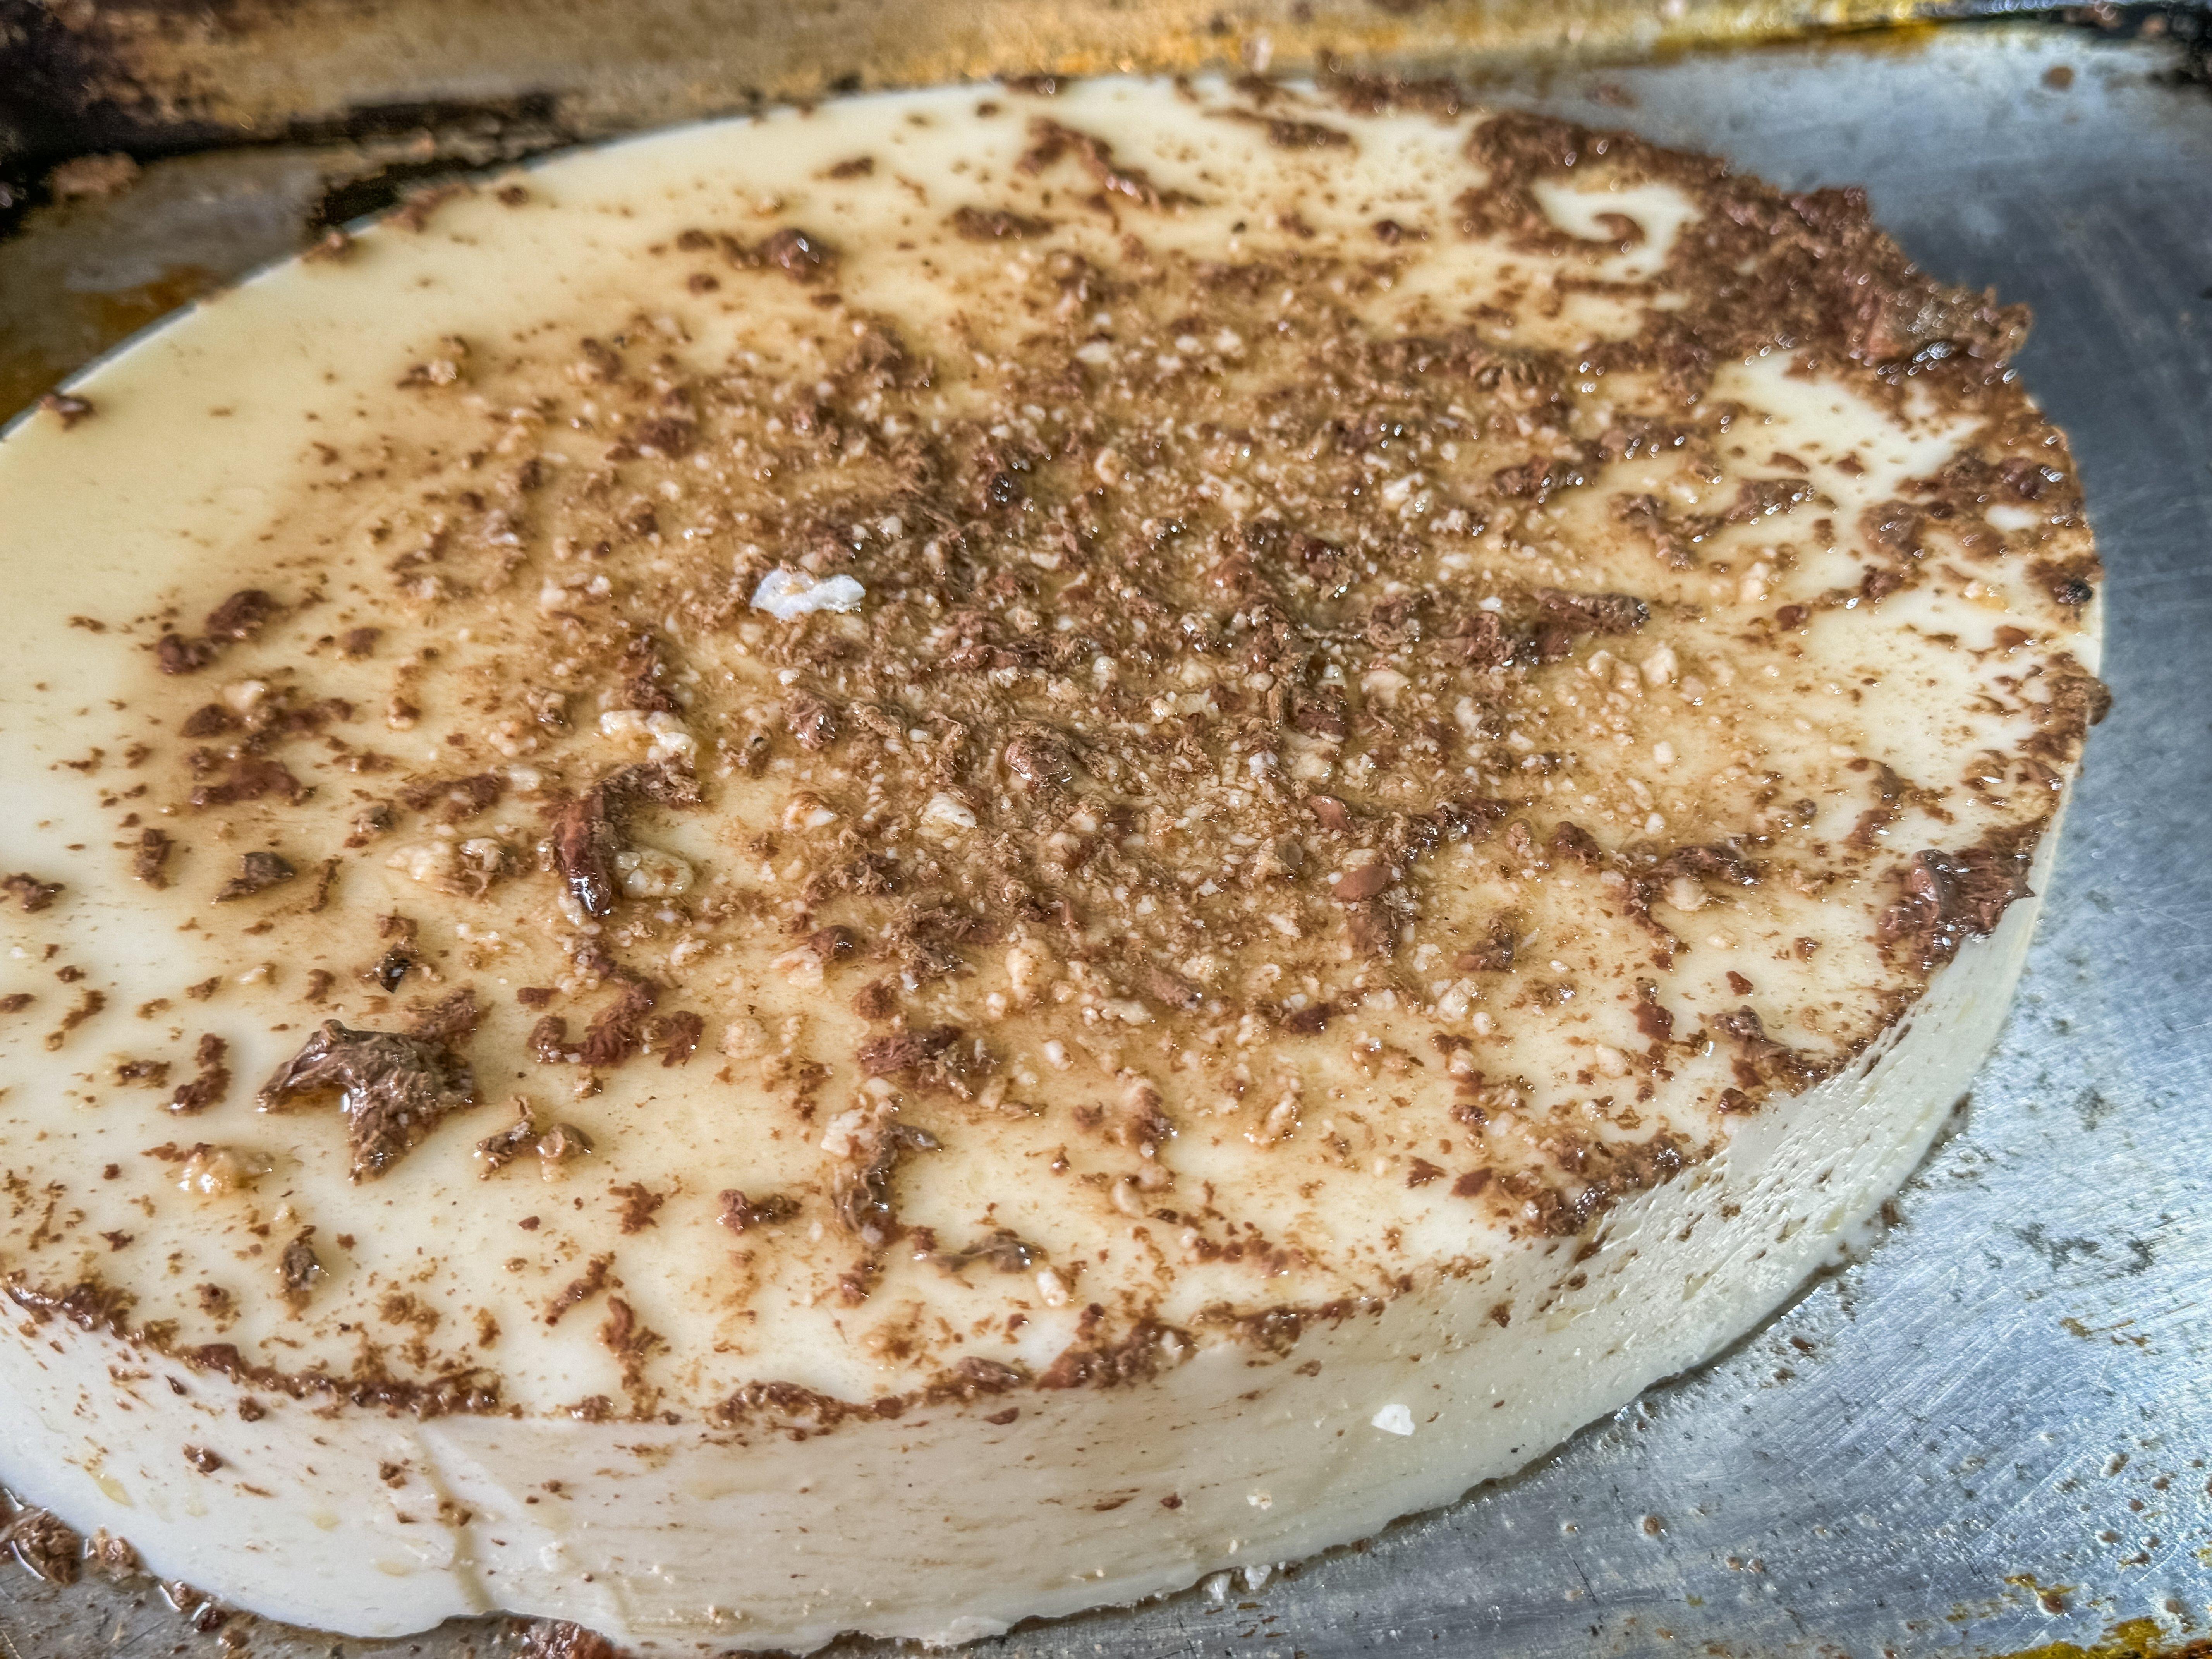
Each round of rendering will produce cleaner and cleaner tallow, ending with pure white.
Use a knife to scrape away this layer until you reach clean, white fat. Clean the slow cooker and add the fat back. Repeat the process. This time, once the fat has been cooled, the block should be much cleaner. Repeat the scraping process again.
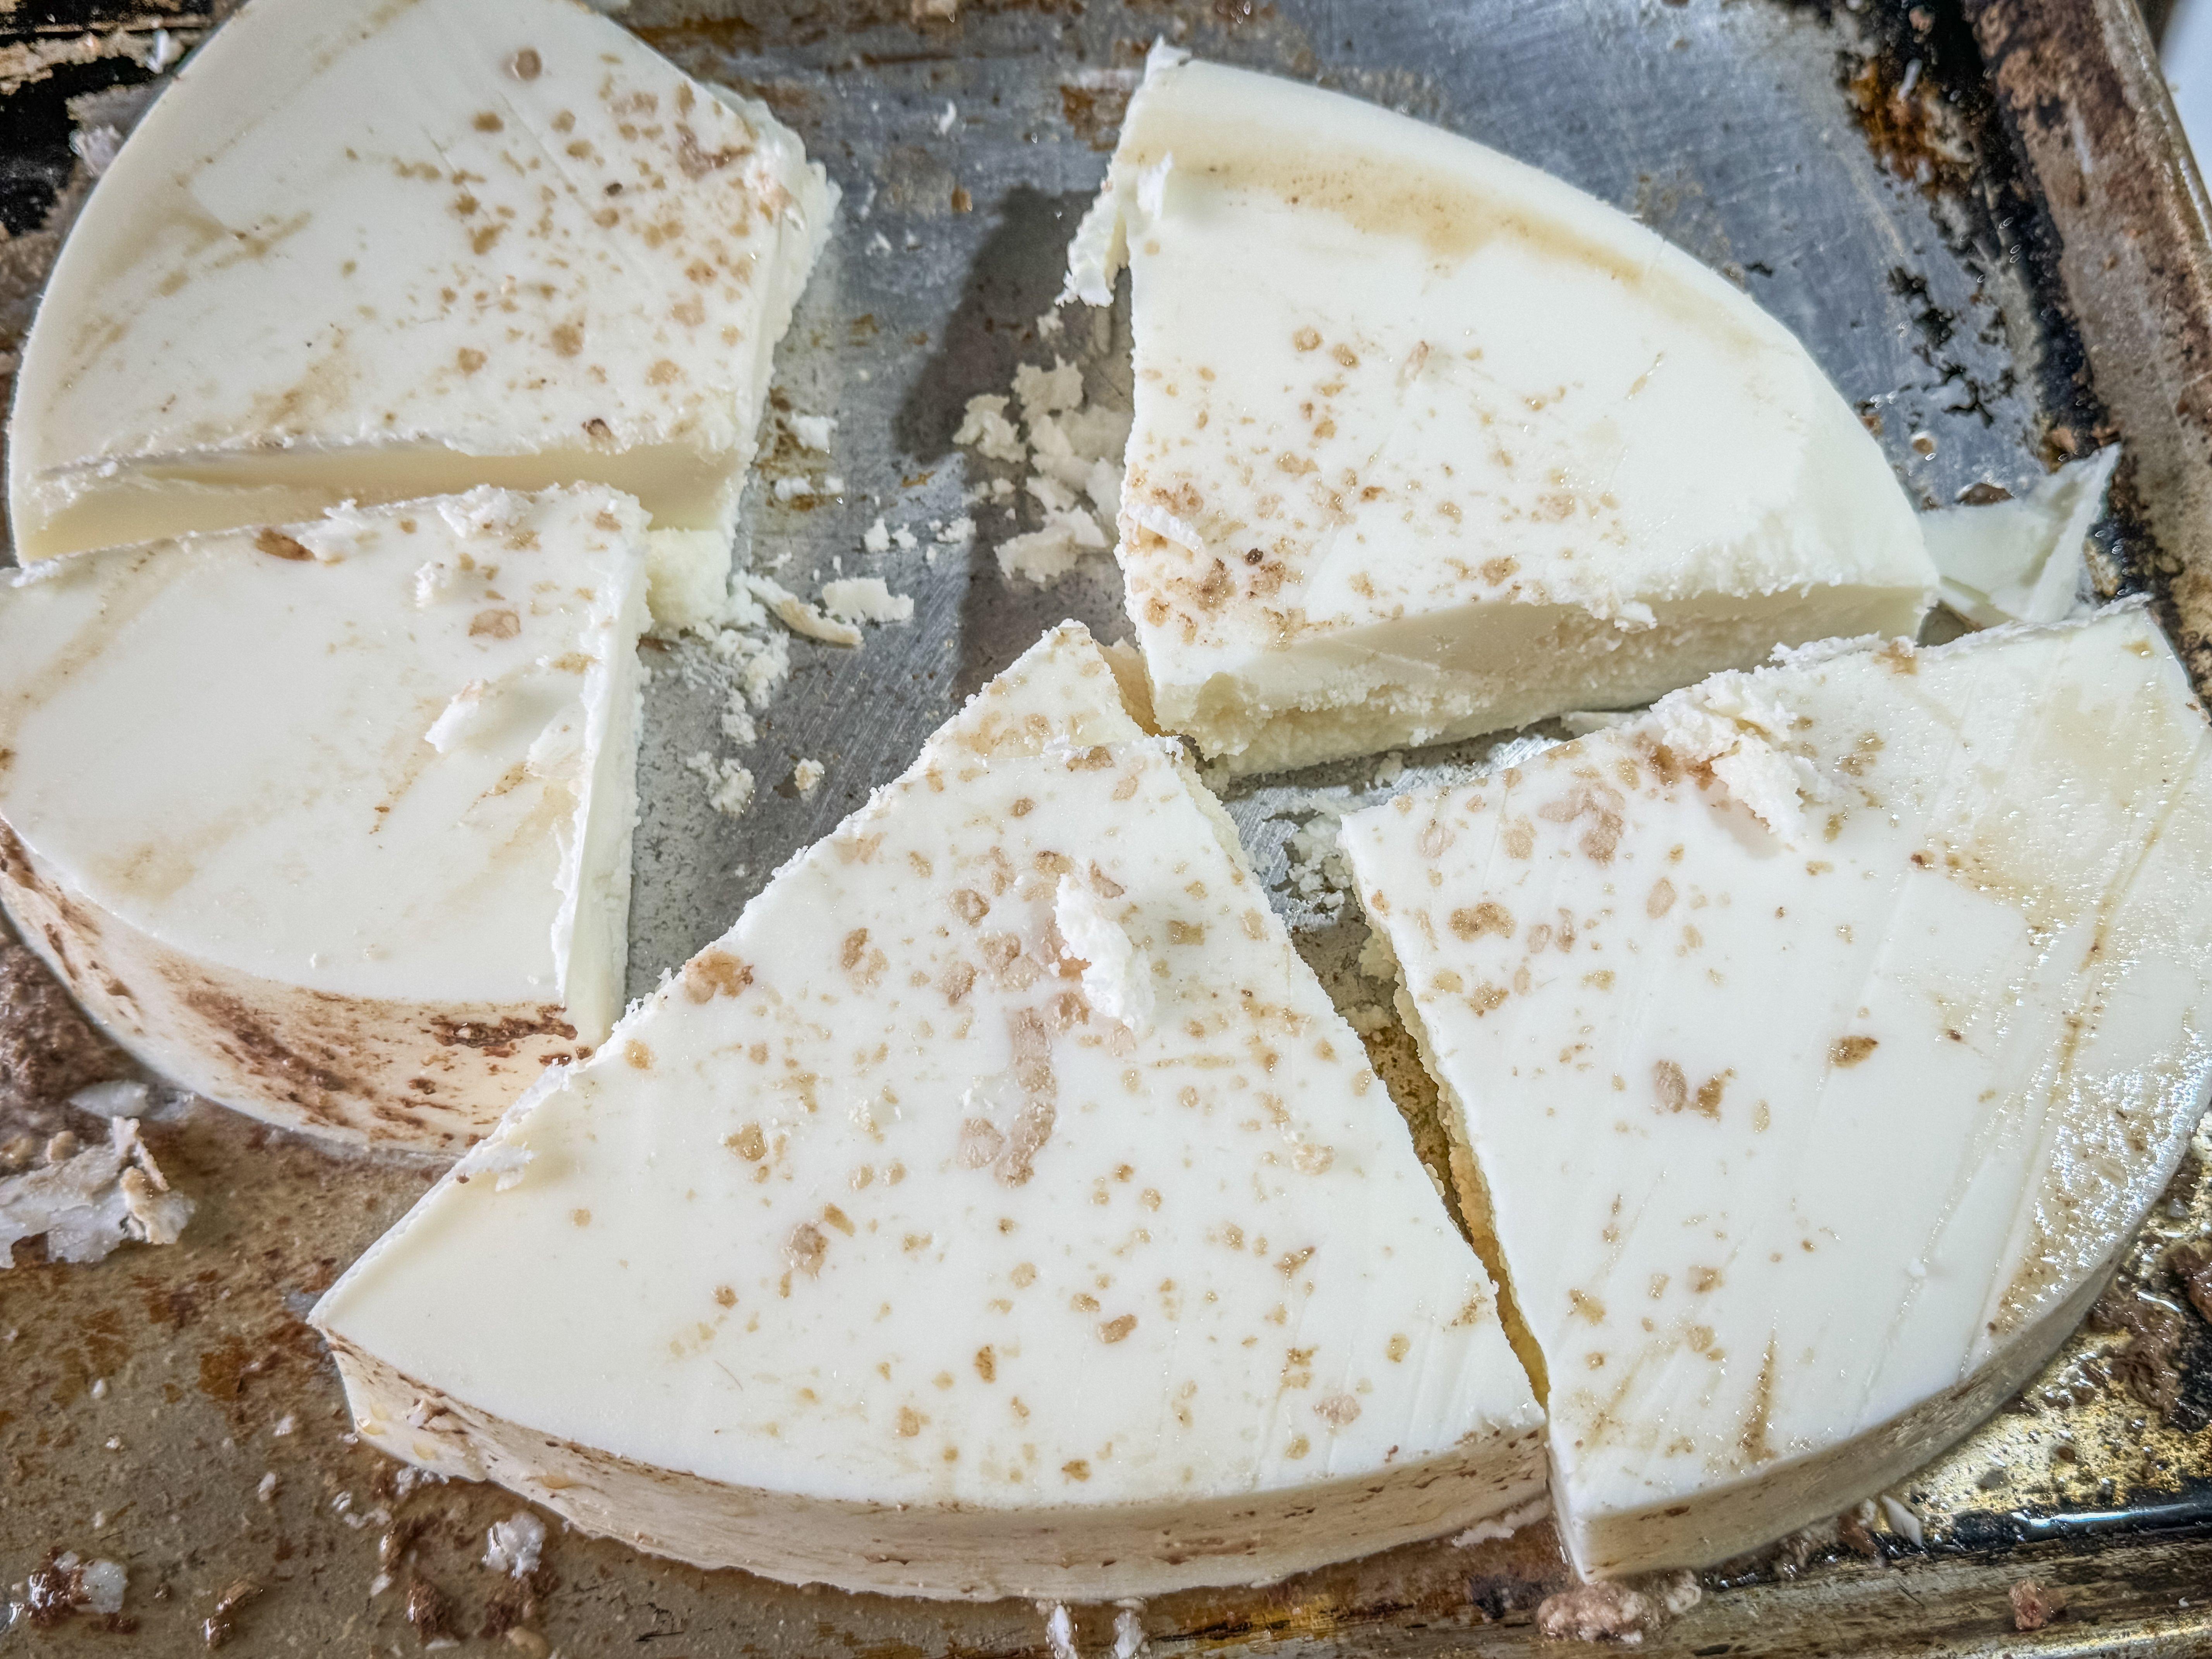
With each render, the fat will contain fewer solids and impurities.
You can do this process as many times as you like. Each time the fat will be cleaner and have less odor. I usually find that three rounds is enough for soap making. After the first round, initial rounds won’t take as long. Just a few hours for the fat to melt and the solids to sink to the bottom will be sufficient.
If you want to store the fat, heat it one last time until it liquefies. Line a strainer with cheesecloth to filter the fat into a stainless or glass container. From there, pour the fat into clean quart jars. Cover the jars with a clean towel and allow the fat to solidify. Top with a new lid and a ring. If you plan on making your soap within a few days, just leave the tallow on the counter. You can also store the jars in the freezer for up to a year. You can also freeze the fat in a vacuum-sealed bag.
To make the soap, you will need lye to add to your fat. I prefer soap-grade sodium hydroxide lye that I order online or purchase at a local Amish grocery.
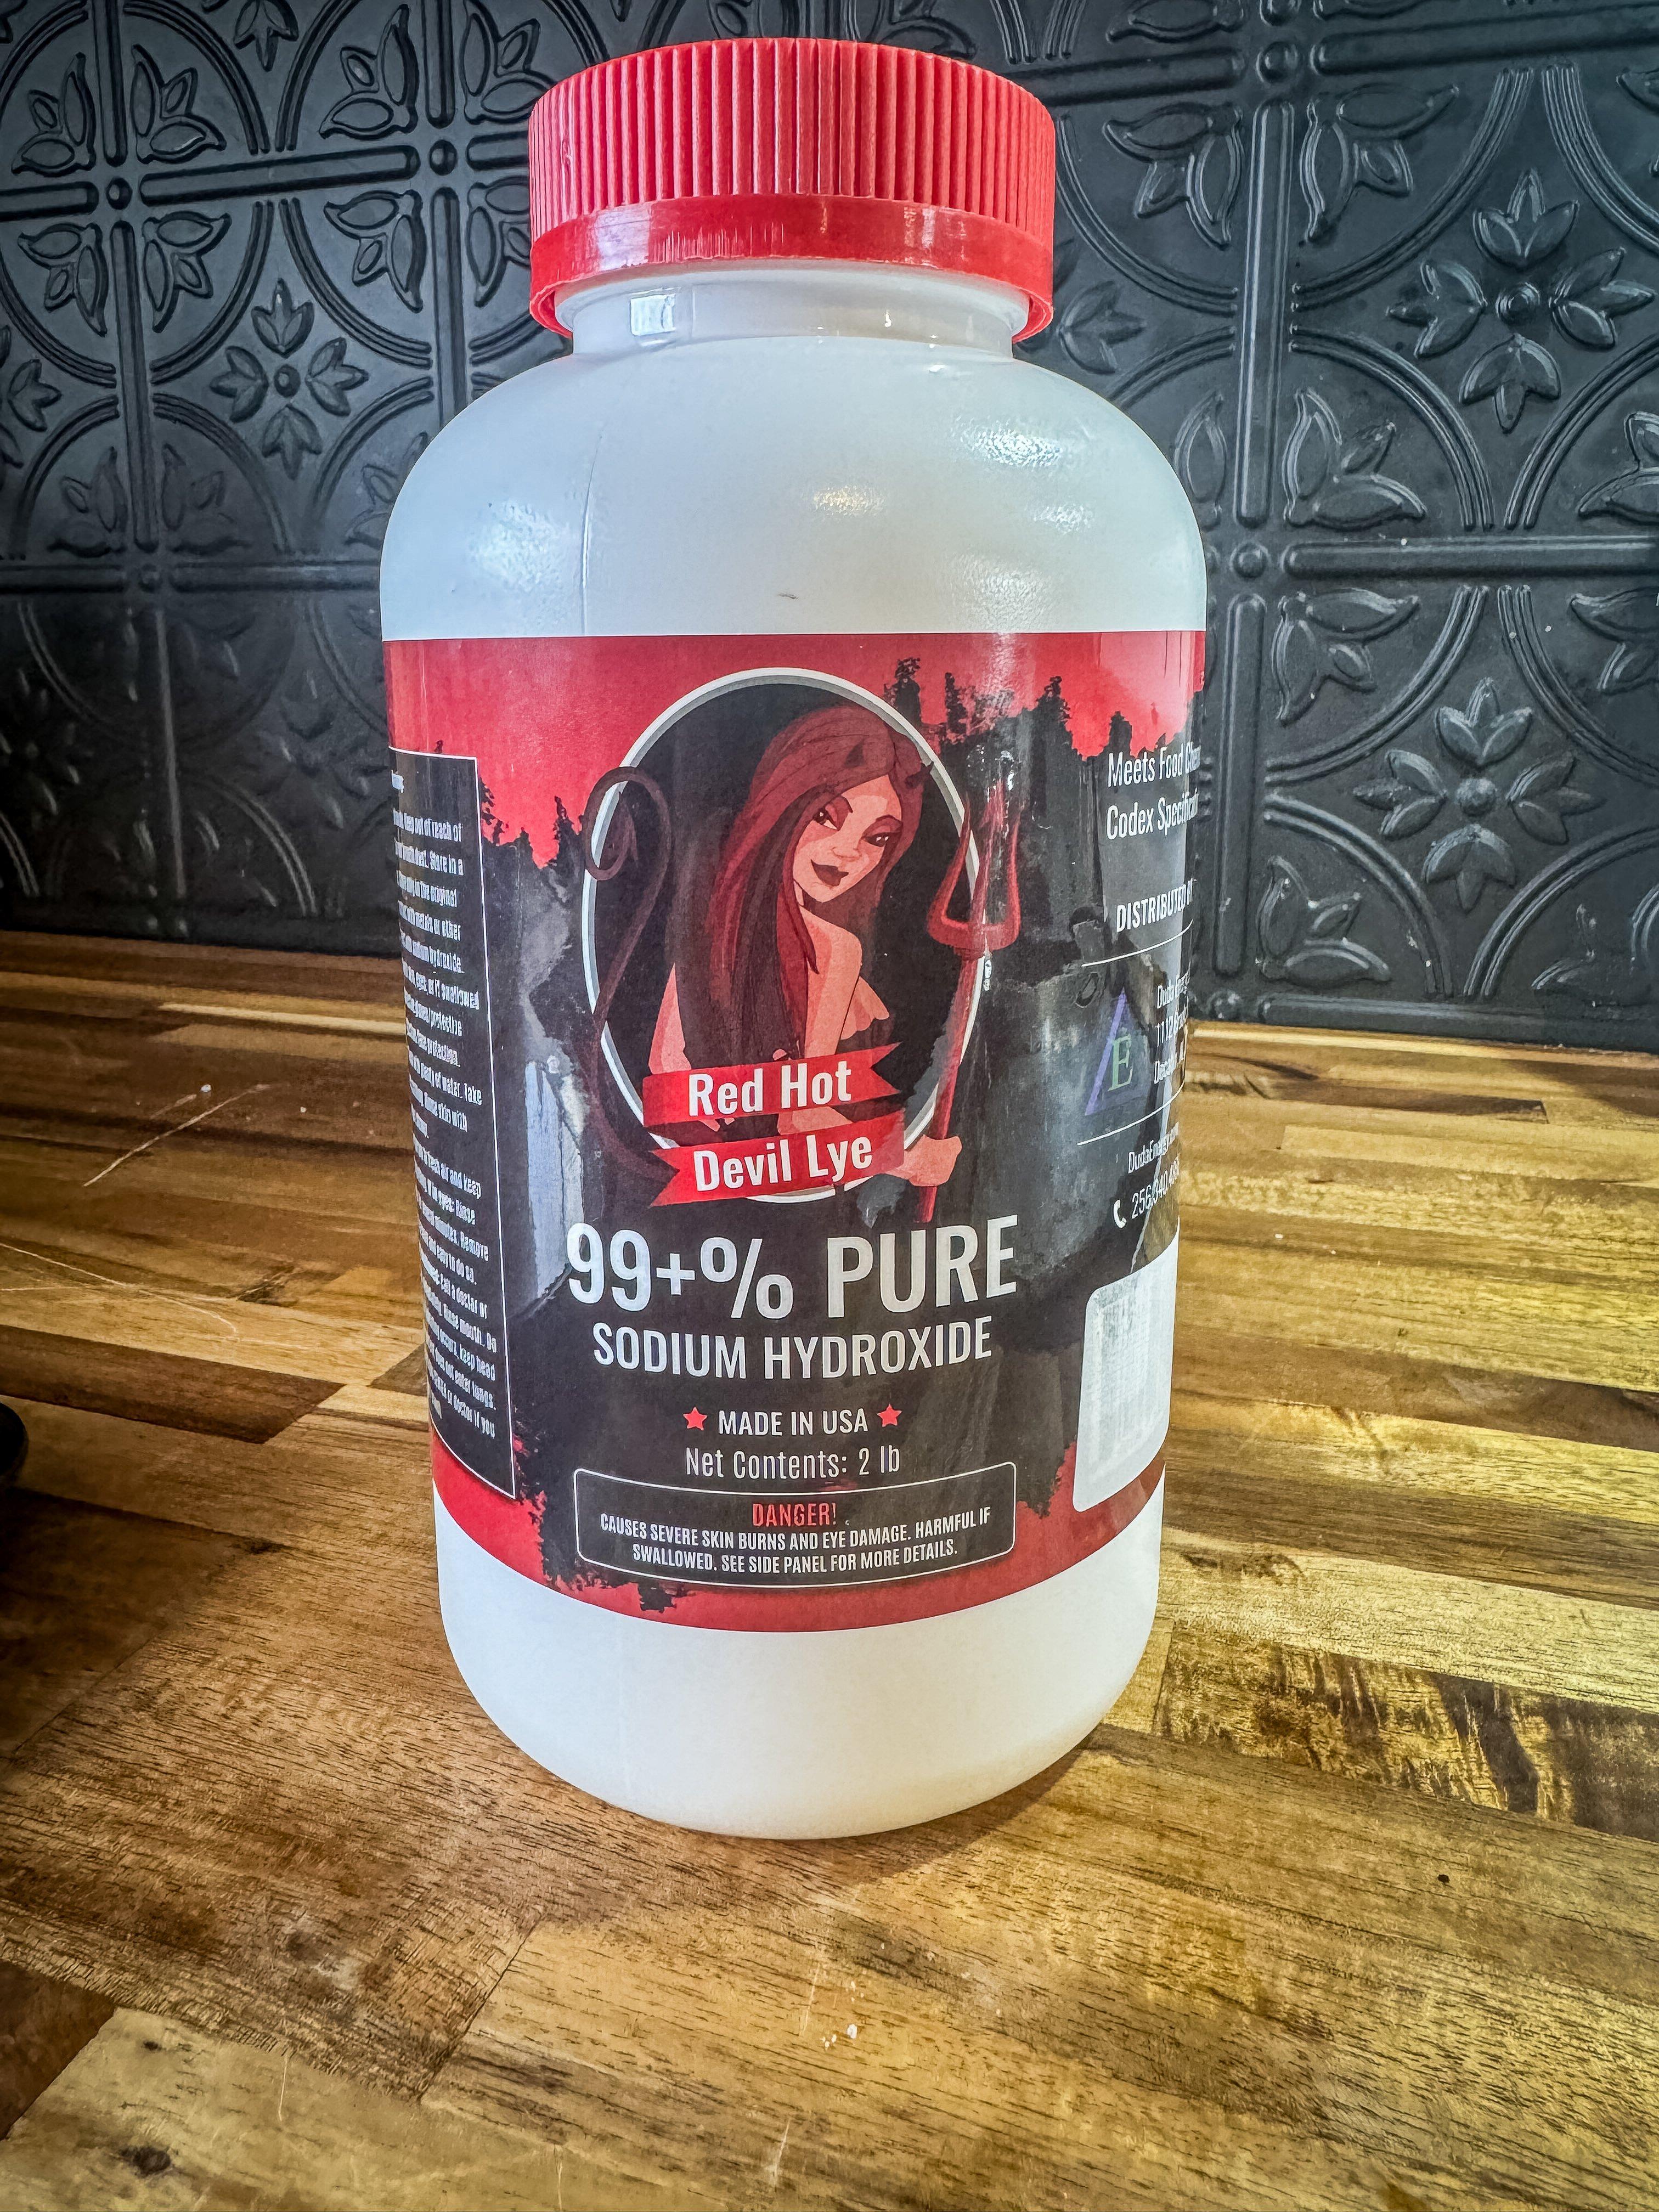
Use lye designed for soap making.
Some soap makers use drain-opening lye, but you can’t be sure that it is free of impurities or other ingredients. A few notes on lye safety: First, lye is the chief ingredient in many drain cleaners. It is highly caustic and has the potential to burn the skin (and other surfaces) if it makes contact. I keep a spray bottle of vinegar nearby to spray down any areas that the lye might touch if it splashes. Wear long sleeves, gloves, and eye protection when using lye. When the lye is introduced to the water, it will release toxic fumes and heat from the exothermic reaction. I mix the two outdoors in a well-ventilated area. Store any leftover lye in a safe area away from kids or pets.
The process of blending the lye-and-water mix into the liquefied fat is called saponification. Saponification is the process in which triglycerides are combined with a strong base to form fatty acid metal salts during the soap-making process. It comes from the root word sapo, which is Latin for soap. Saponification occurs when the lye is neutralized completely into the fat. You can do this by hand, but an immersion stick blender greatly speeds the process. Once saponification has occurred, the lye is inert and no longer dangerous.
Use a digital scale to precisely weigh all ingredients.
To start the process, first measure your ingredients. This recipe calls for specific weights of each. If you want to increase or decrease the size of your batch, use a soap calculator for accuracy.
• 32 ounces tallow
• 4.2 ounces lye
• 12.16 ounces distilled water
• 1 fluid ounce essential oil (optional; I like lemongrass oil)
• 1 teaspoon honey (optional)
Melt the weighed tallow in the slow cooker.
Once the fat is nearly all melted, put on your safety gear and carefully measure the lye.
In an area with good ventilation (I do this outside), carefully stir the lye into the measured distilled water. Always add the lye to the water—do NOT add the water to the lye, as it can result in a volcano-like reaction.
Stir this lye-and-water mixture until it has dissolved and let it sit for a few minutes. There will be a chemical reaction between the lye and water, and the water will become very hot. Take care not to splash the mixture onto your skin or countertop. Keep the vinegar close by in case you do, and spray any splashes immediately to neutralize the lye.
Check temperatures of both the lye-and-water mixture and the fat. Allow both to cool to below 110 degrees. Then, slowly stir the mixture into the melted fat in the slow cooker.
Switch to an immersion blender and proceed to blend the tallow, lye, and water until you reach trace. Trace is when the mixture turns to a puddinglike consistency and holds its shape when you drip a bit on top. You can do this step with a stainless-steel spoon, but it may take an hour or longer to reach trace. With the blender, it usually occurs within 5-10 minutes. If your soap hardens and crumbles immediately, that is a condition known as seizing. It can happen if you mismeasured the lye amount or if the fat or lye was too warm when combined. If this happens, just put the lid on the slow cooker and let it heat until the soap softens enough to pour or spoon into molds.
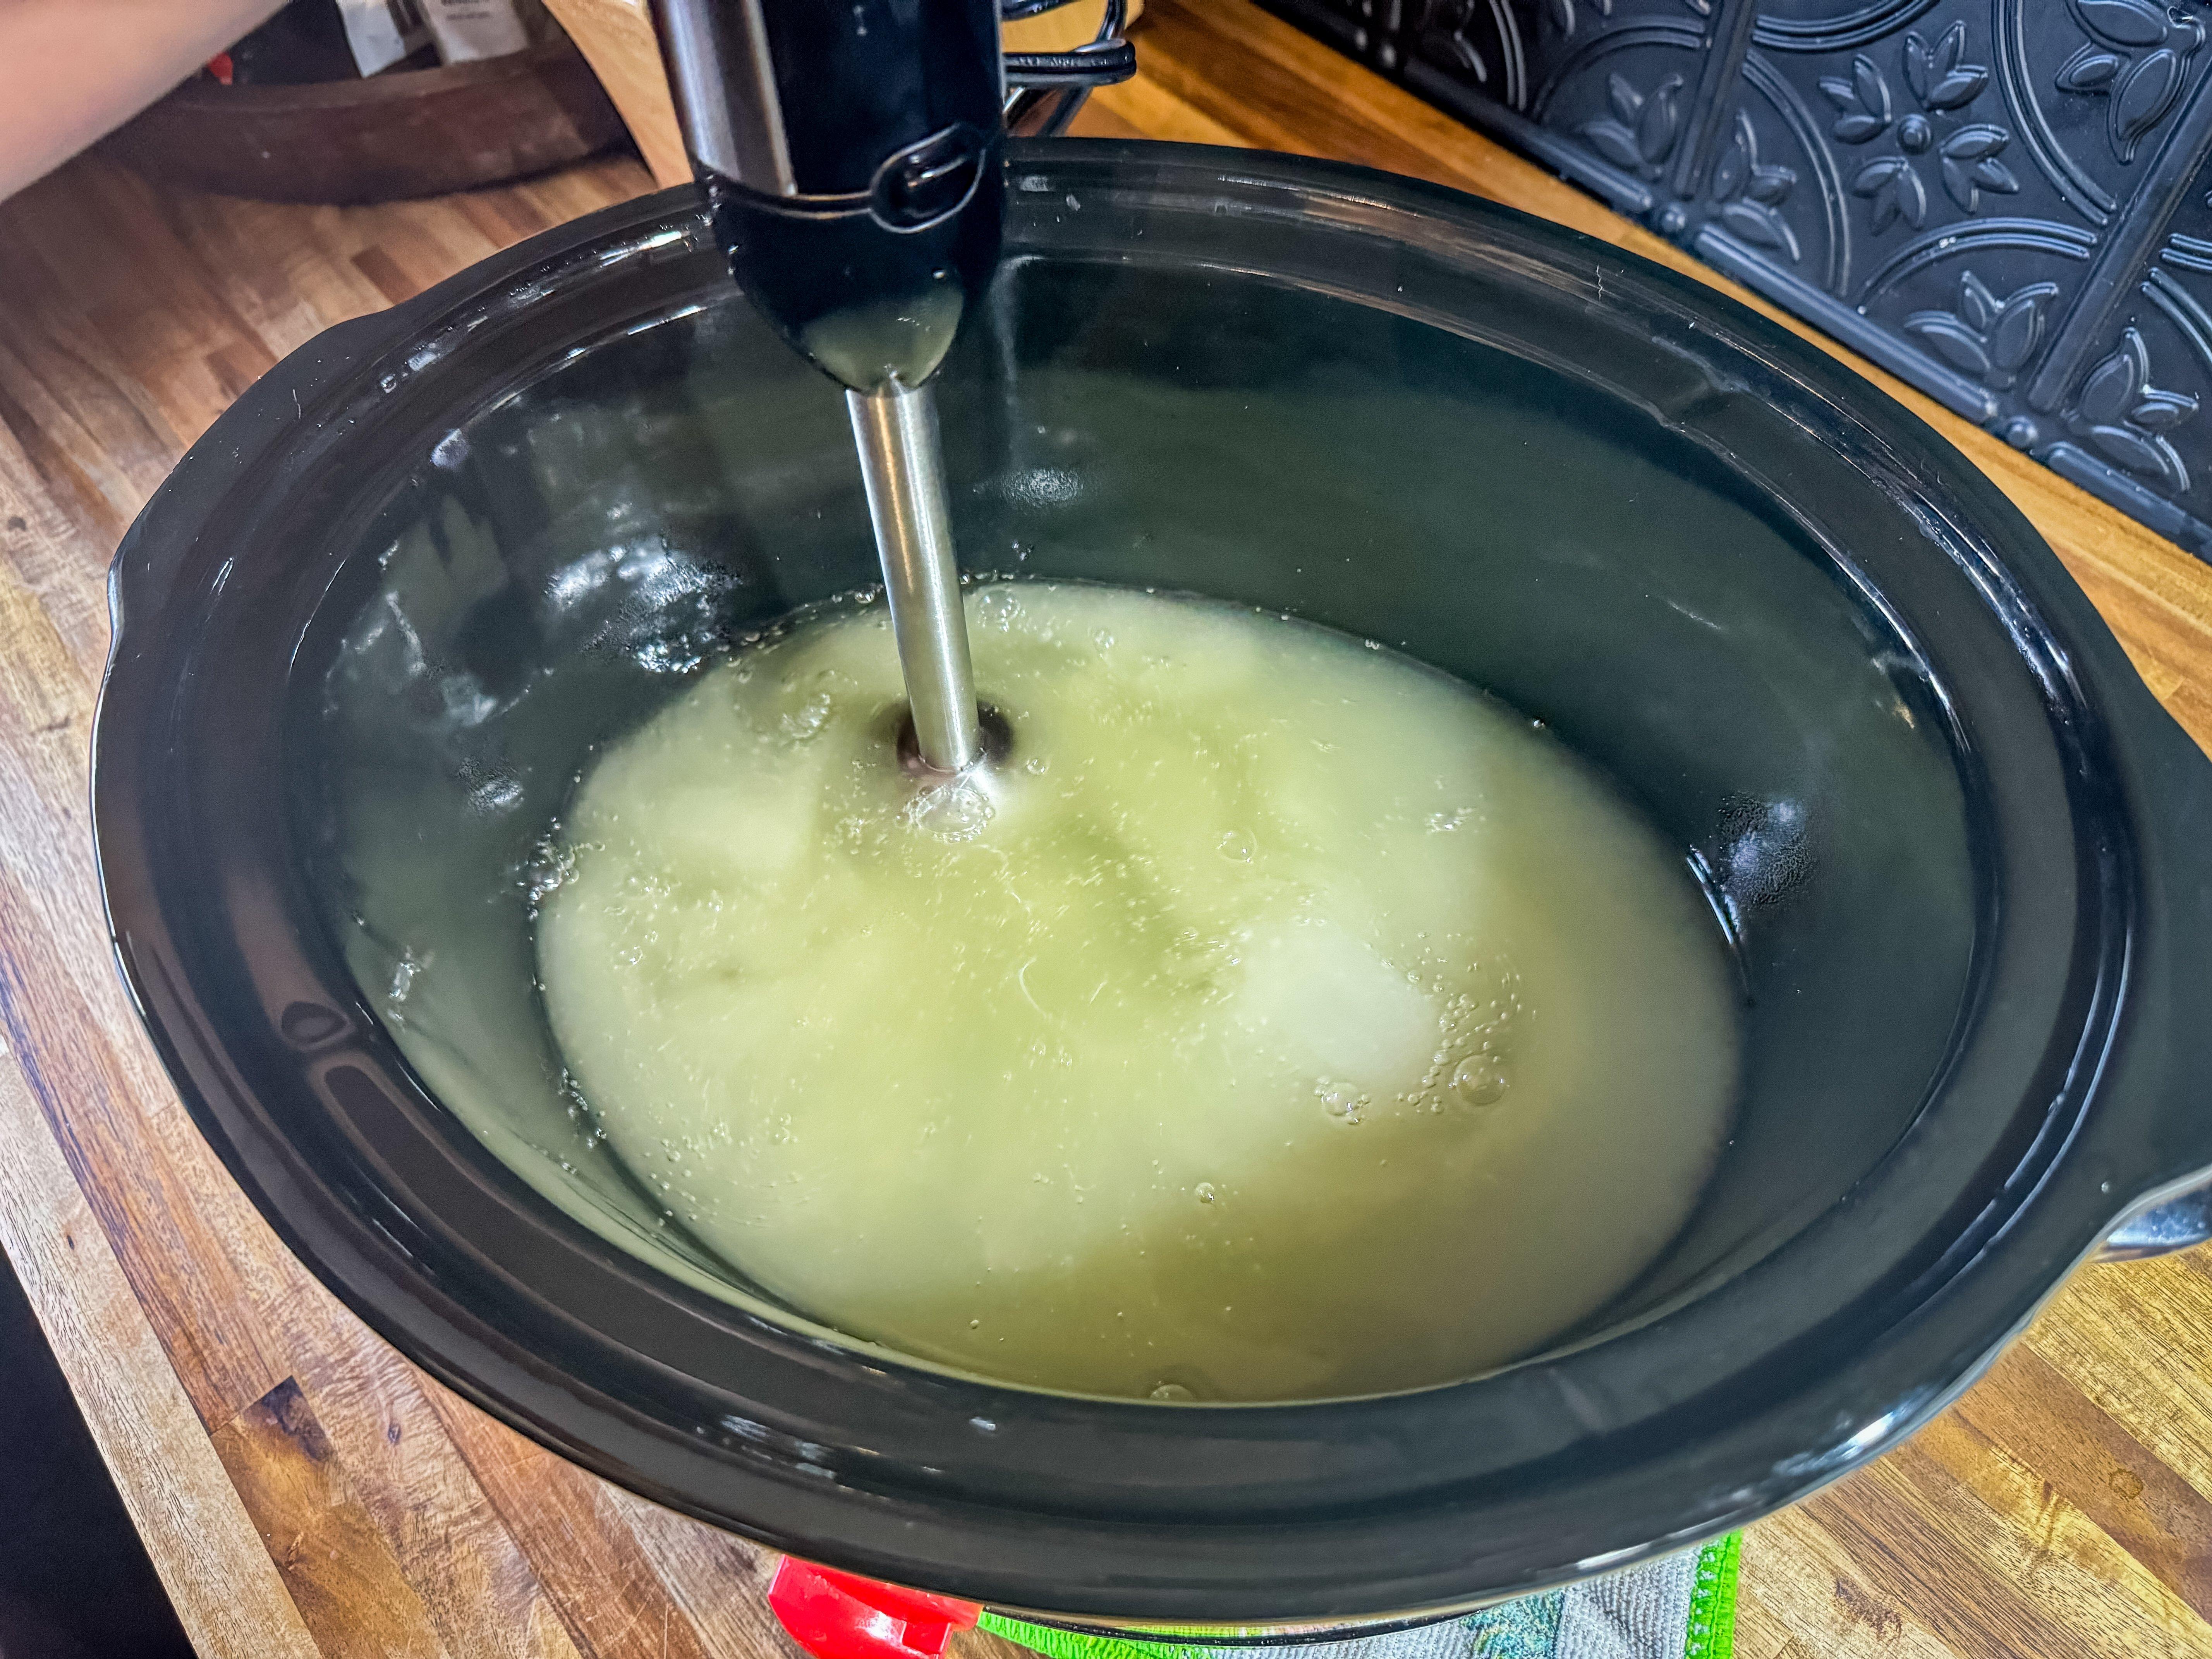
Blend the fat and lye to form trace.
Now put the lid on the slow cooker, set it on low, and allow it to cook for 45-60 minutes. It will bubble and foam, which is fine. Watch the soap, and if it bubbles to the point of overflowing, give it a quick stir.
Old-time soap makers knew their soap was ready to mold by tasting a TINY drop after the cooking process. (For liability reasons, neither Timber-2-Table nor Realtree recommend using this method.) If it stings your tongue, there is still a tiny bit of lye in the soap that hasn’t totally saponified. If it tastes like soap, it’s ready. If you’d rather pass on this testing method (recommended), just cook the soap for a full 60 minutes. Now is the time to add your essential oil, honey, herbs, or other flavorings. Stir well to combine. Turn off the heat.
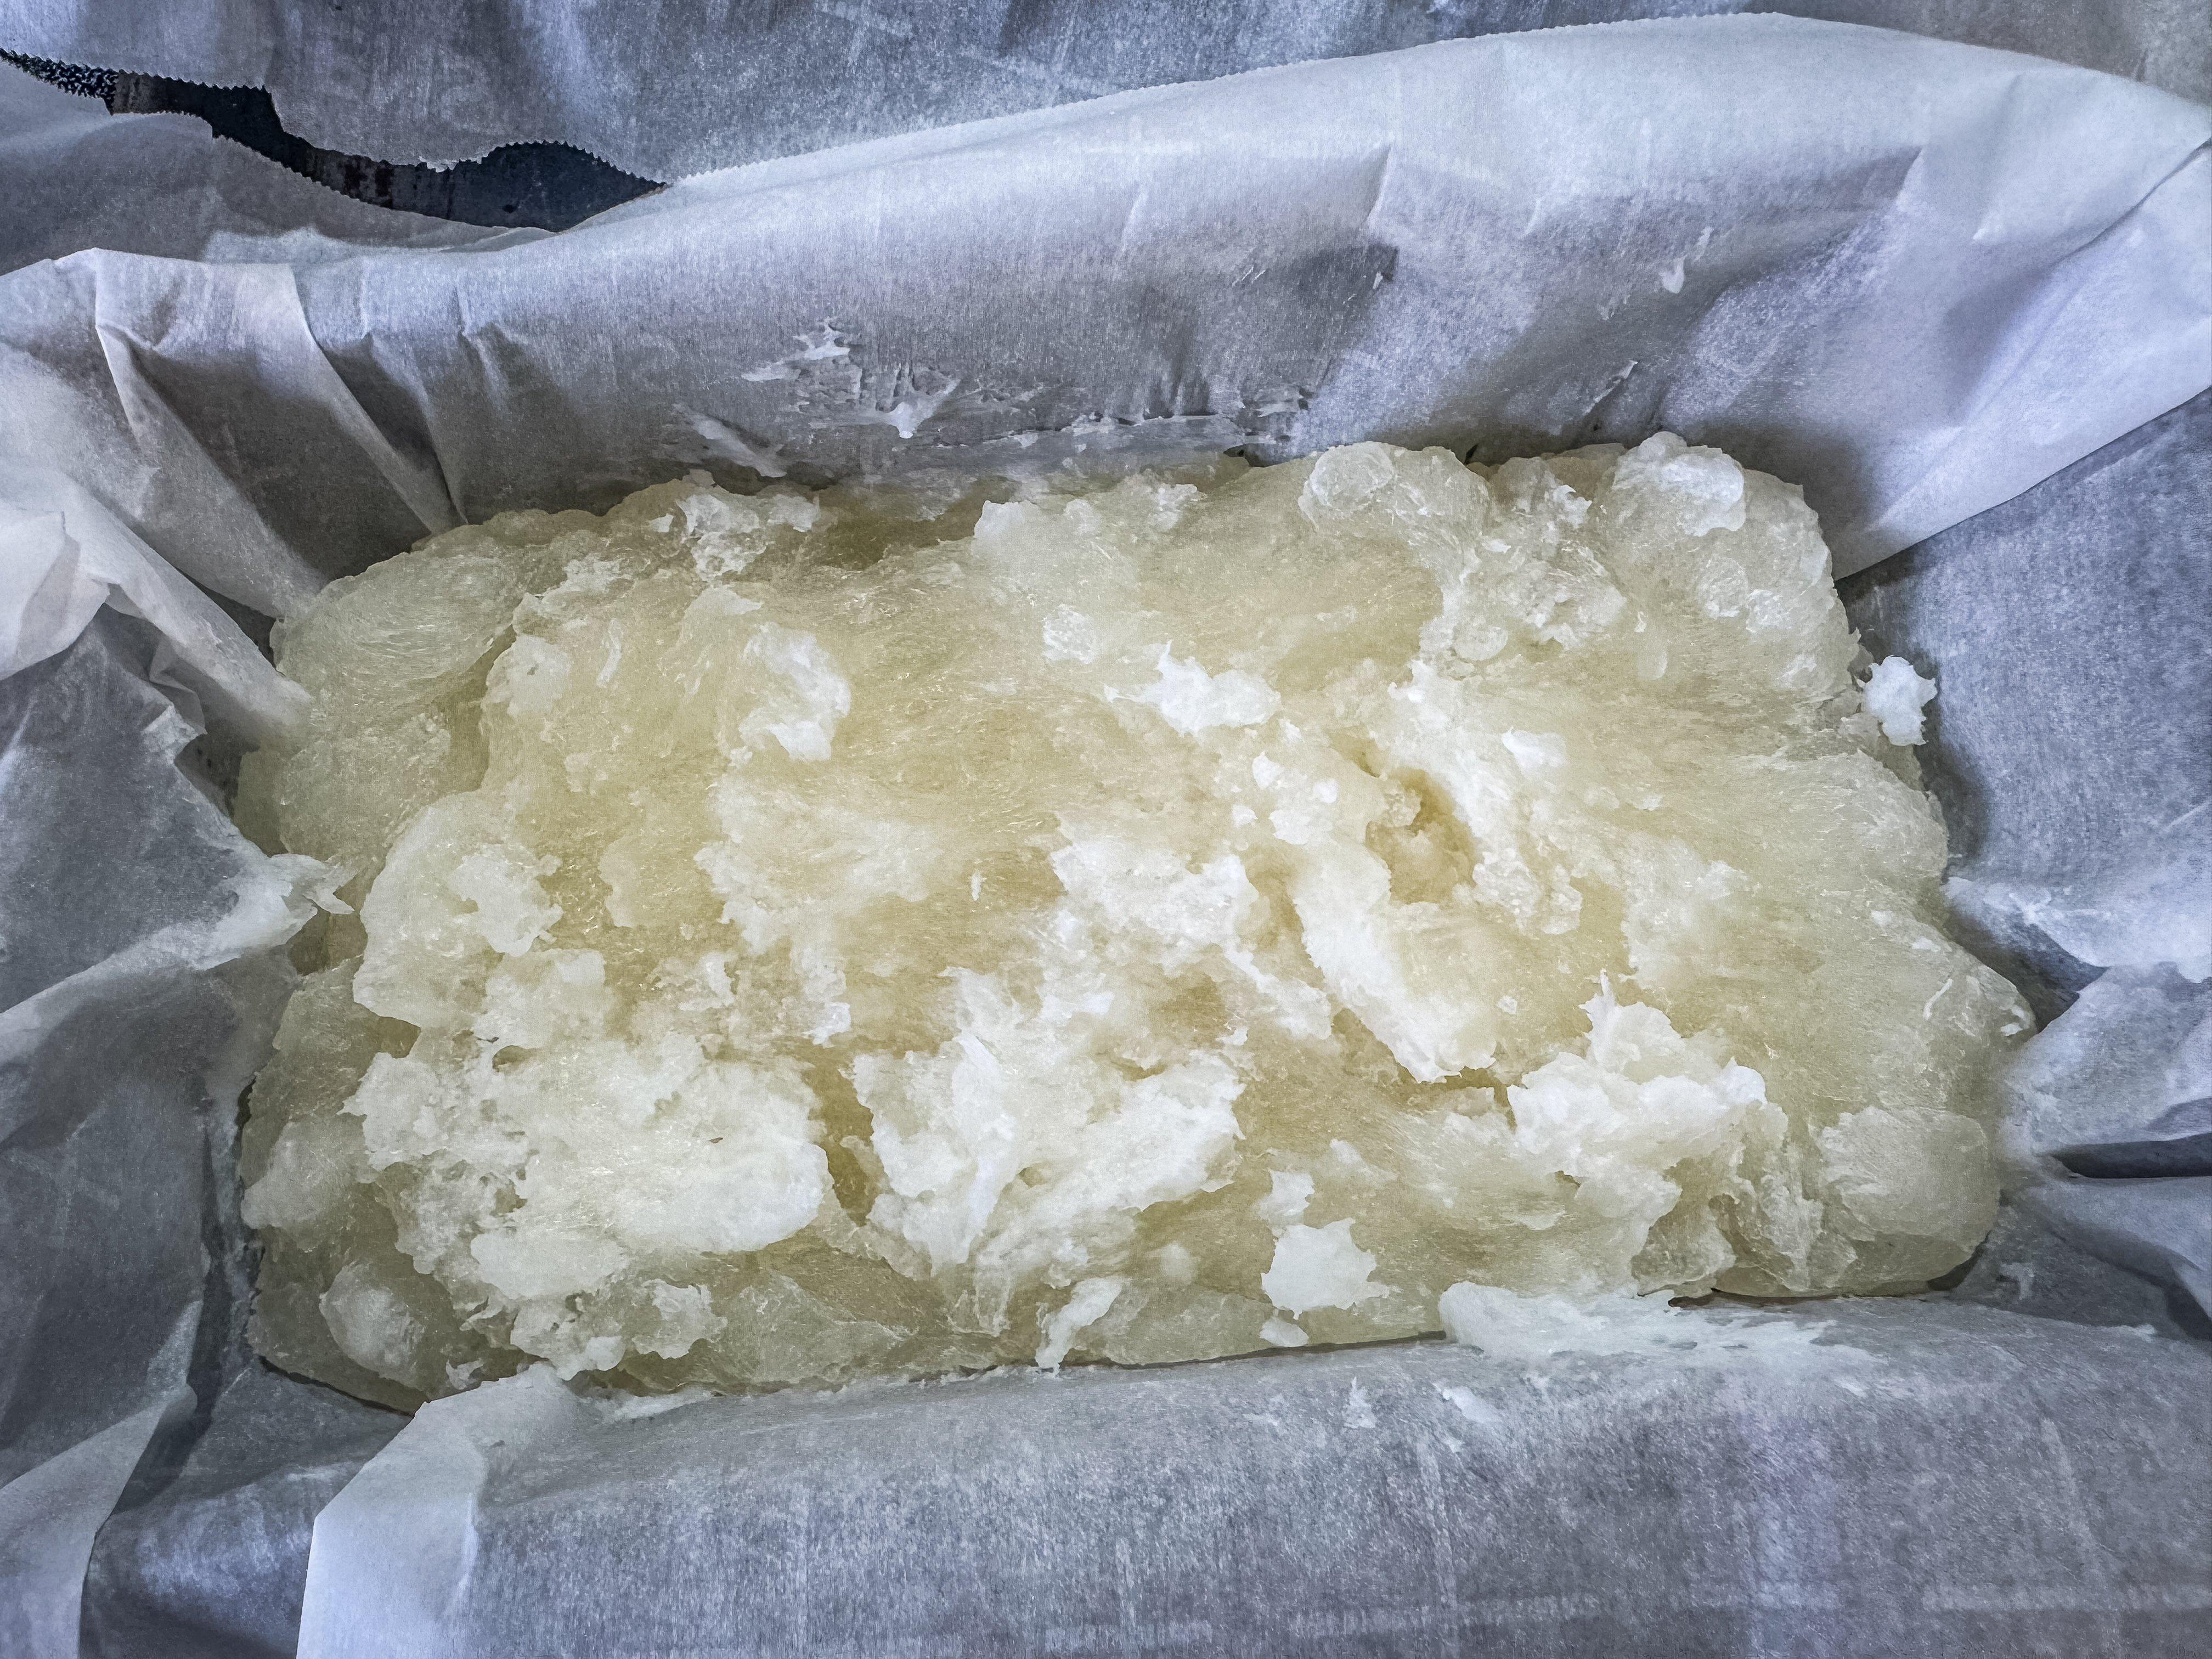
Pour or spoon the liquid soap into lined molds and allow to harden before removing.
Line soap molds, baking dishes, or loaf pans with parchment paper. Ladle the liquid soap into the molds. Allow the soap to harden over the next 24 hours, then remove it from the mold and use a sharp knife to cut it into bars.
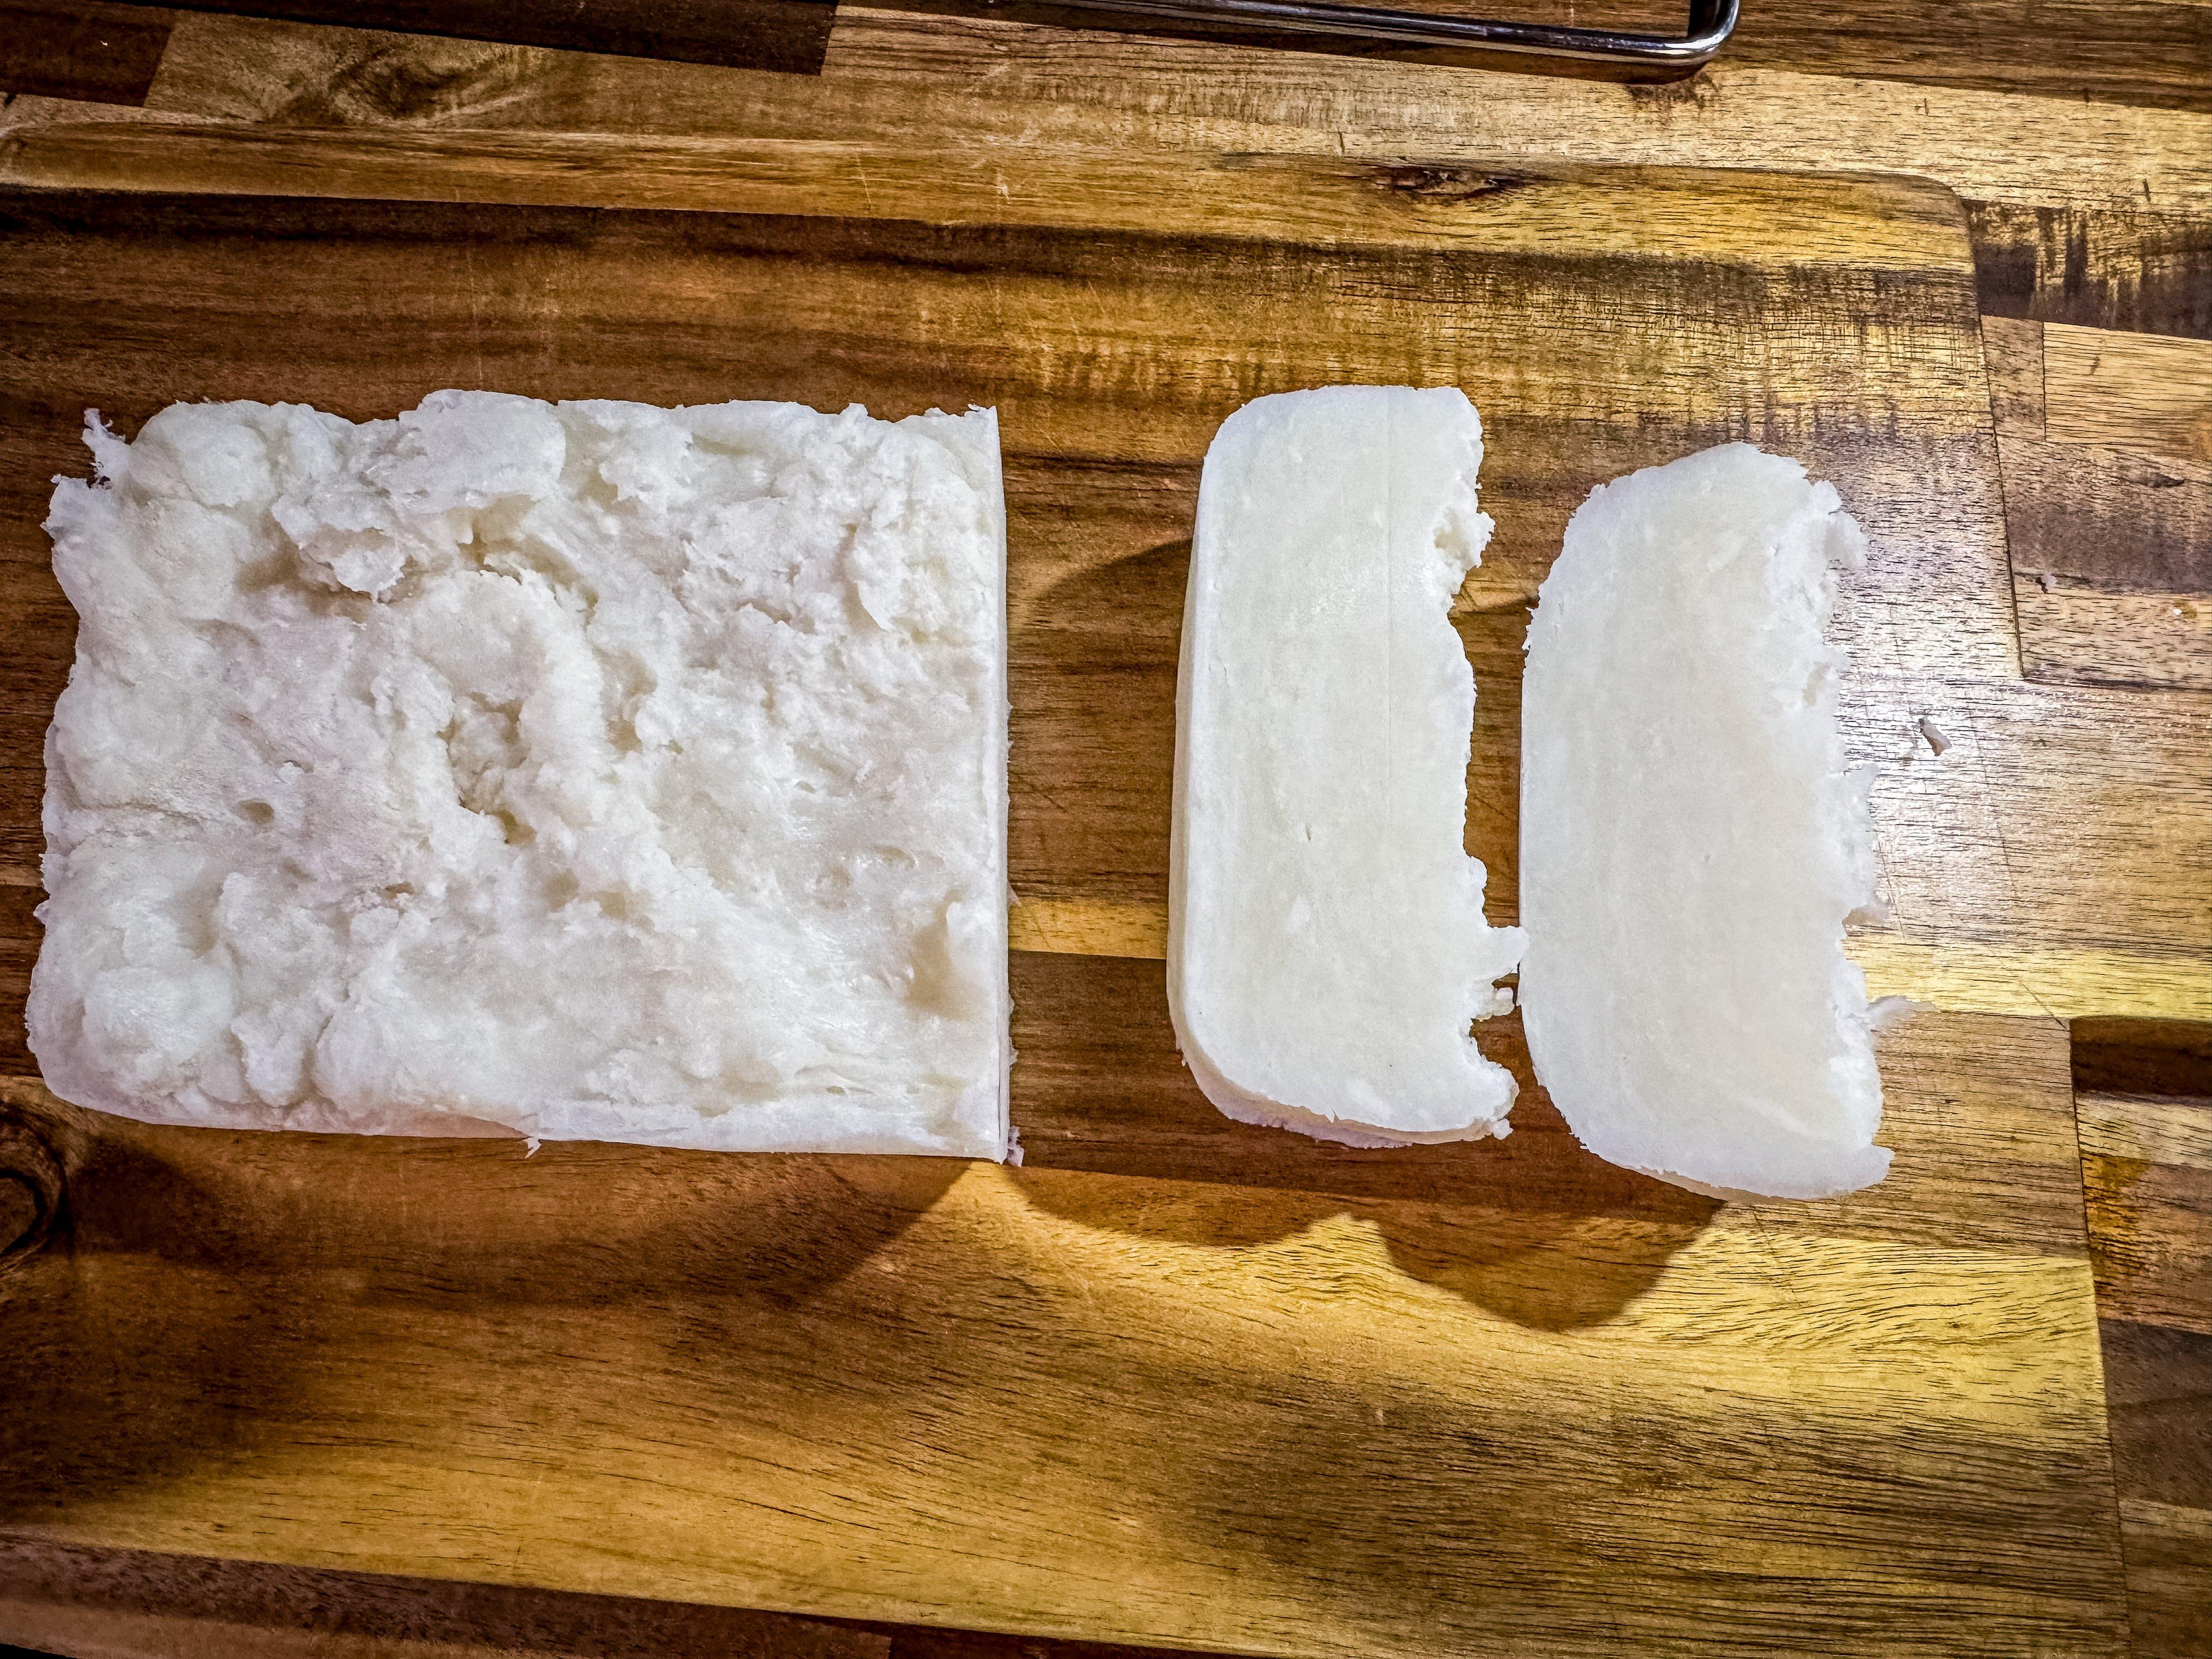
Slice the soap into bars and age before using.
Homemade soap needs to be aged for maximum effectiveness. Two to six weeks is standard for this process. Just place the bars onto a wire rack on a table or kitchen counter with good airflow. The longer the soap ages, the better it will foam and the longer it will last. Letting your soap just lie there is hard. Try a bar after two weeks, but let the rest continue to age. As the soap ages, moisture escapes and the crystal structure inside the soap forms. Use your deer fat soap just like you would any other soap. You will probably be surprised at just how well it works. My wife and daughter love it for their skin.